Materials:
Yarn, (acrylic or cotton) of your choice. Choose 2 matching colours (I have colour A - orange, colour B - brown).
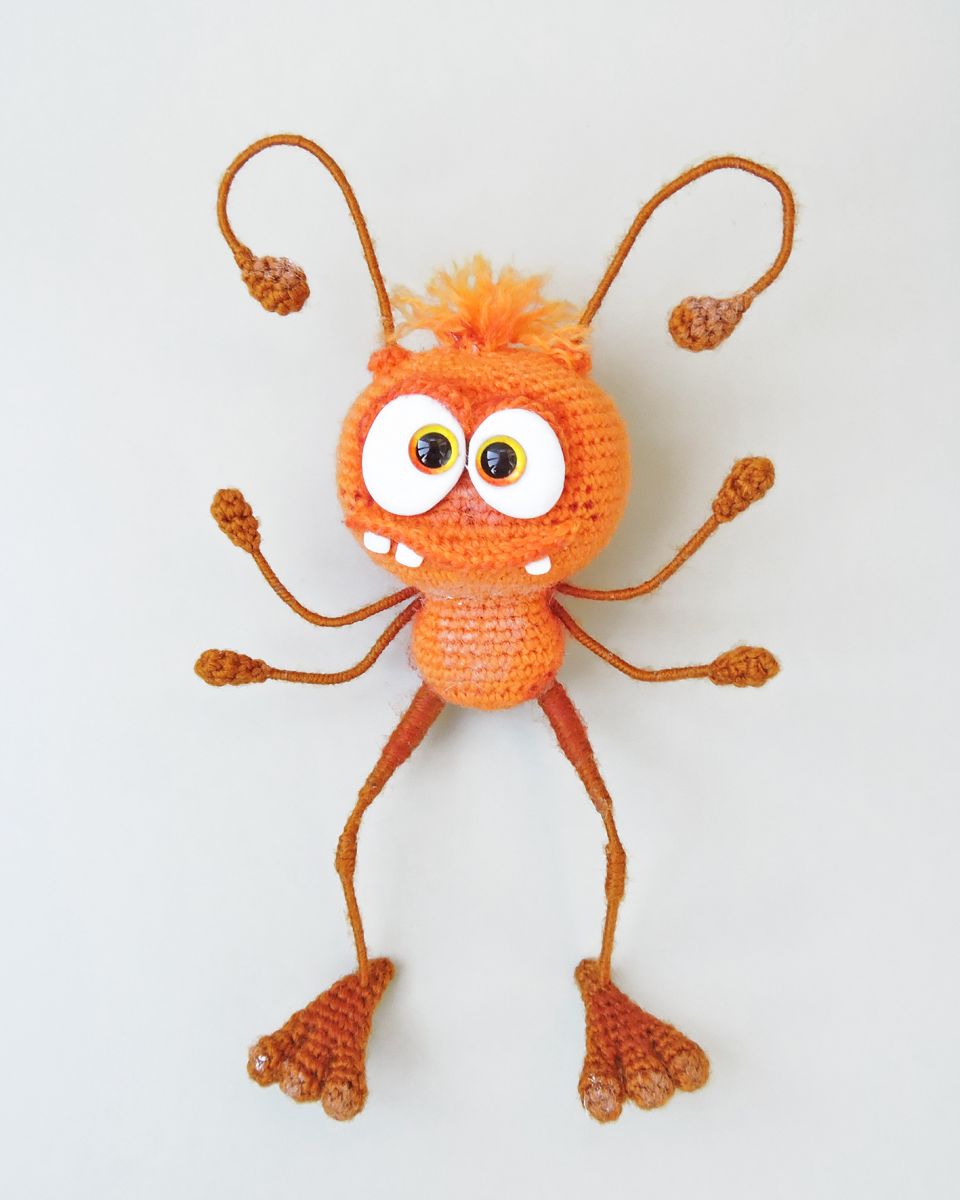
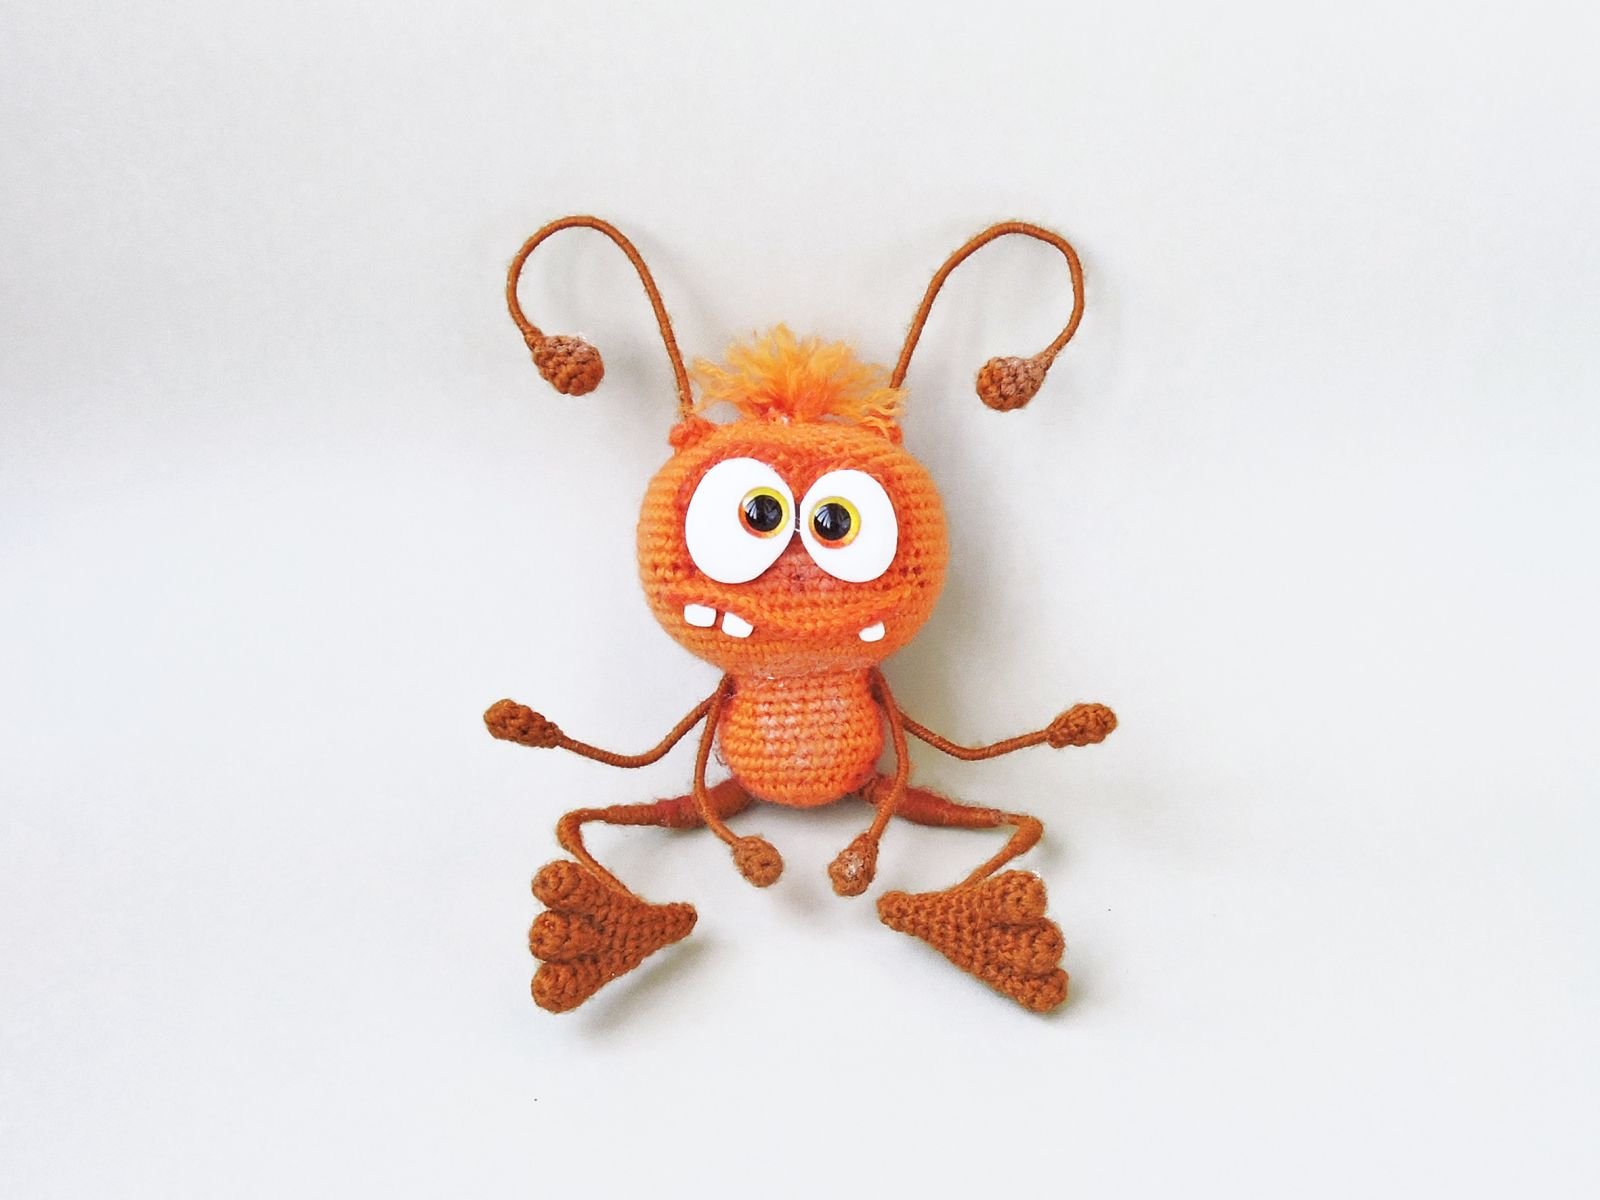
I used acrylic yarn, 225 m/50 g. My cockroach is 11.5 cm tall + 4-5 cm for moustache. You may use any left over yarn as the consumption is minimal.
- A crochet hook, I used 1,25 mm crochet hook;
- Hollow fibre for stuffing;
- A sewing needle, matching sewing threads;
- A long needle for sculpting, strong thread for sculpting;
- 1 pair of ready-made eyes;
- A piece of white polymer clay for eyes and teeth;
- Wire with a diameter of 1mm (2 pieces of 30 cm and 4 pieces of 10 cm);
- Adhesive fabric tape/plaster;
- Transparent glue.
Abbreviations:
ch – chain
sl st – slip stitch
sc – single crochet
inc – increase (2 sc in 1 st)
dec – decrease (single crochet two stitches together)
(...) x N times – repeat instructions in brackets N times
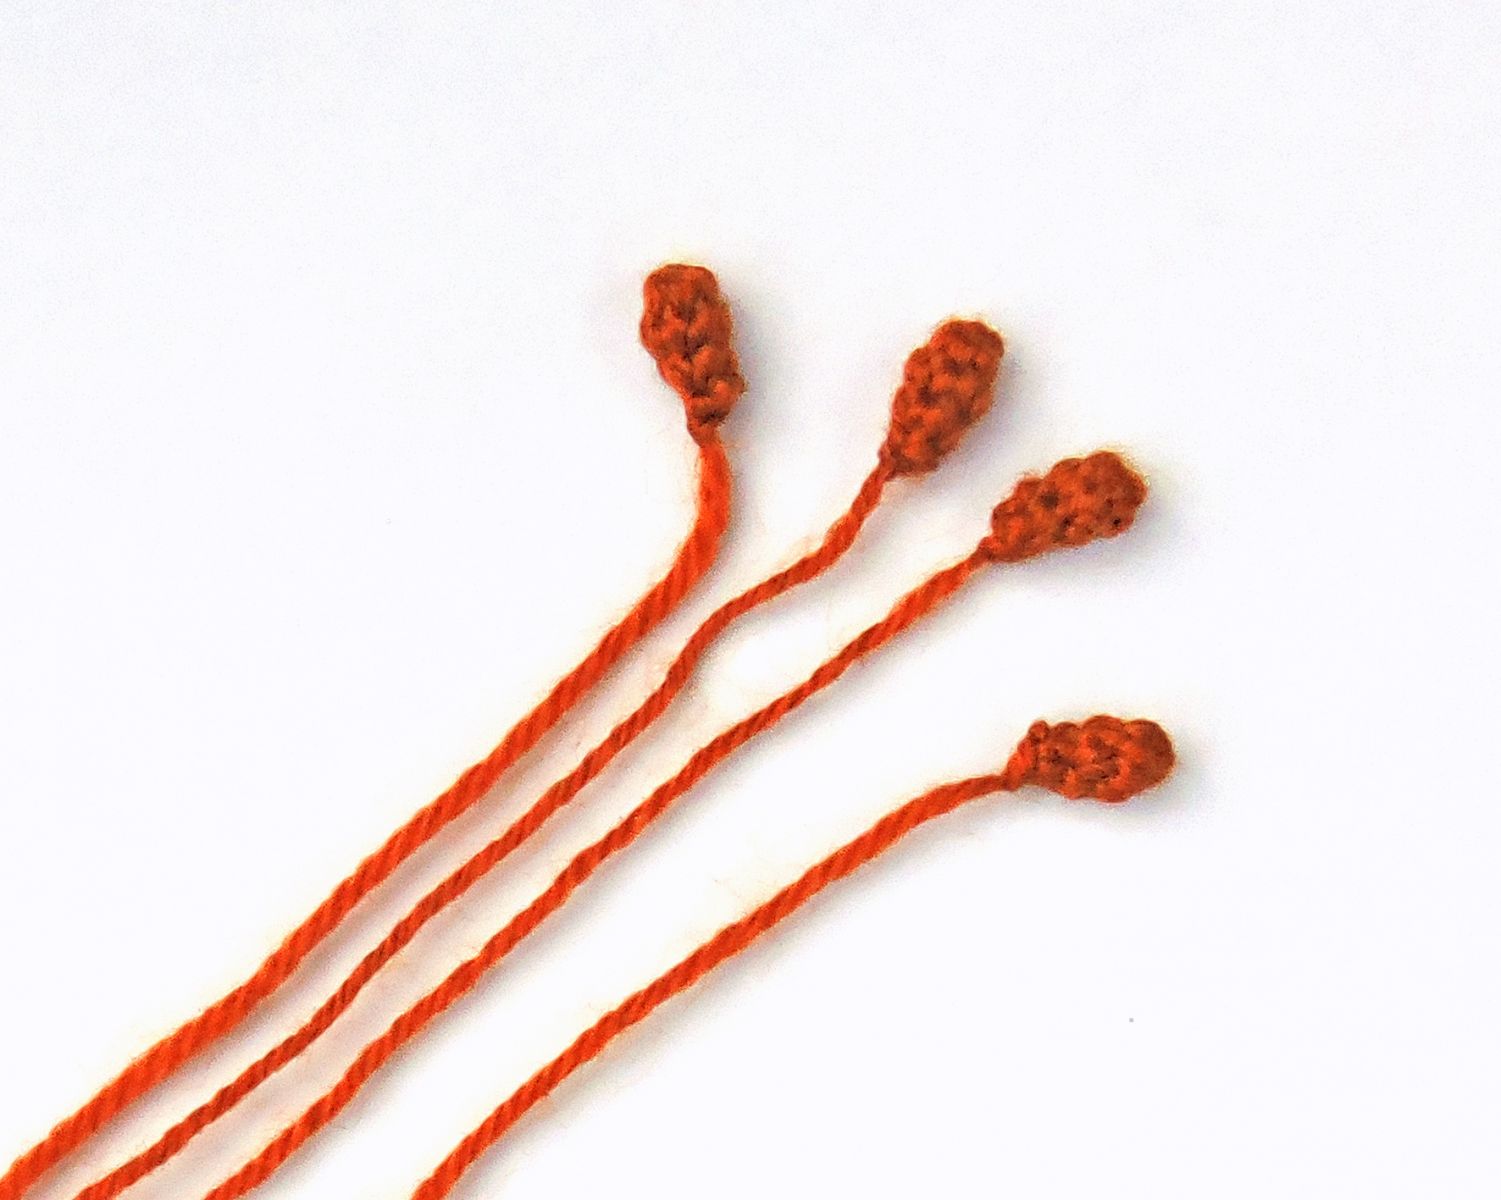
Arms (make 4)
Work with the colour B.
1 Rnd: 6 sc in a Magic Ring
2 Rnd: 6 sc
3 Rnd: dec, 4 sc [5]
4 Rnd (incomplete): dec [4]
Cut off the thread, leave a long tail, about 30 cm.
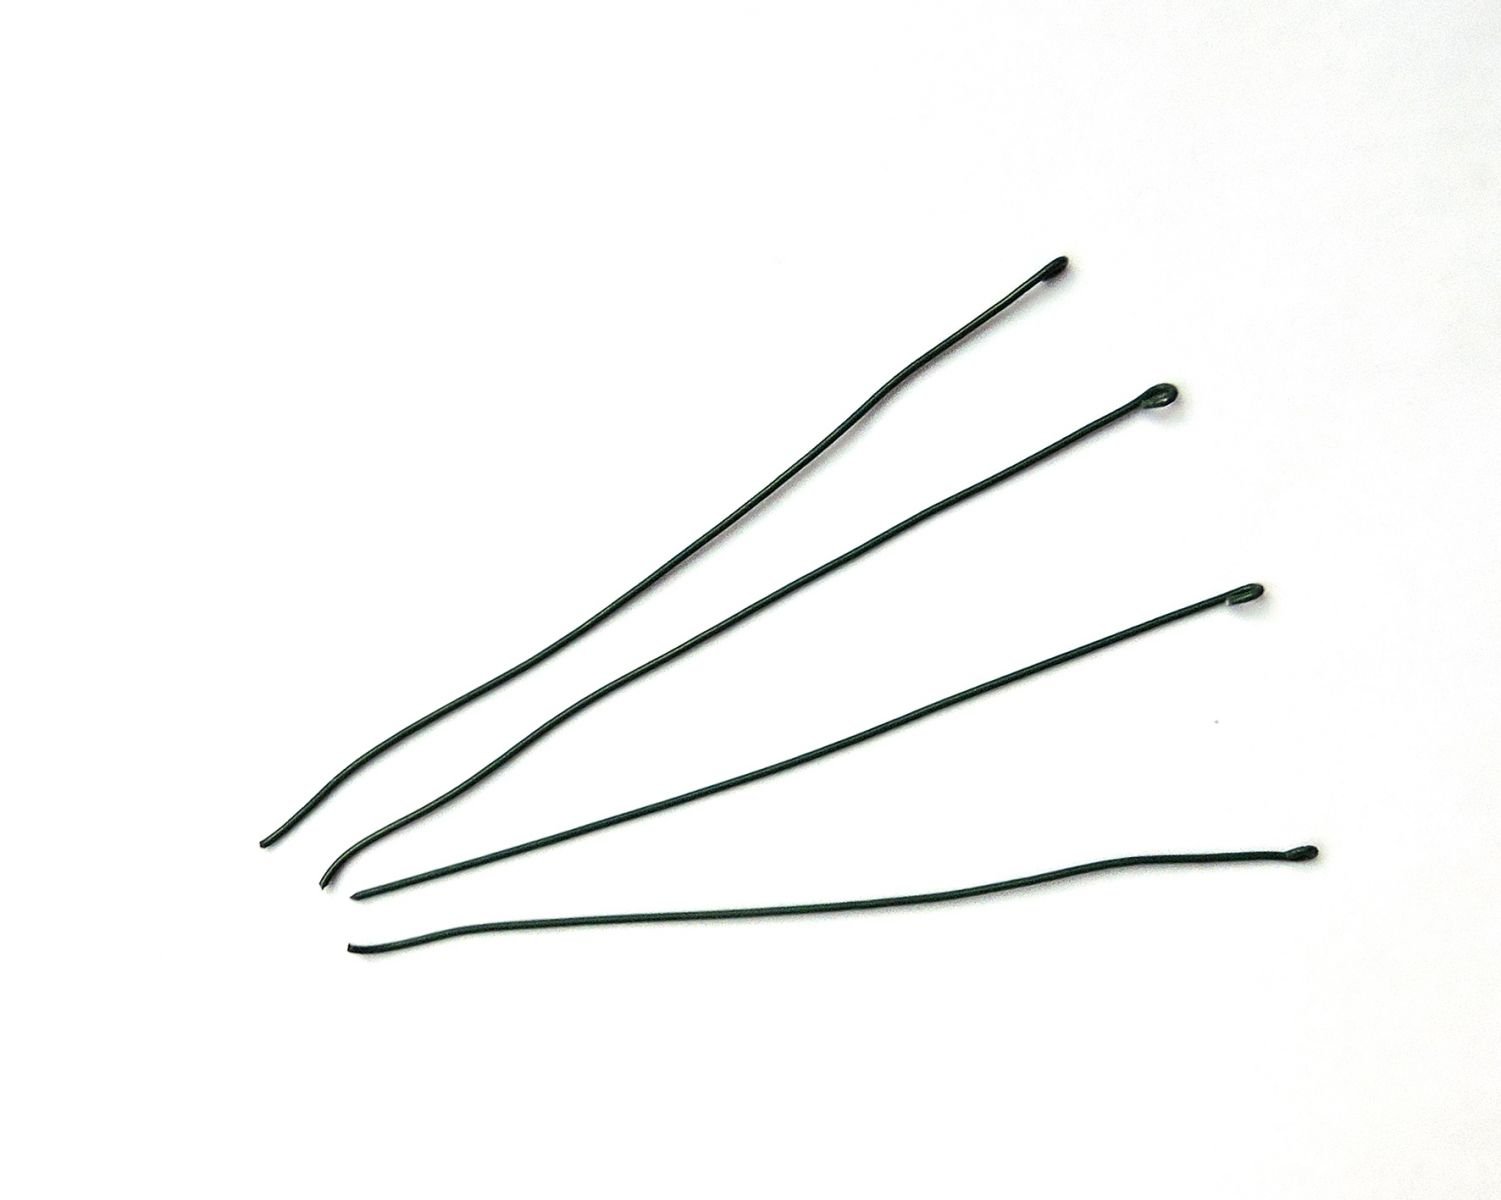
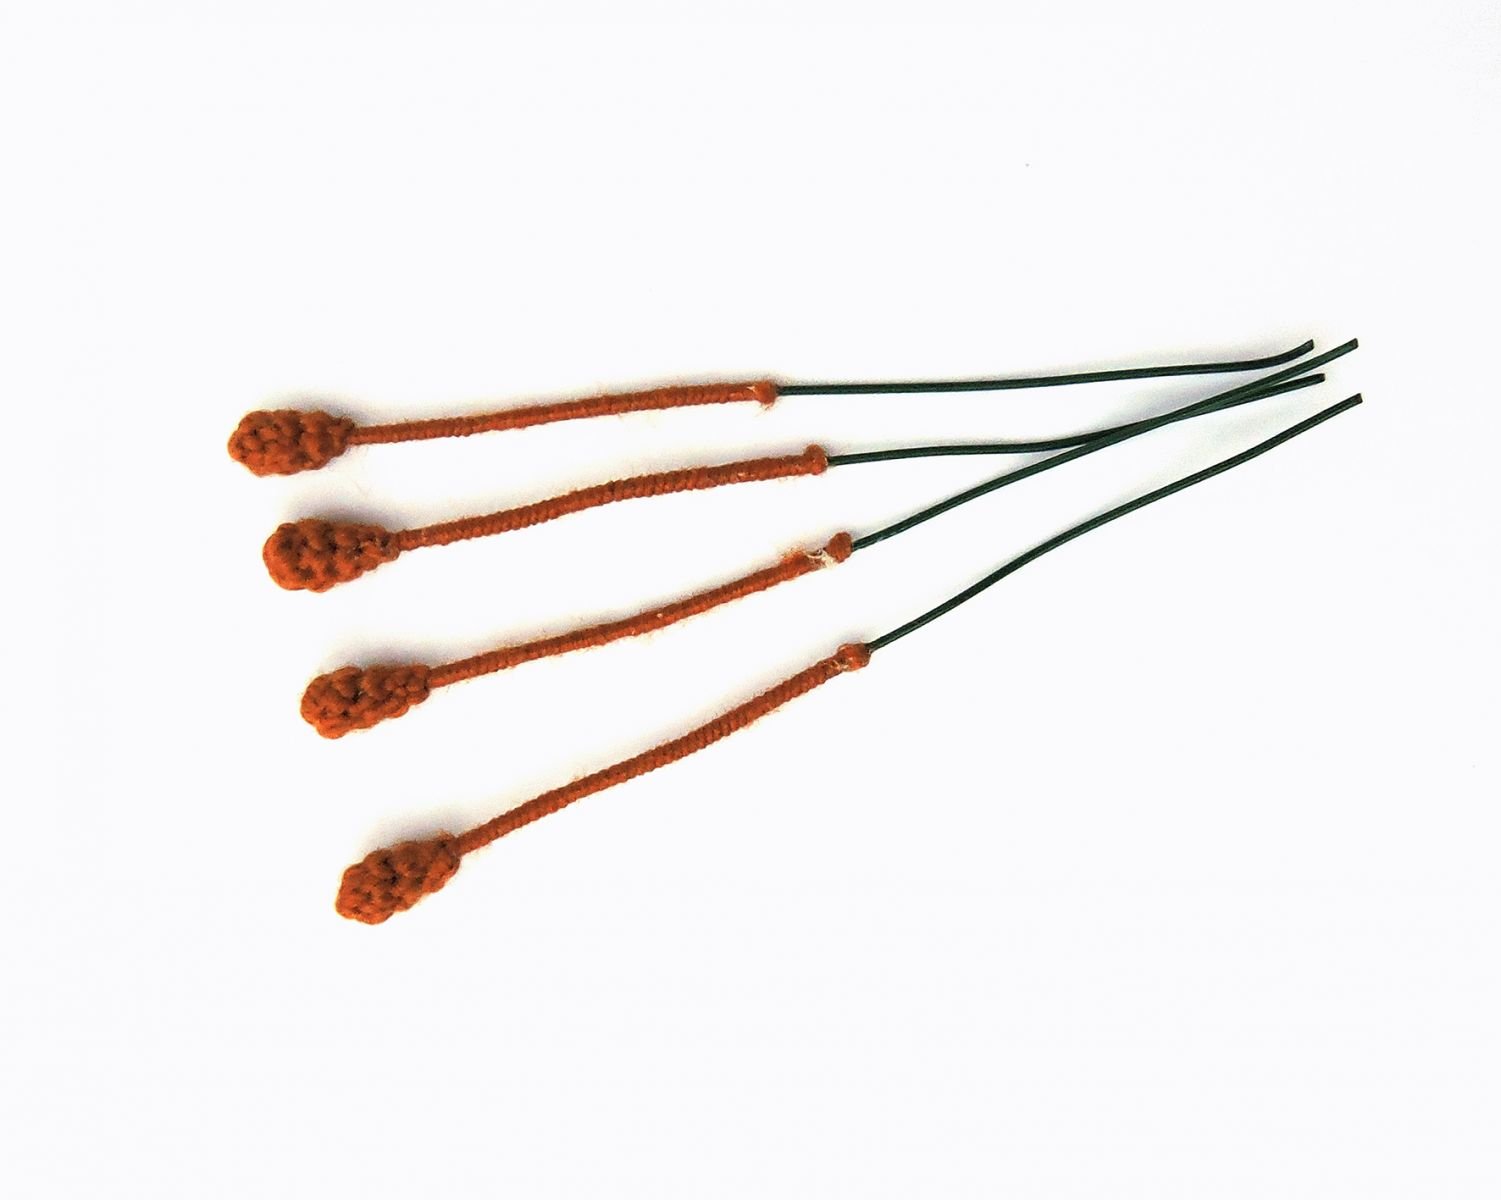
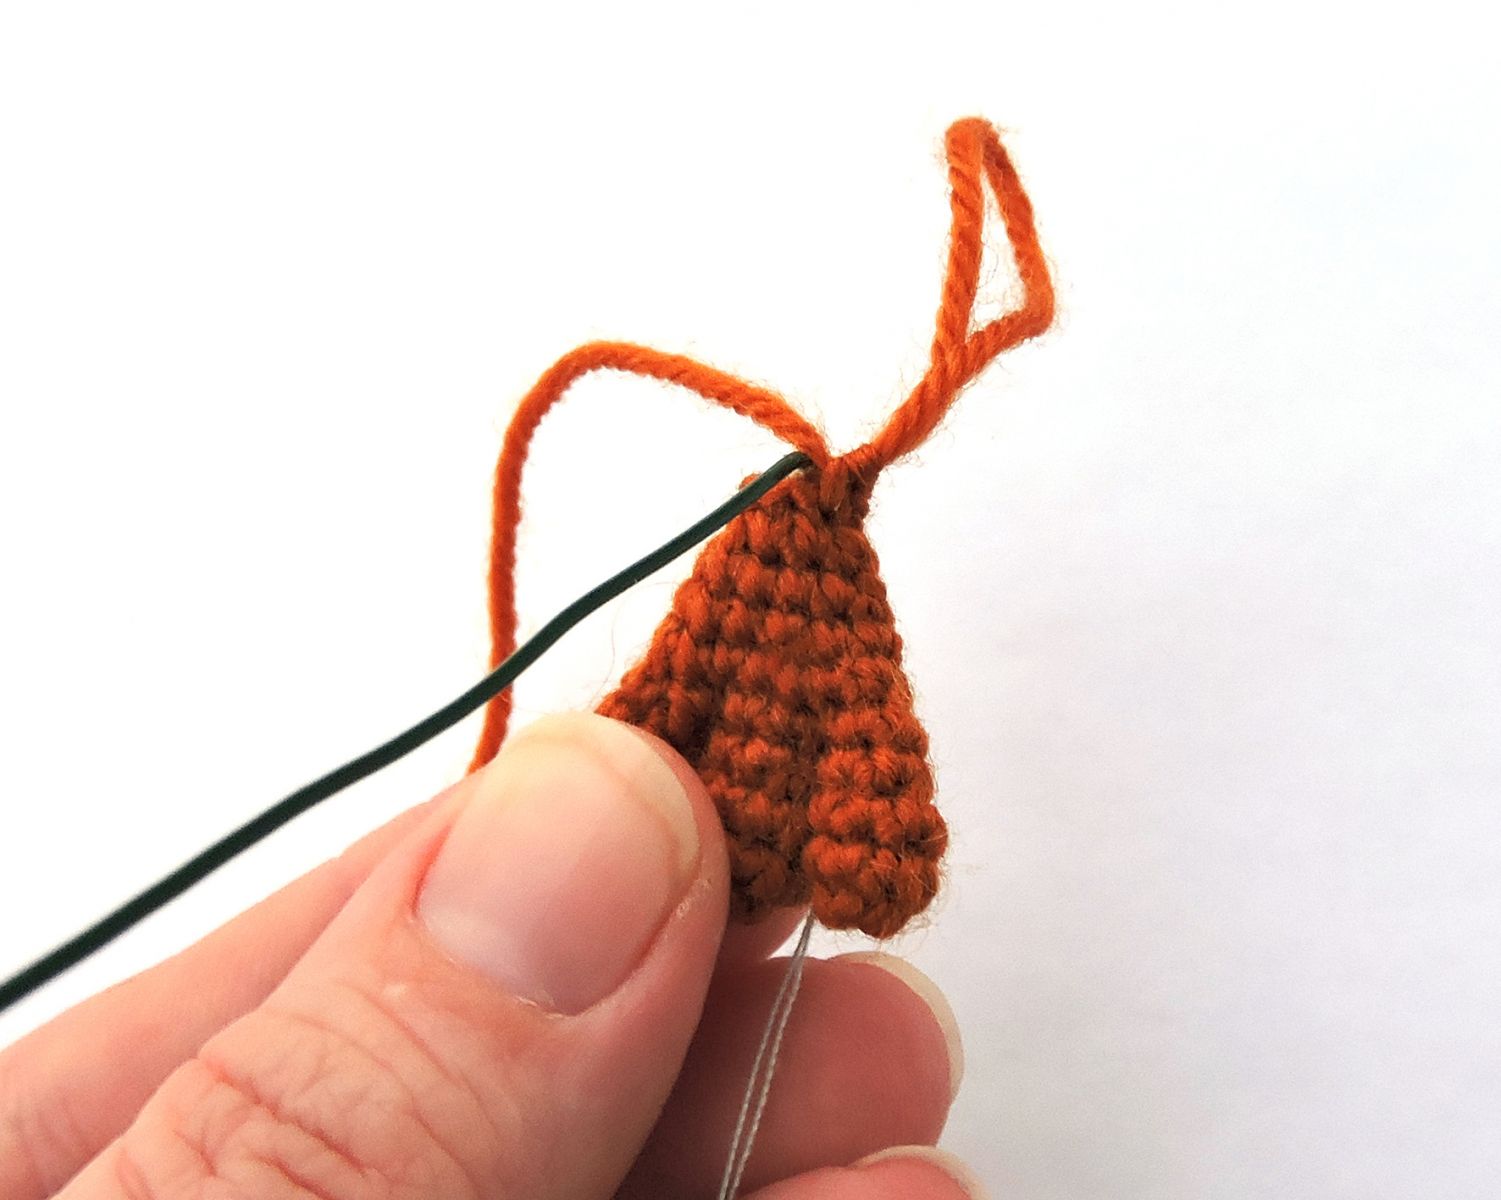
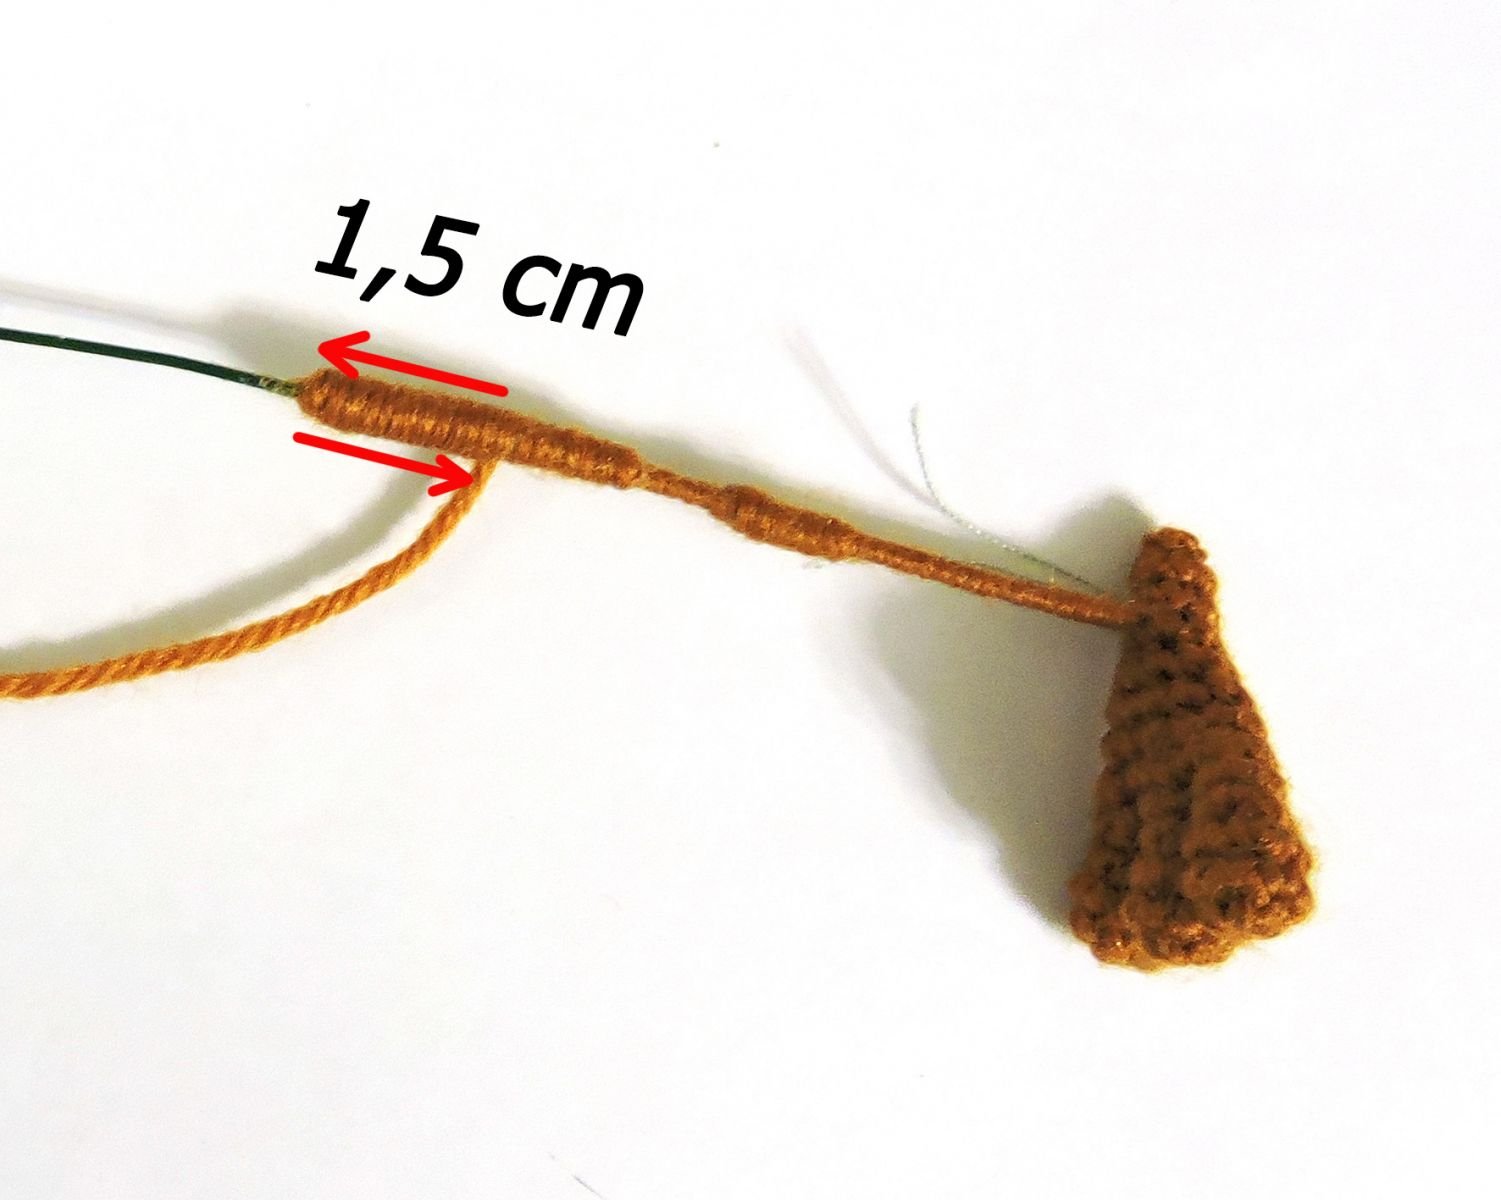
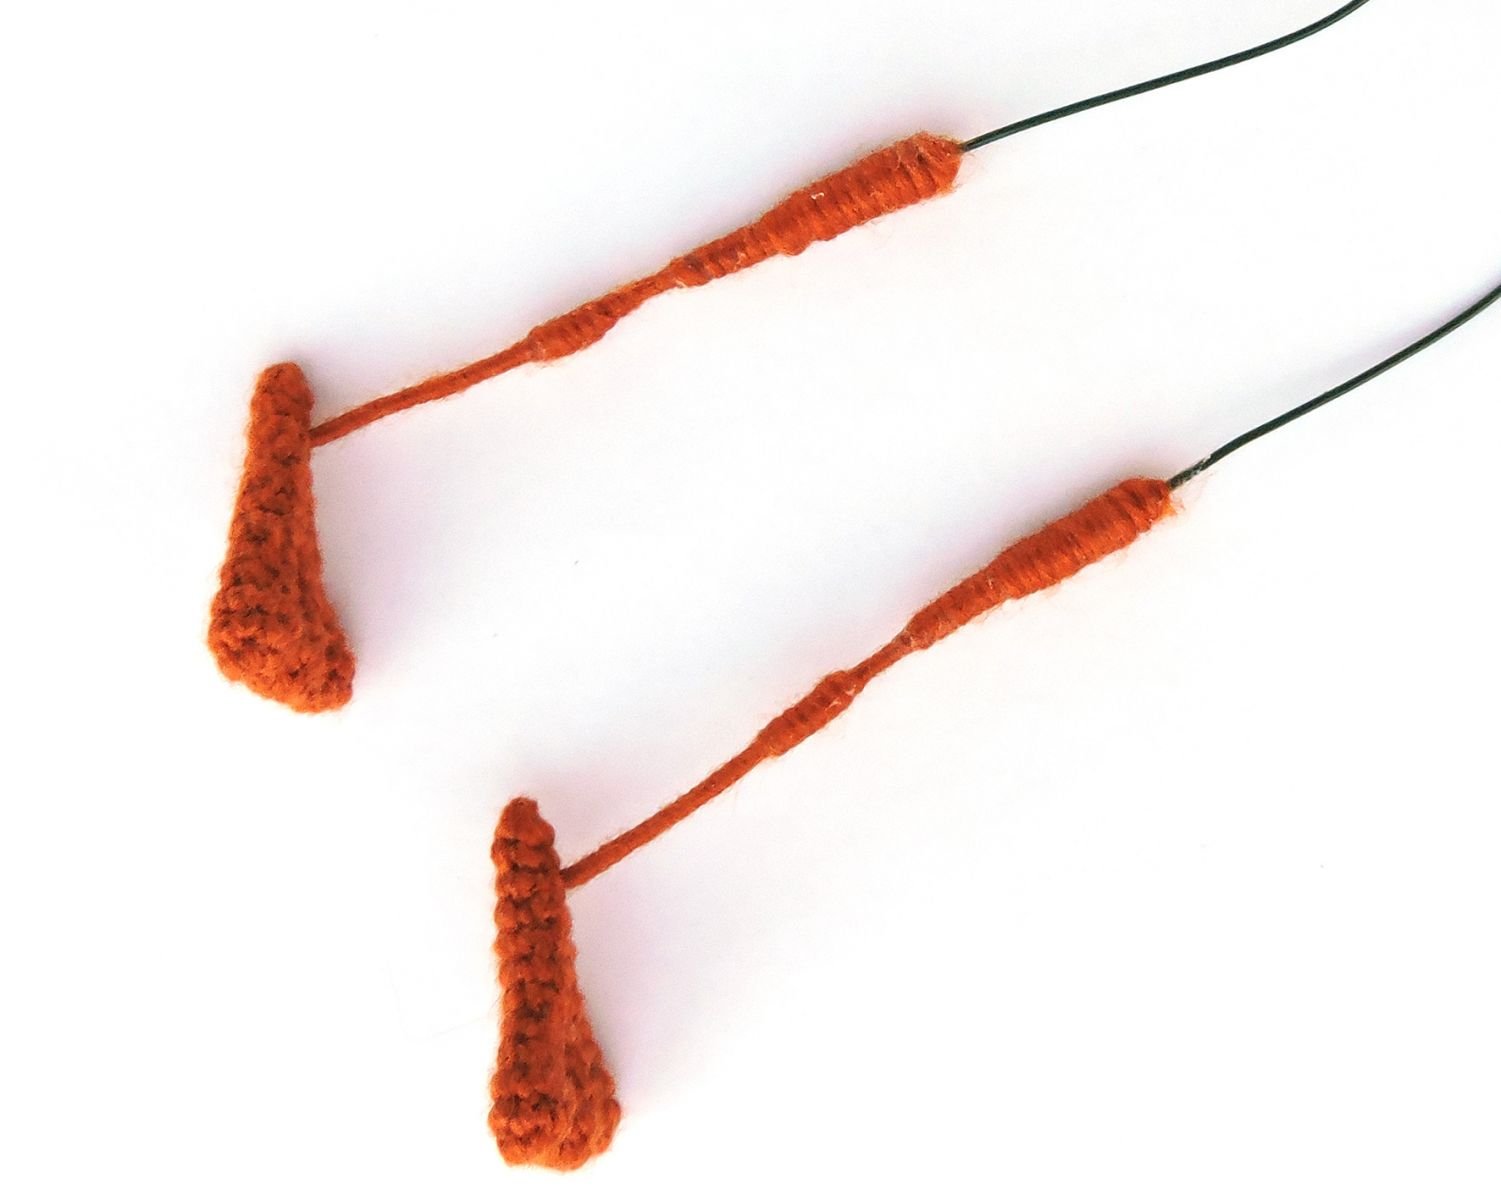
Prepare the wire - 4 pieces of 10 cm. Make a loop on the end of the wire. Insert the wire into the legs. Pull off loops around the wire.
Apply some transparent glue onto the half of the wire and make neat wraps around it with yarn.
Legs (make 2)
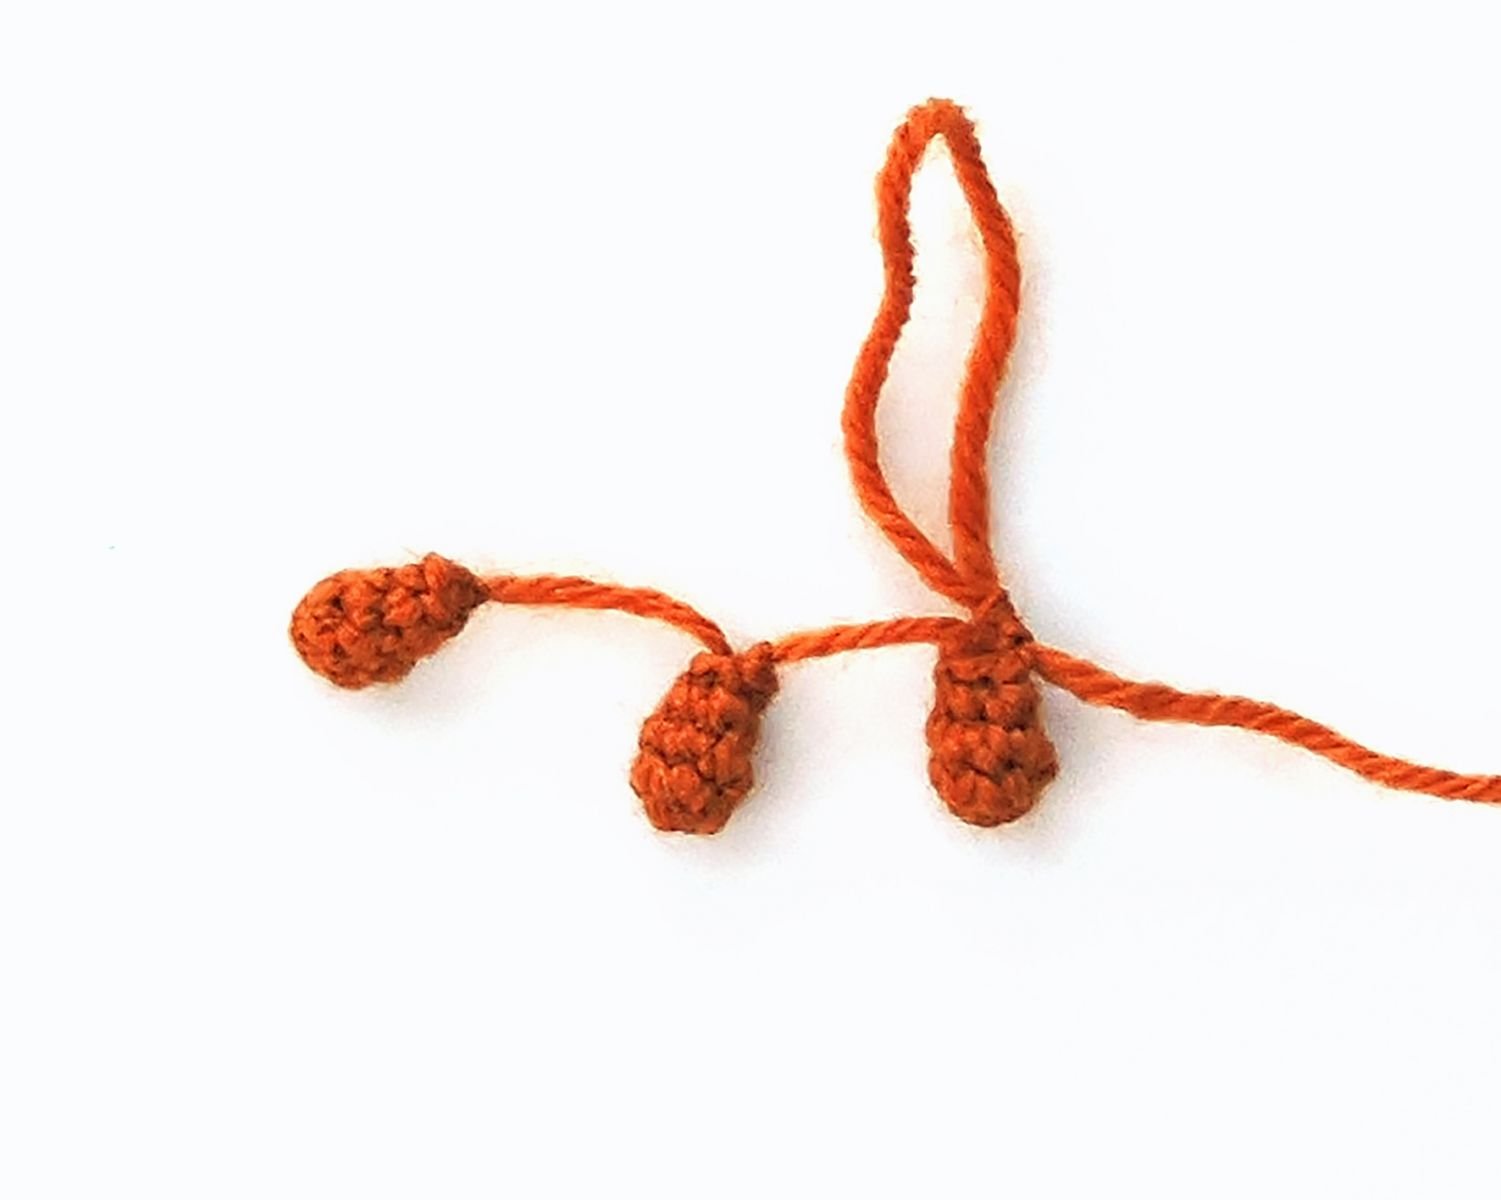
Work with the colour B. The legs consist of toes and feet. First crochet the toes (3 for each leg):
1 Rnd: 6 sc in a Magic Ring
2 Rnd: inc, 5 sc [7]
3 Rnd: 7 sc
4 Rnd: dec, 1 sc, dec, 2 sc [5]
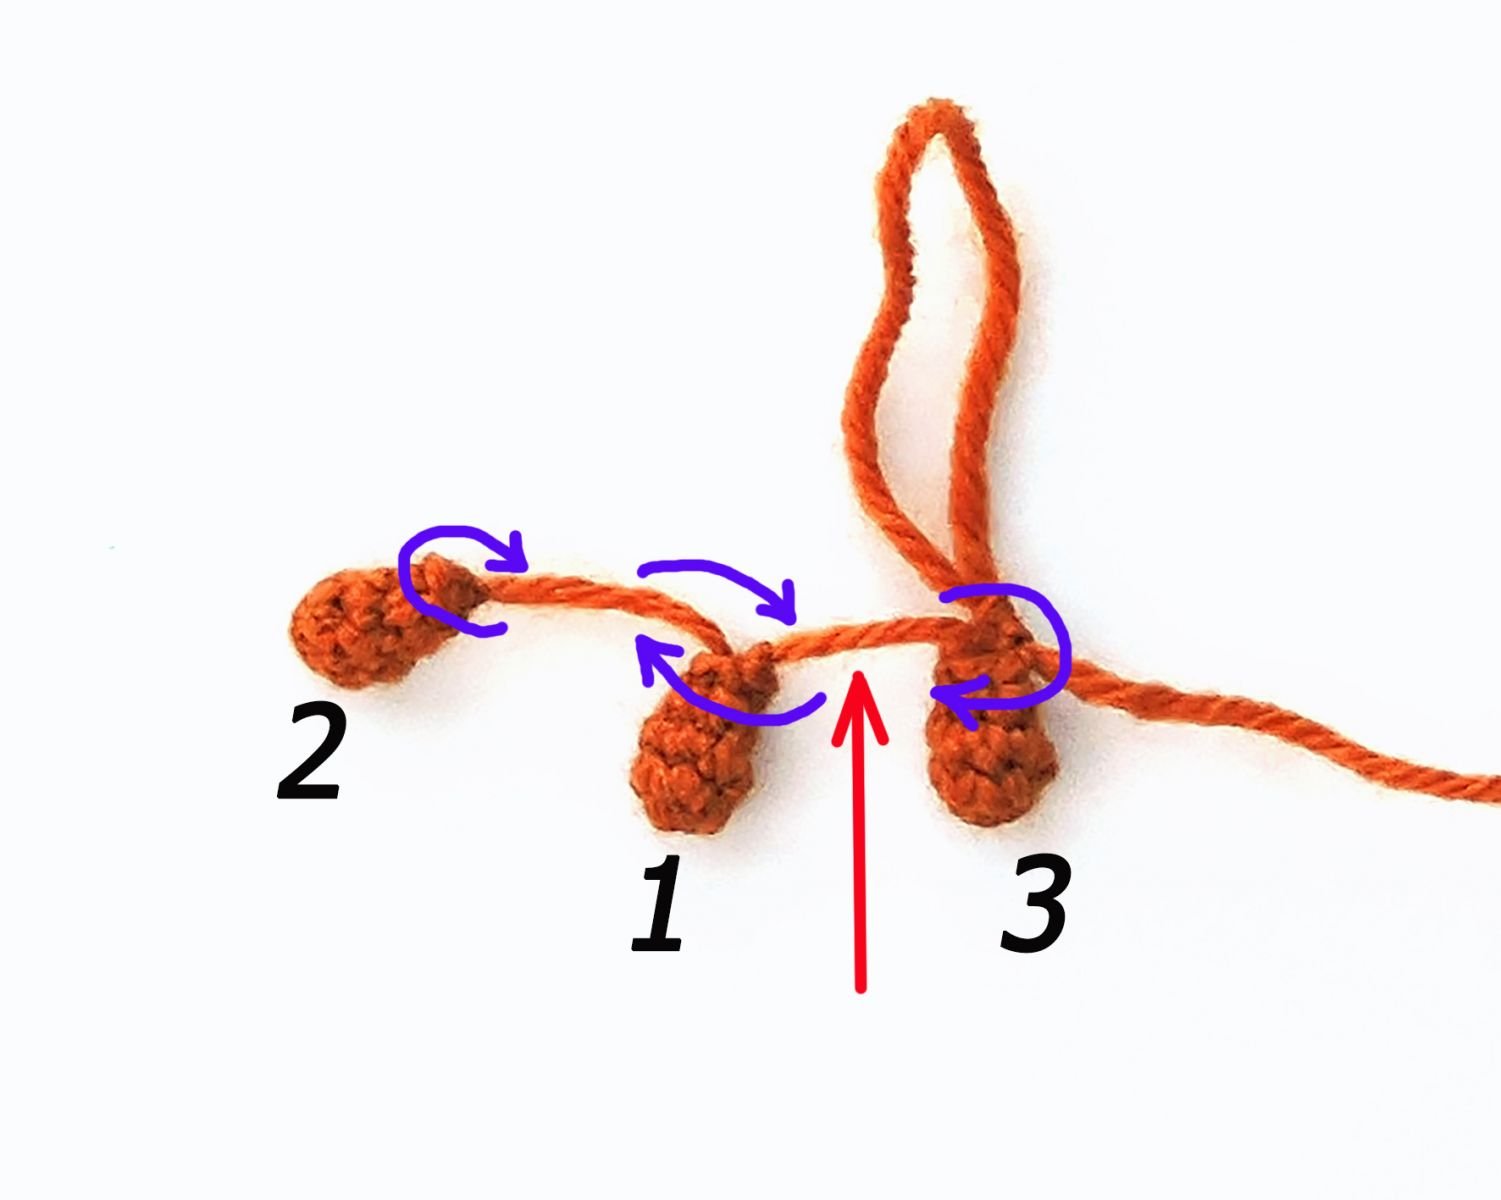
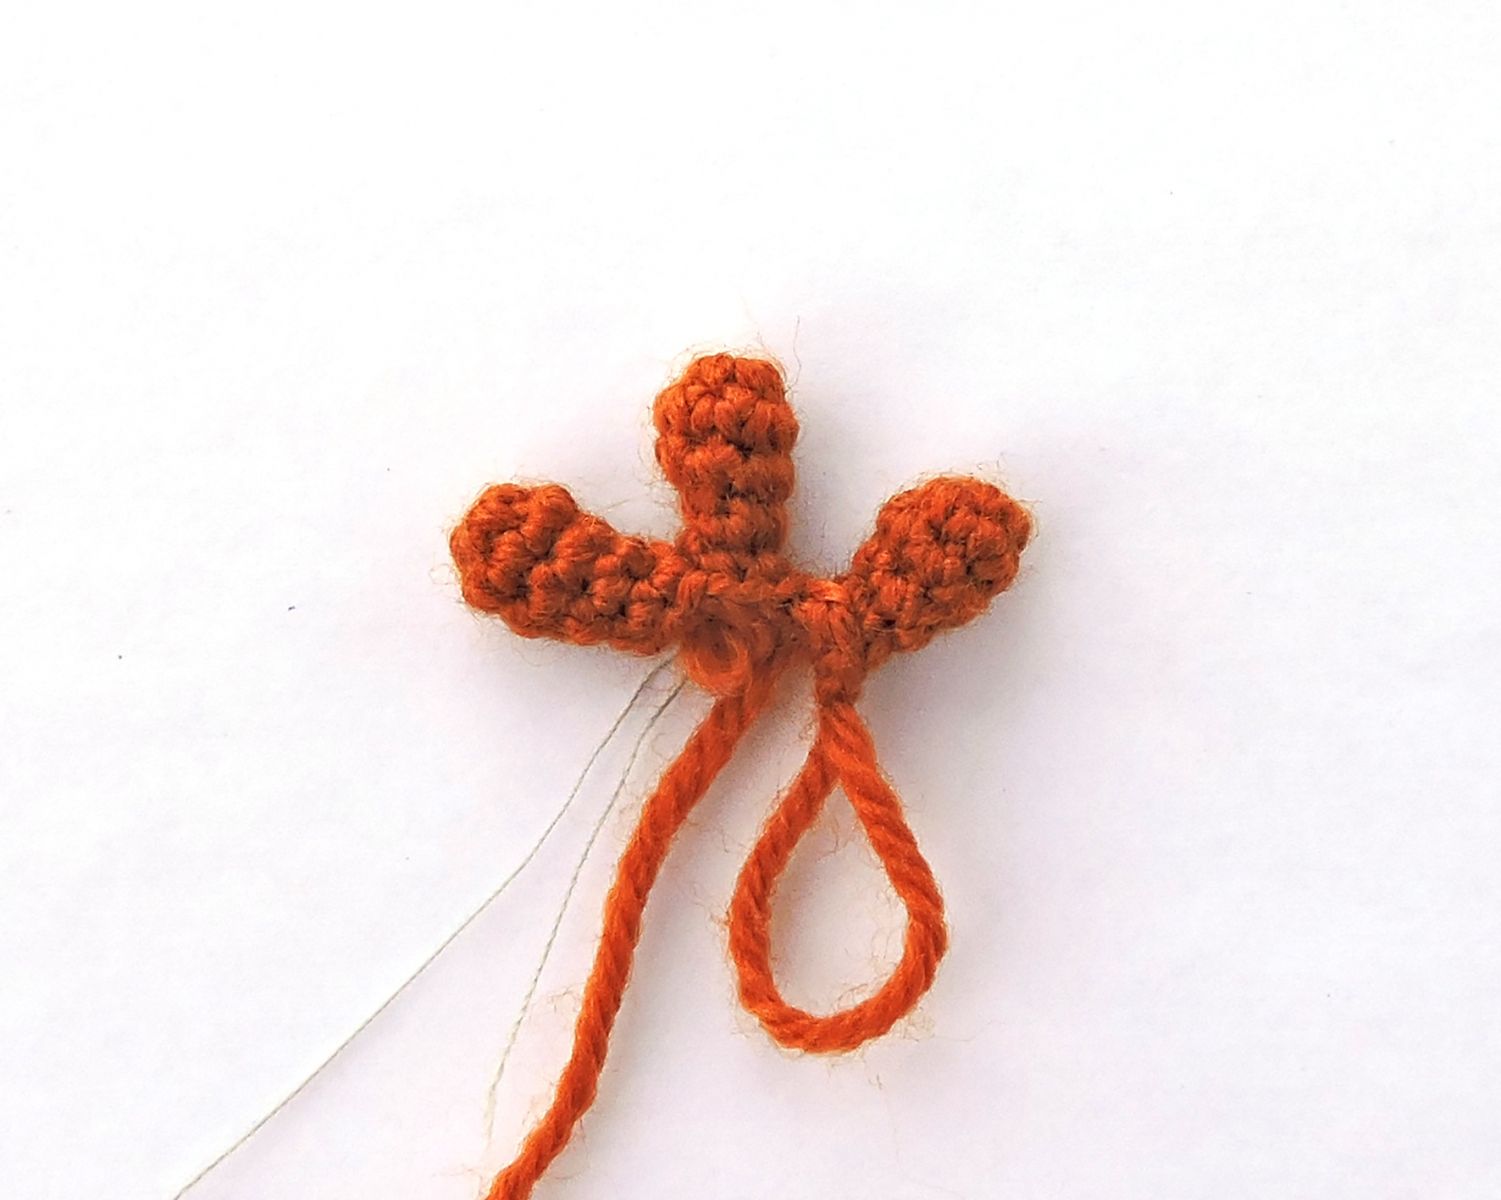
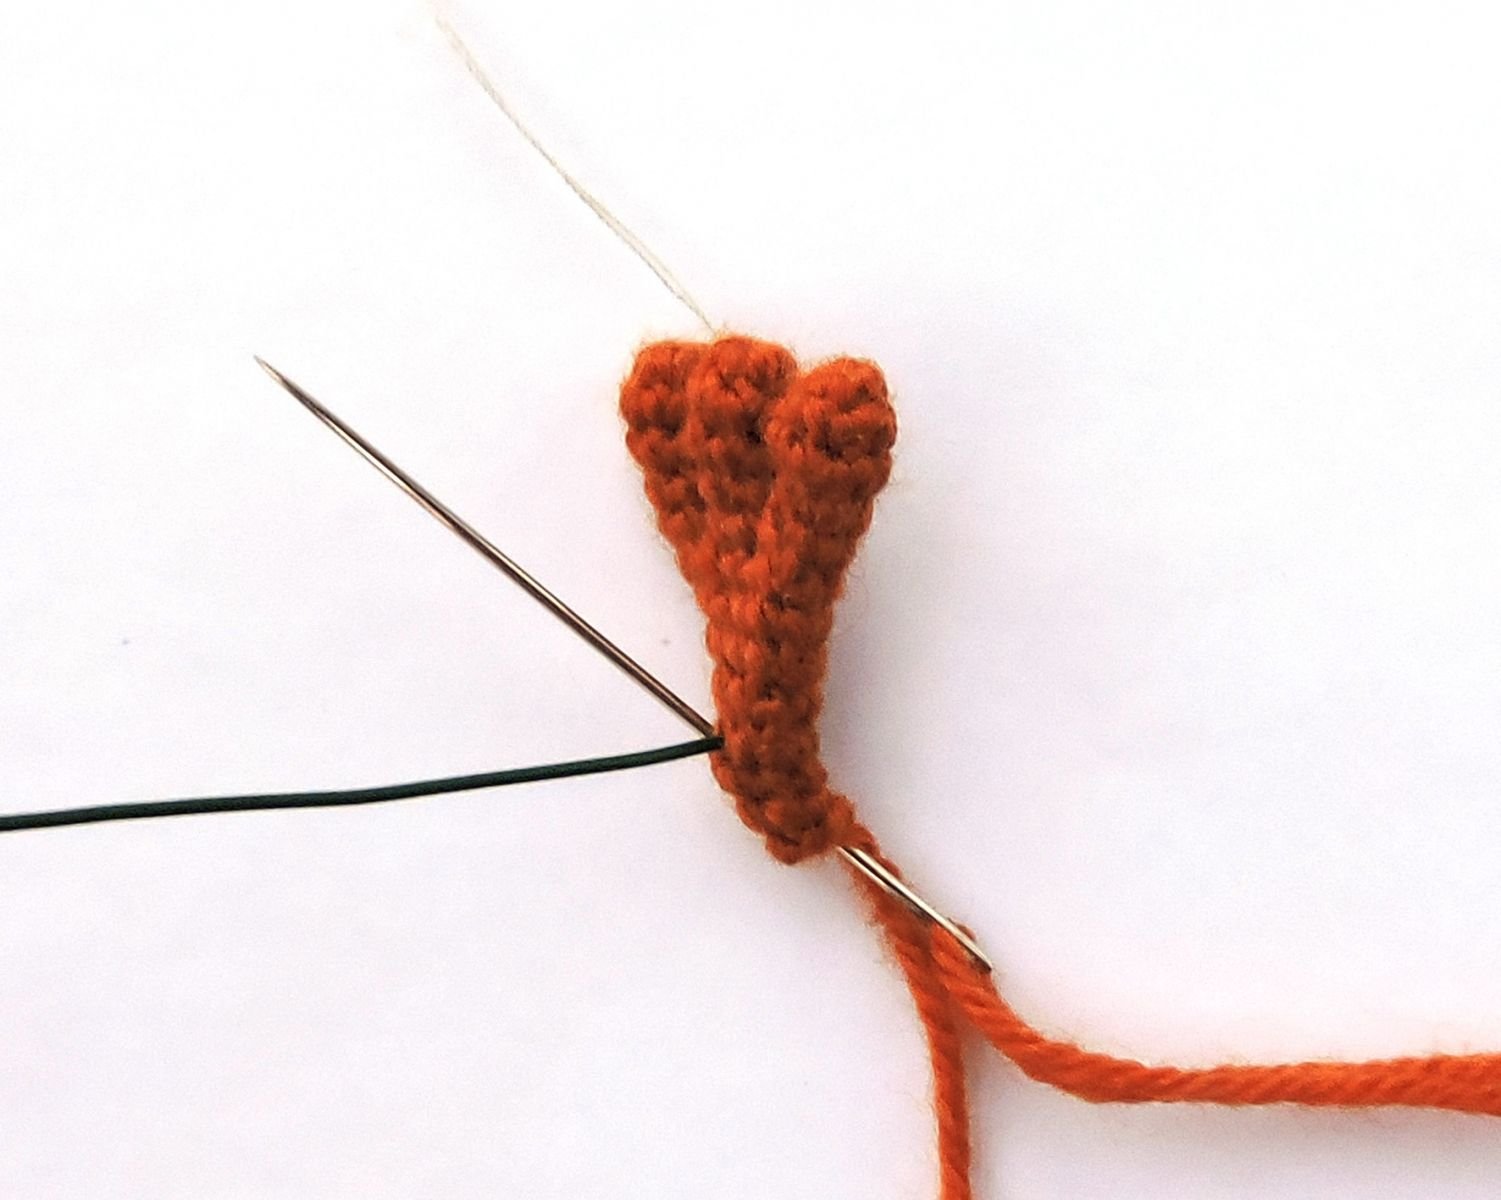
Fasten and cut off the thread on two of the toes. Leave the thread on toe no. 3 and continue crocheting. See the pictures for guidance
1 Rnd: work into loops of the 1st toe 2 sc, work into loops of the 2nd toe 5 sc, work into loops of the 1st toe 3 sc, work into loops of the 3rd toe 5 sc [15]
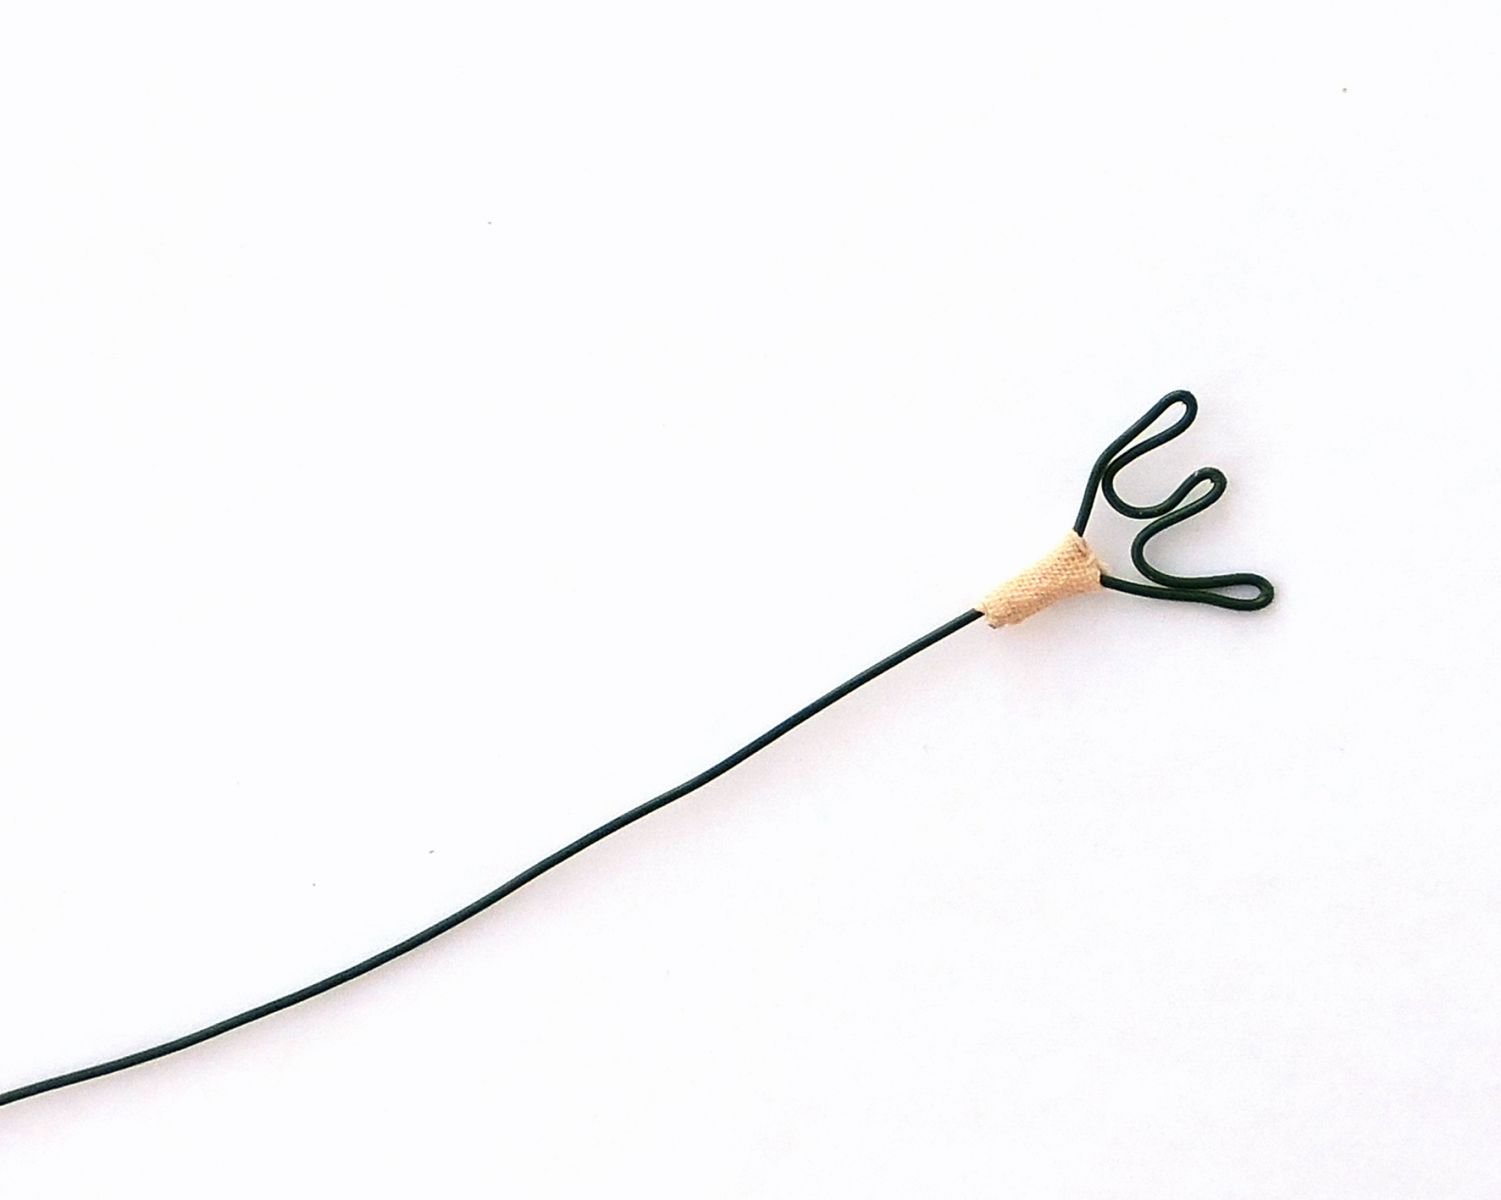
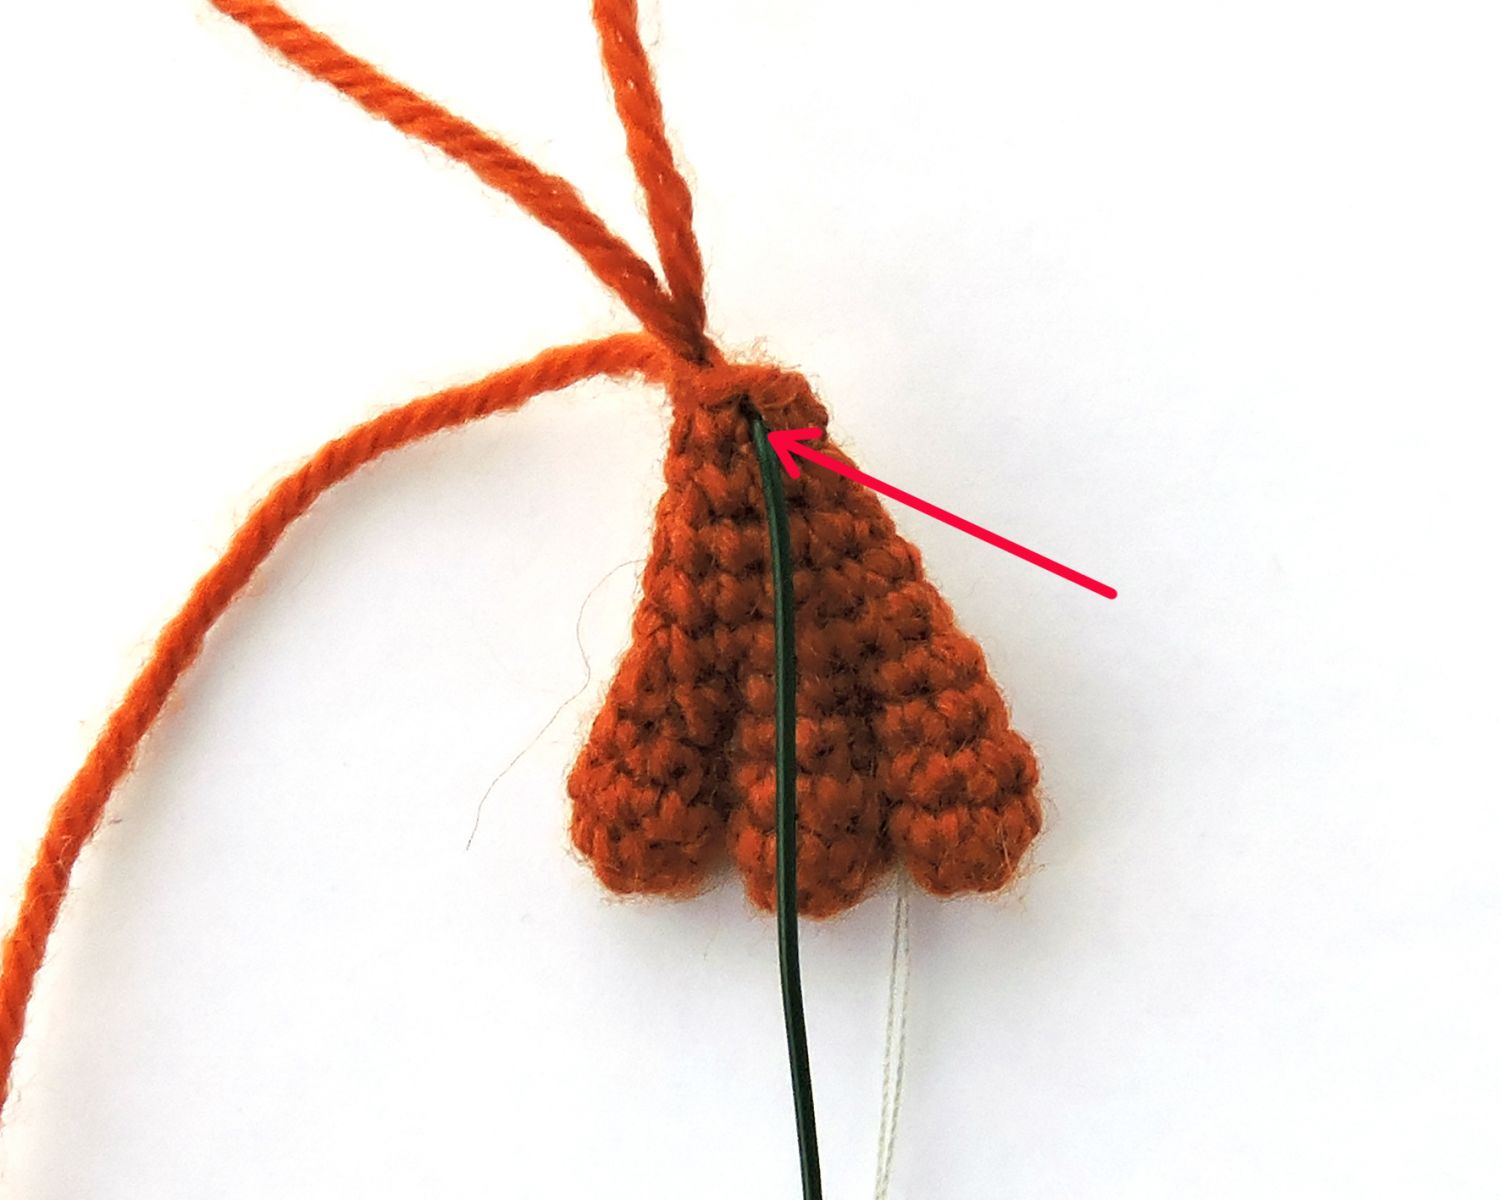
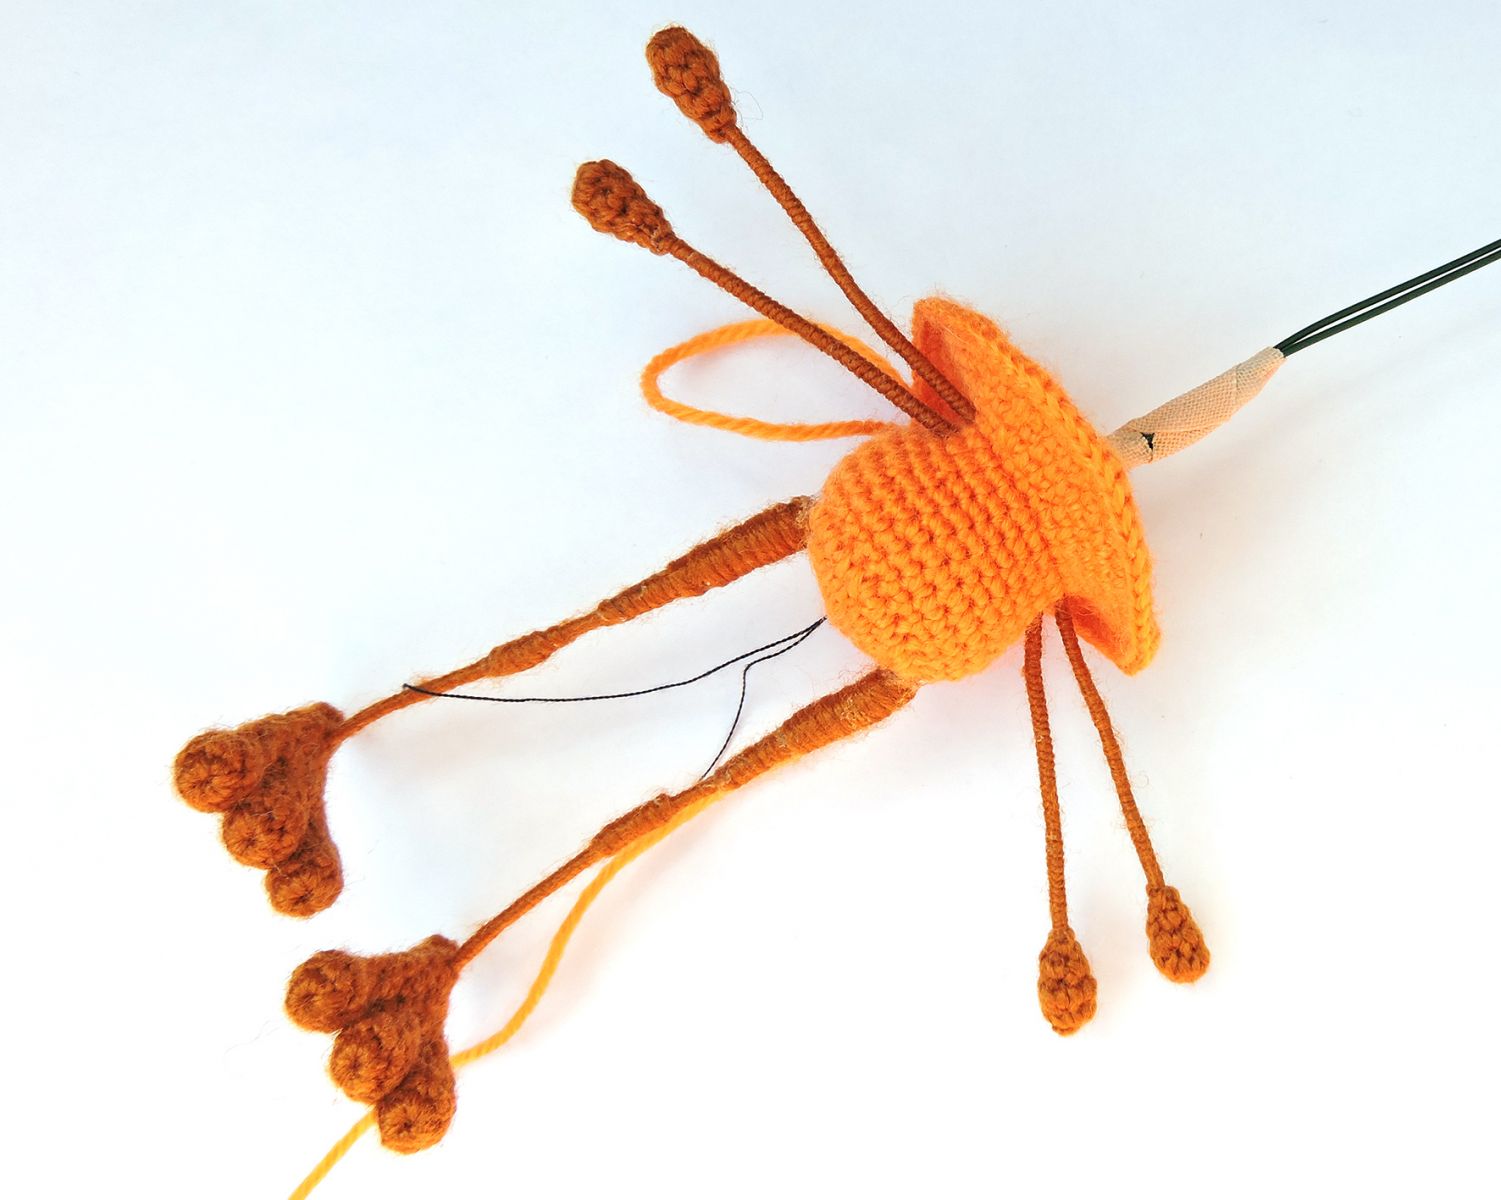
Prepare a 30 cm piece of wire for the frame. The wire frame will stretch from the legs to the moustache.
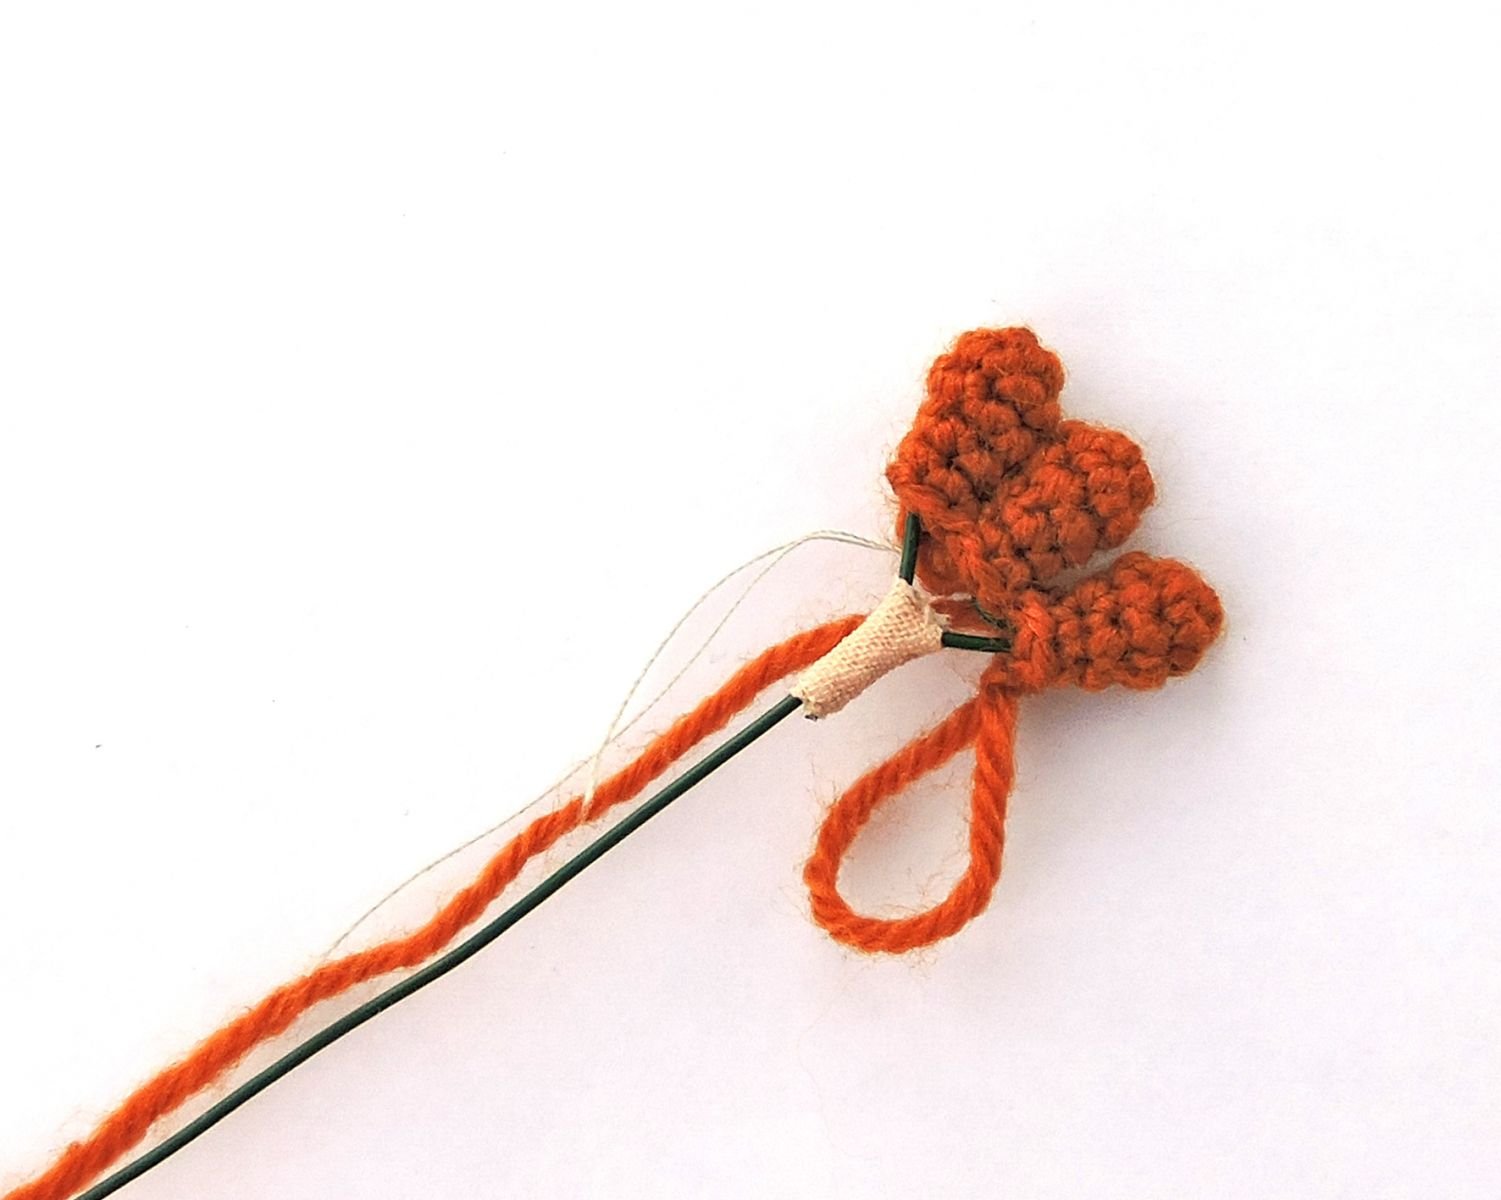
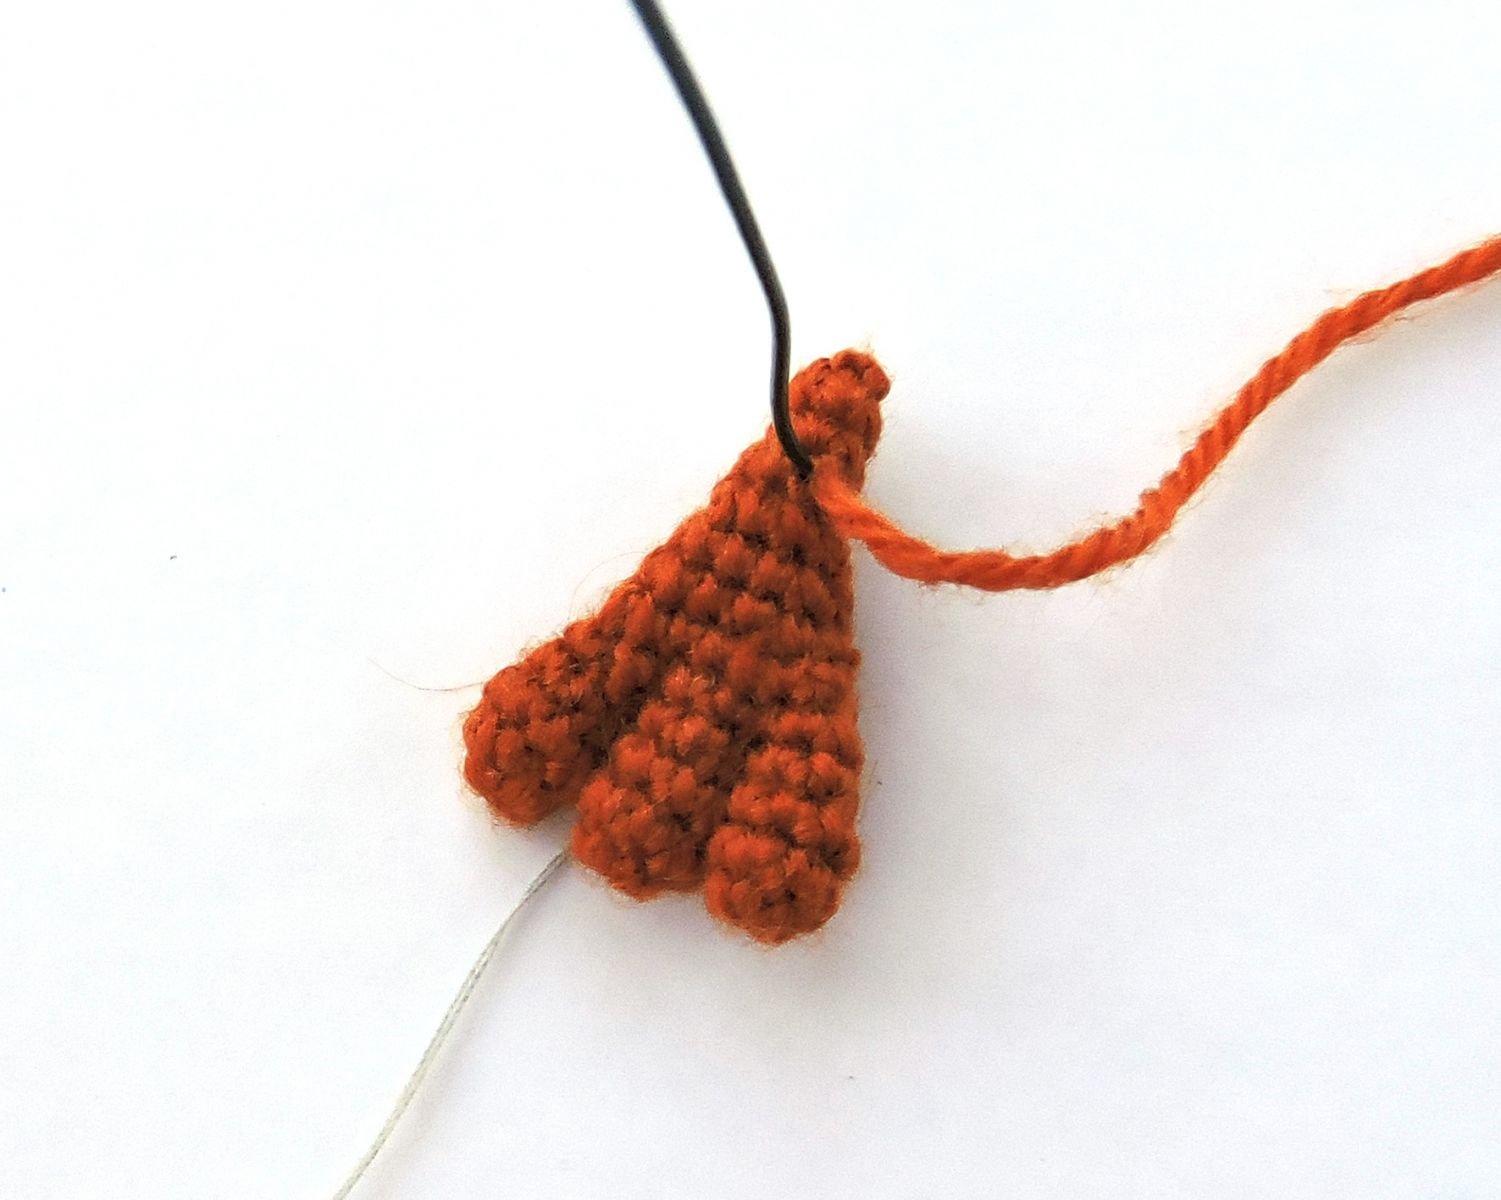
Fold the wire as in the photo. Fix it with a Band-Aid. Insert into the toes.
2 Rnd: 4 sc, dec, 5 sc, dec, 2 sc [13]
3 Rnd: 6 sc, dec, 5 sc [12]
4 Rnd: 3 sc, dec, 4 sc, dec, 1 sc [10]
5 Rnd: 3 sc, dec, 2 sc, dec, 1 sc [8]
6 Rnd: 2 sc, dec, 1 sc, at this point, take the wire out (see photo for guidance), 1 sc, dec [6]
7 Rnd: 6 sc
8 Rnd: dec, 4 sc [5]
Cut off the thread, leave a long tail, about 90 cm.
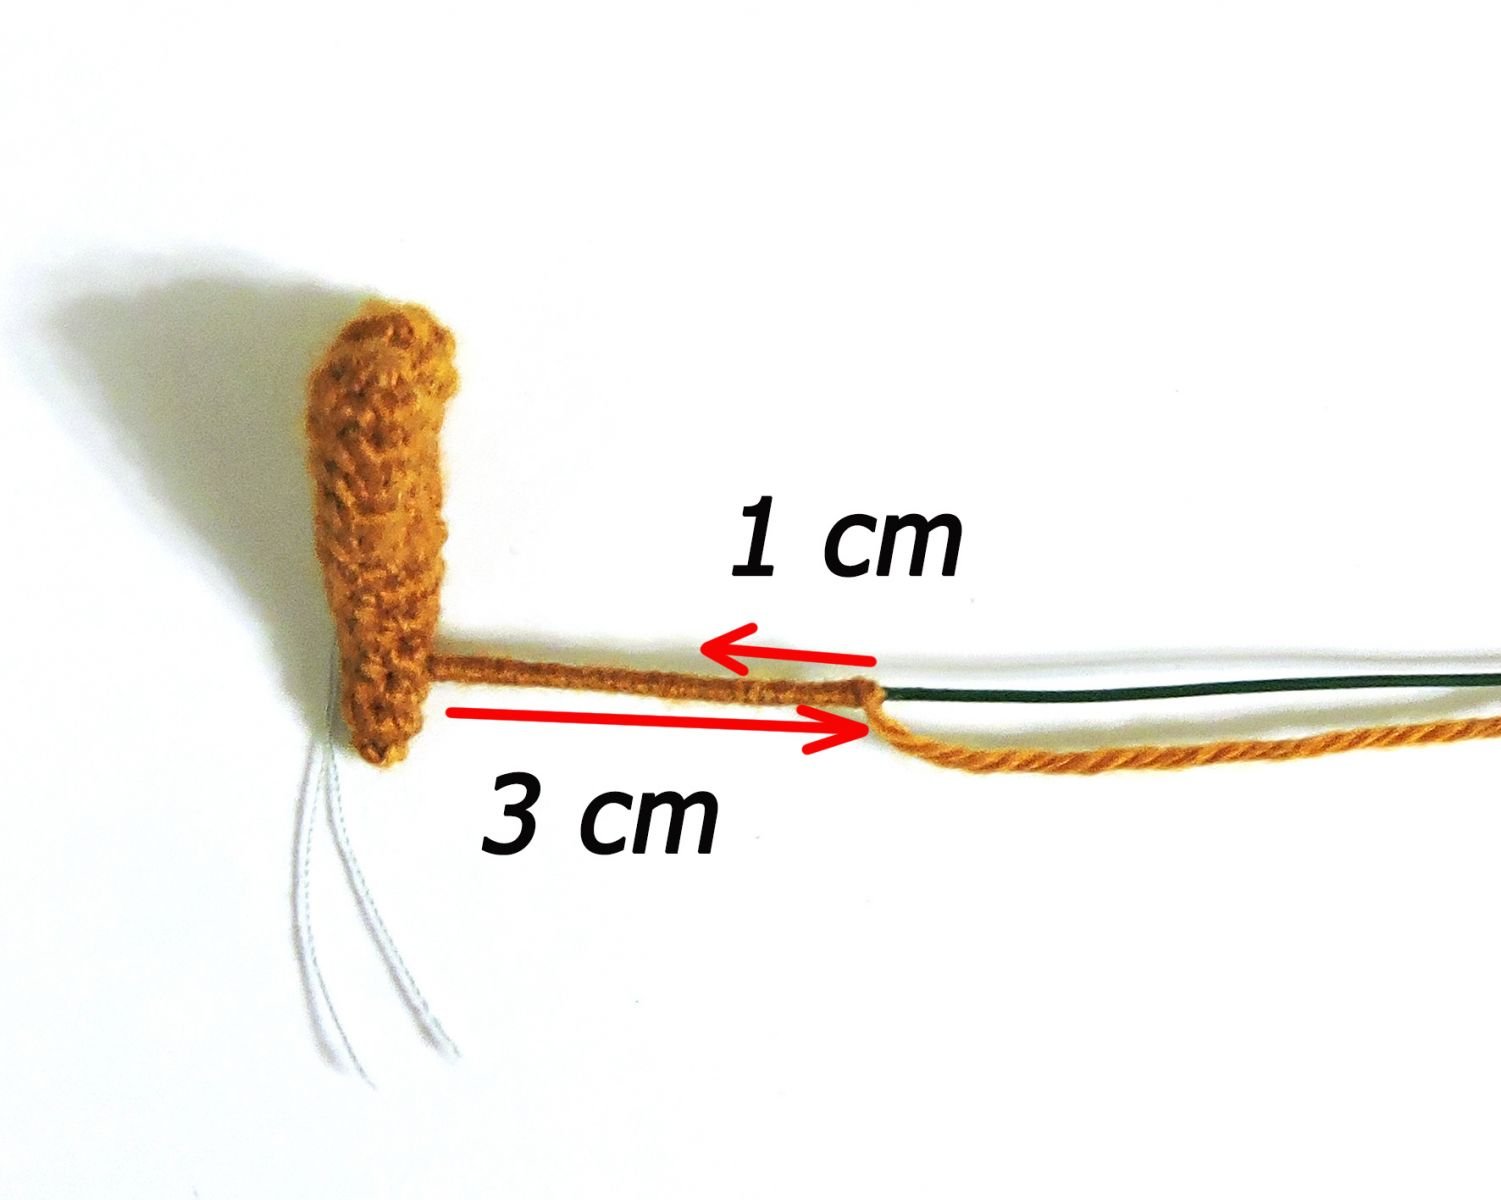
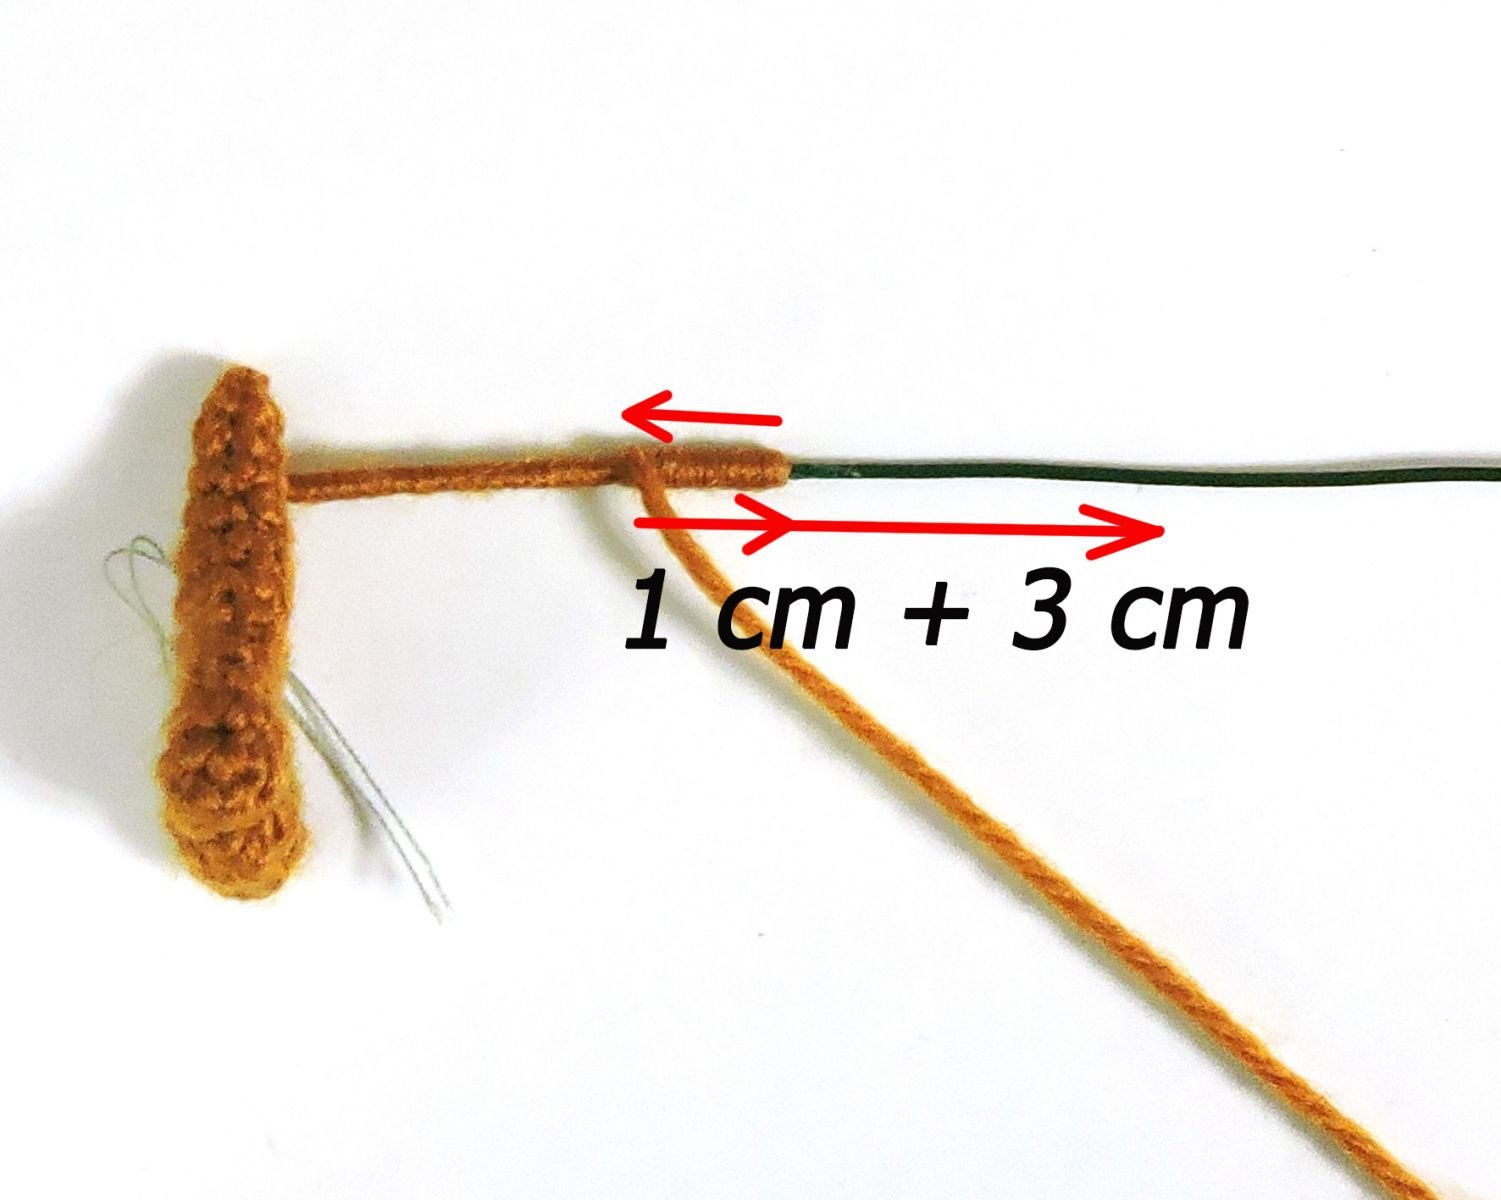
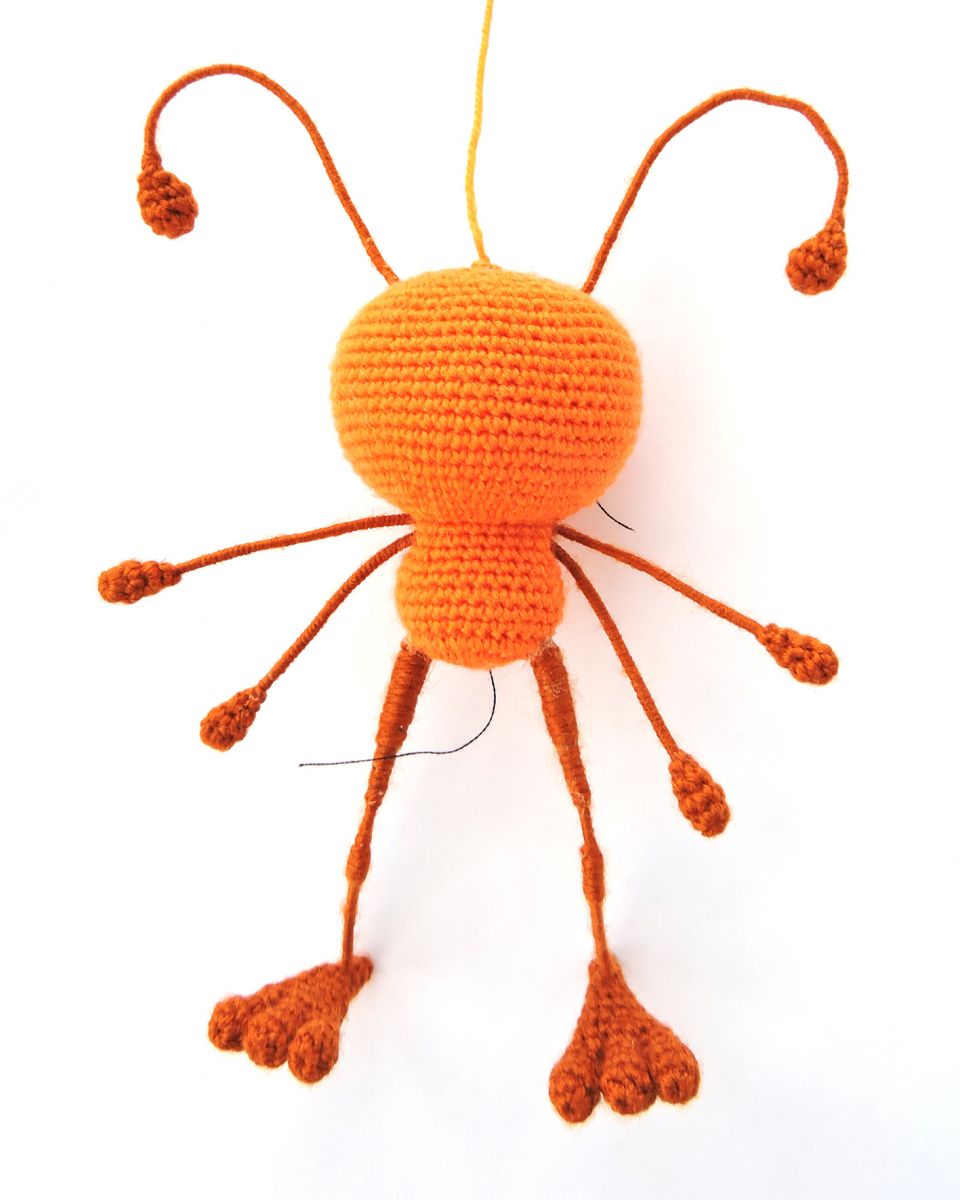
Pull off the loops. Take the yarn out in the spot where the wire sticks out.
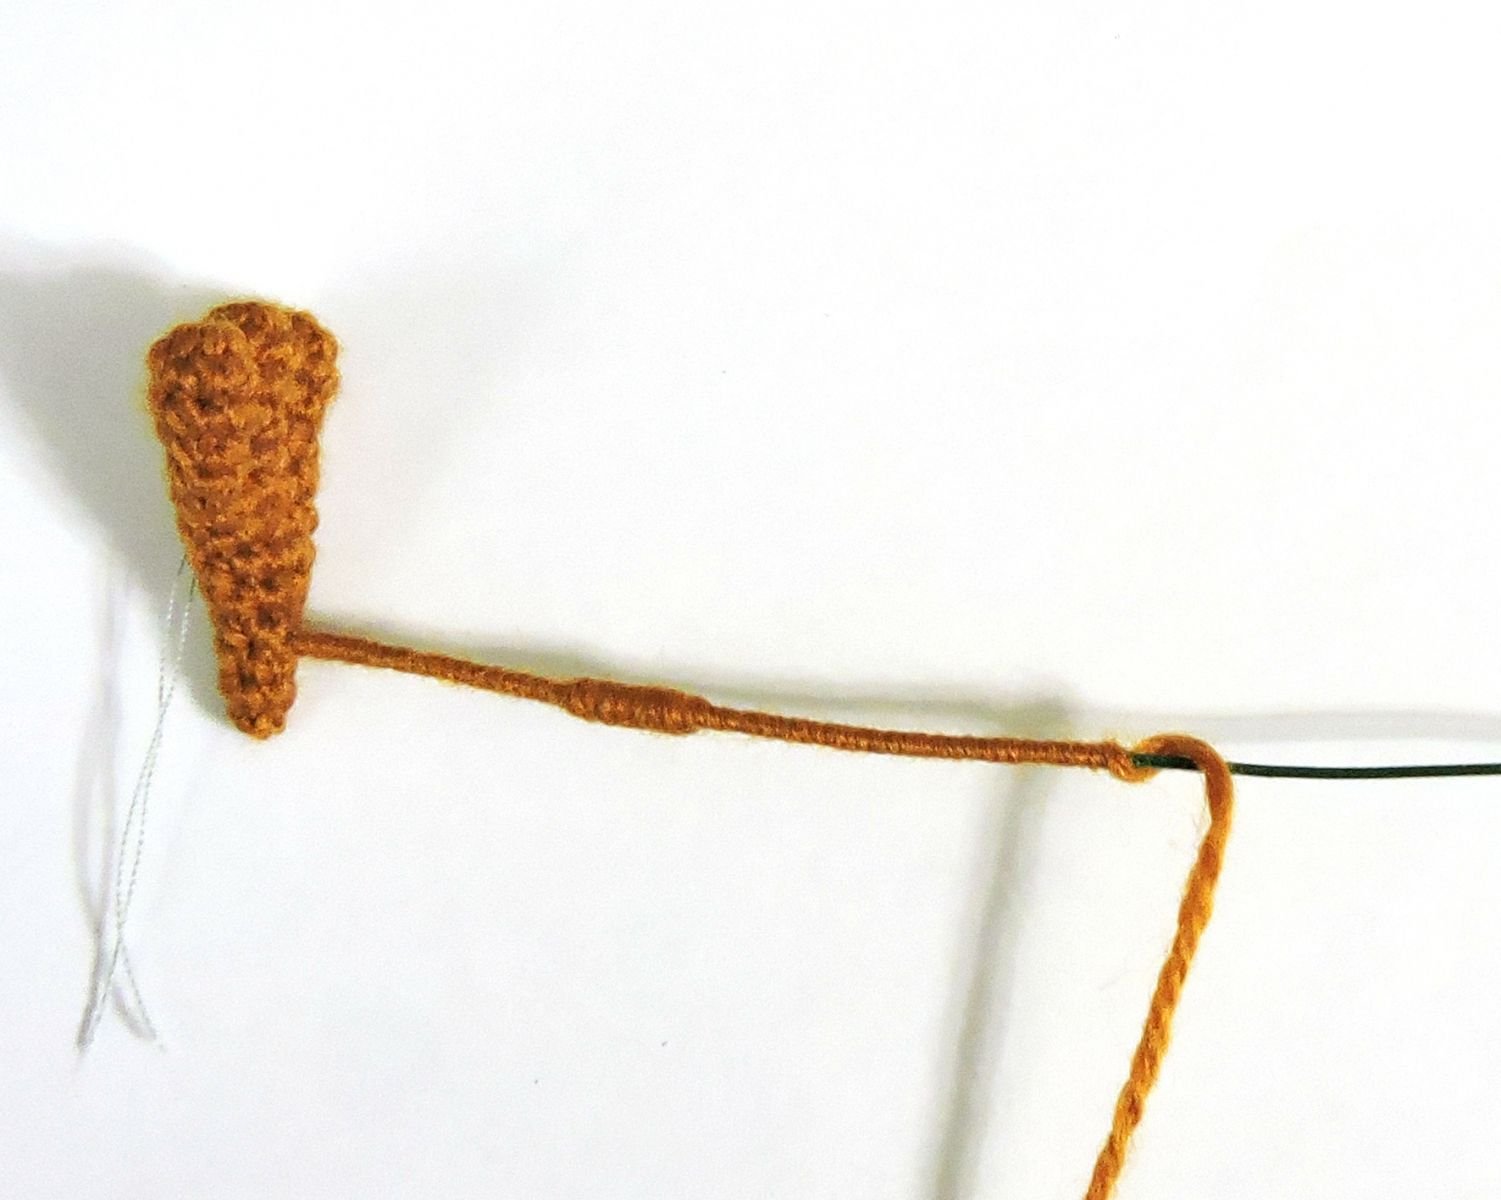
Apply a tiny amount of transparent glue onto a length of approx. 3cm and wrap it around with the yarn. Now work downwards (approx. 1 cm down) and upwards to form a knee.
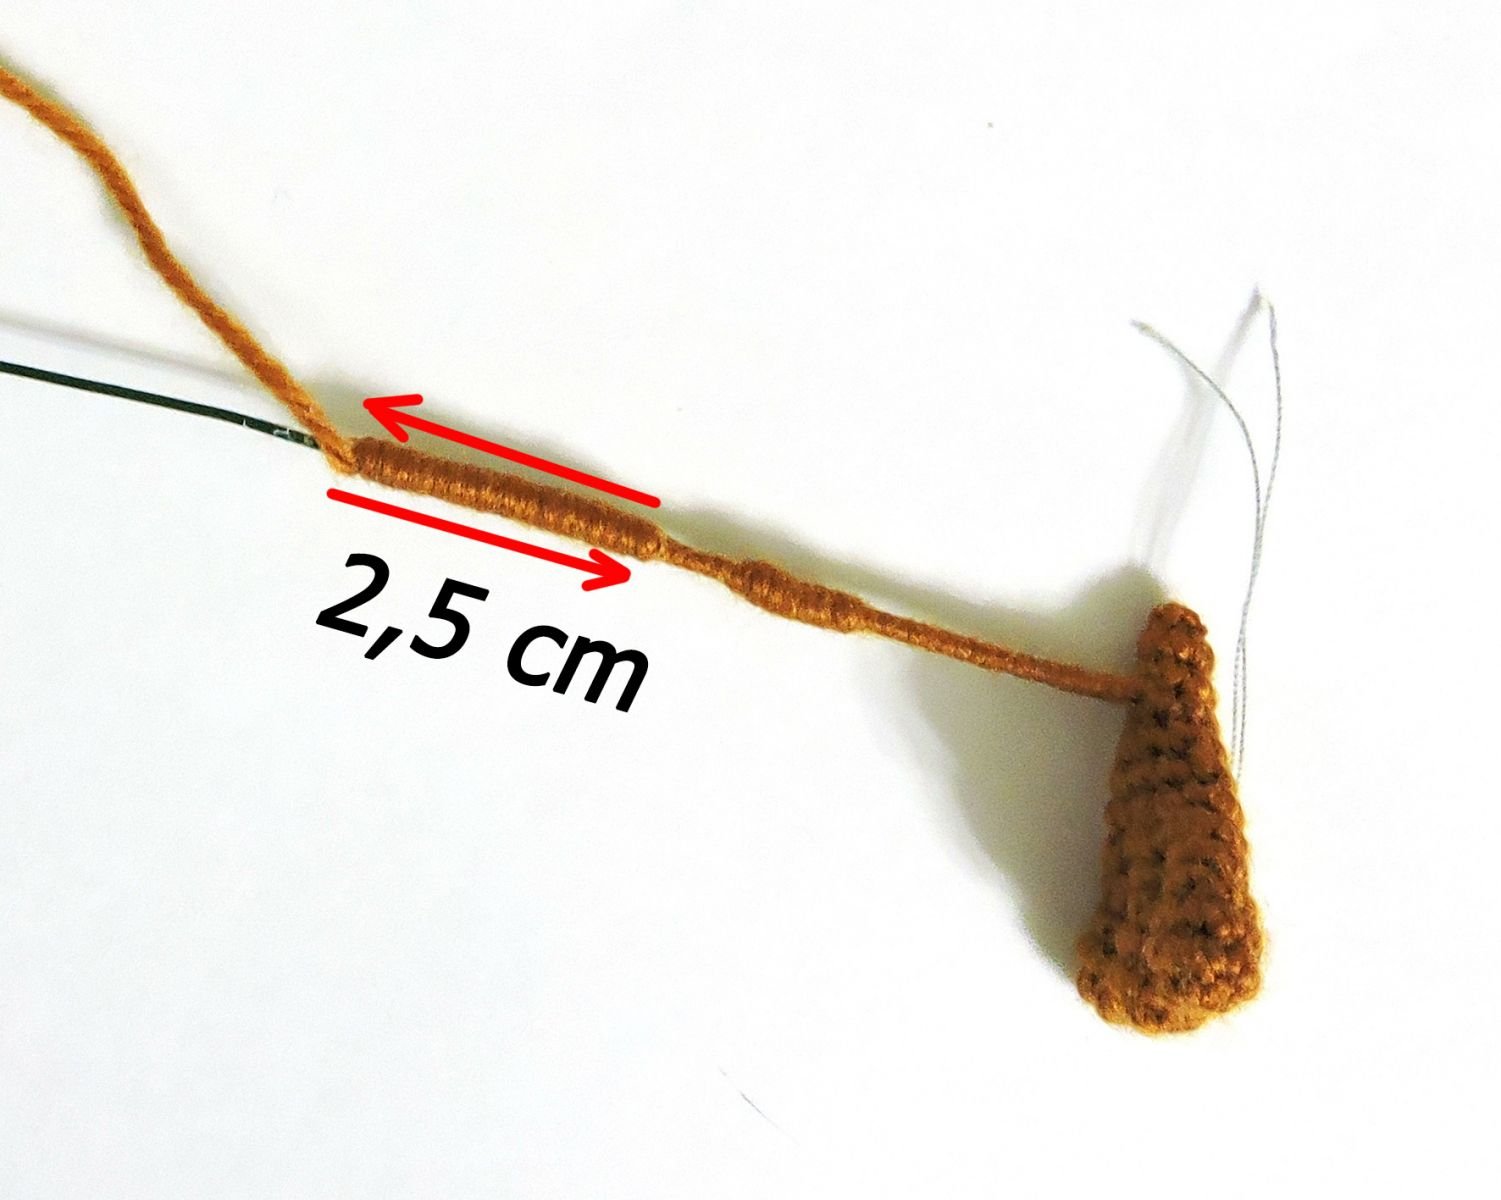
The whole leg should measure 6cm. To make a hip wrap the yarn around in the backward direction (approx. 2.5cm down) and then upwards once more. Apply some more glue to hold the yarn in place. Work 1.5 cm downwards and then upwards. Fasten the yarn with some glue, cut off.
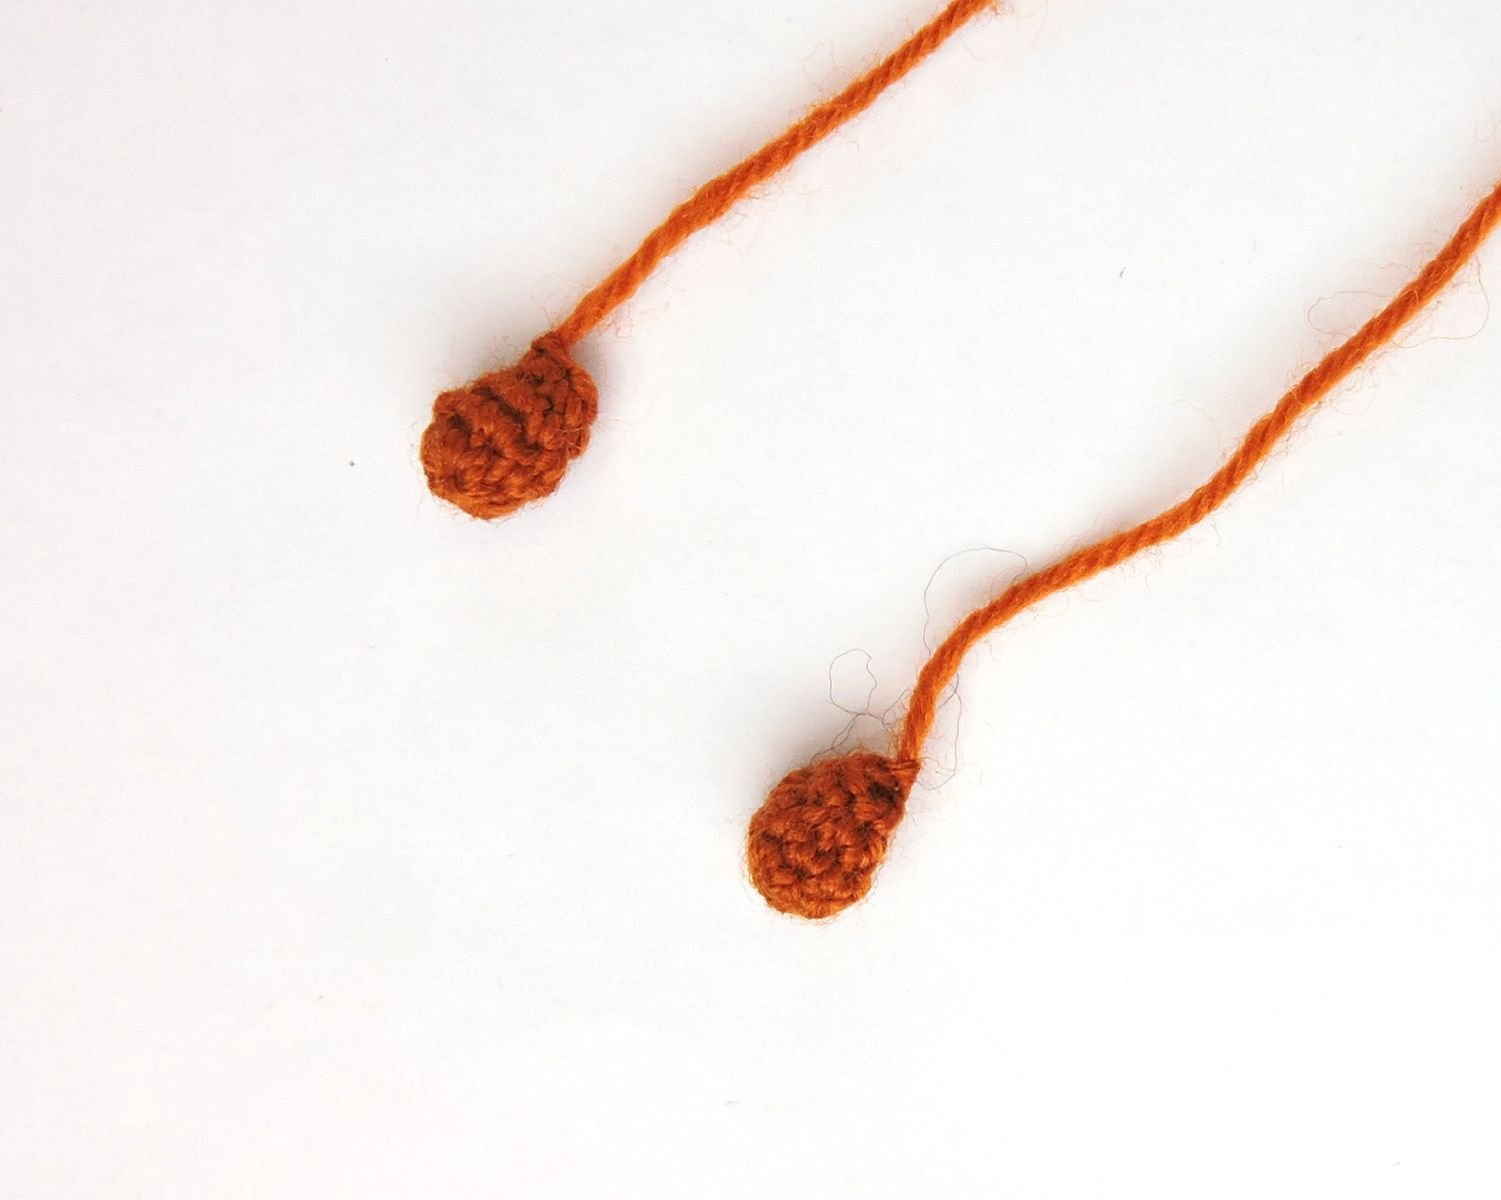
Tips of the mustache (make 2)
Work with the colour B.
1 Rnd: 6 sc in a Magic Ring
2 Rnd: (inc, 1 sc) х 3 times [9]
3 Rnd: 9 sc
4 Rnd: (dec, 1 sc) х 3 times [6]
Cut off the thread, leave a long tail, about 40 cm.
Body
The marker should be in line with the centre of the back. Adjust as and when to keep it straight.
Work with the colour A.
1 Rnd: 6 sc in a Magic Ring
2 Rnd: inc х 6 times [12]
3 Rnd: (1 sc, inc) х 6 times [18]
In the next round, mark the 6th and 18th loops with an additional marker - the place where the legs are attached.
4 Rnd: (1 sc, inc, 1 sc) х 6 times [24]
5 Rnd: (3 sc, inc) х 6 times [30]
6 Rnd: Into the front loops only: 30 sc
7-8 Rnd: 30 sc
9 Rnd: (8 sc, dec) х 3 times [27]
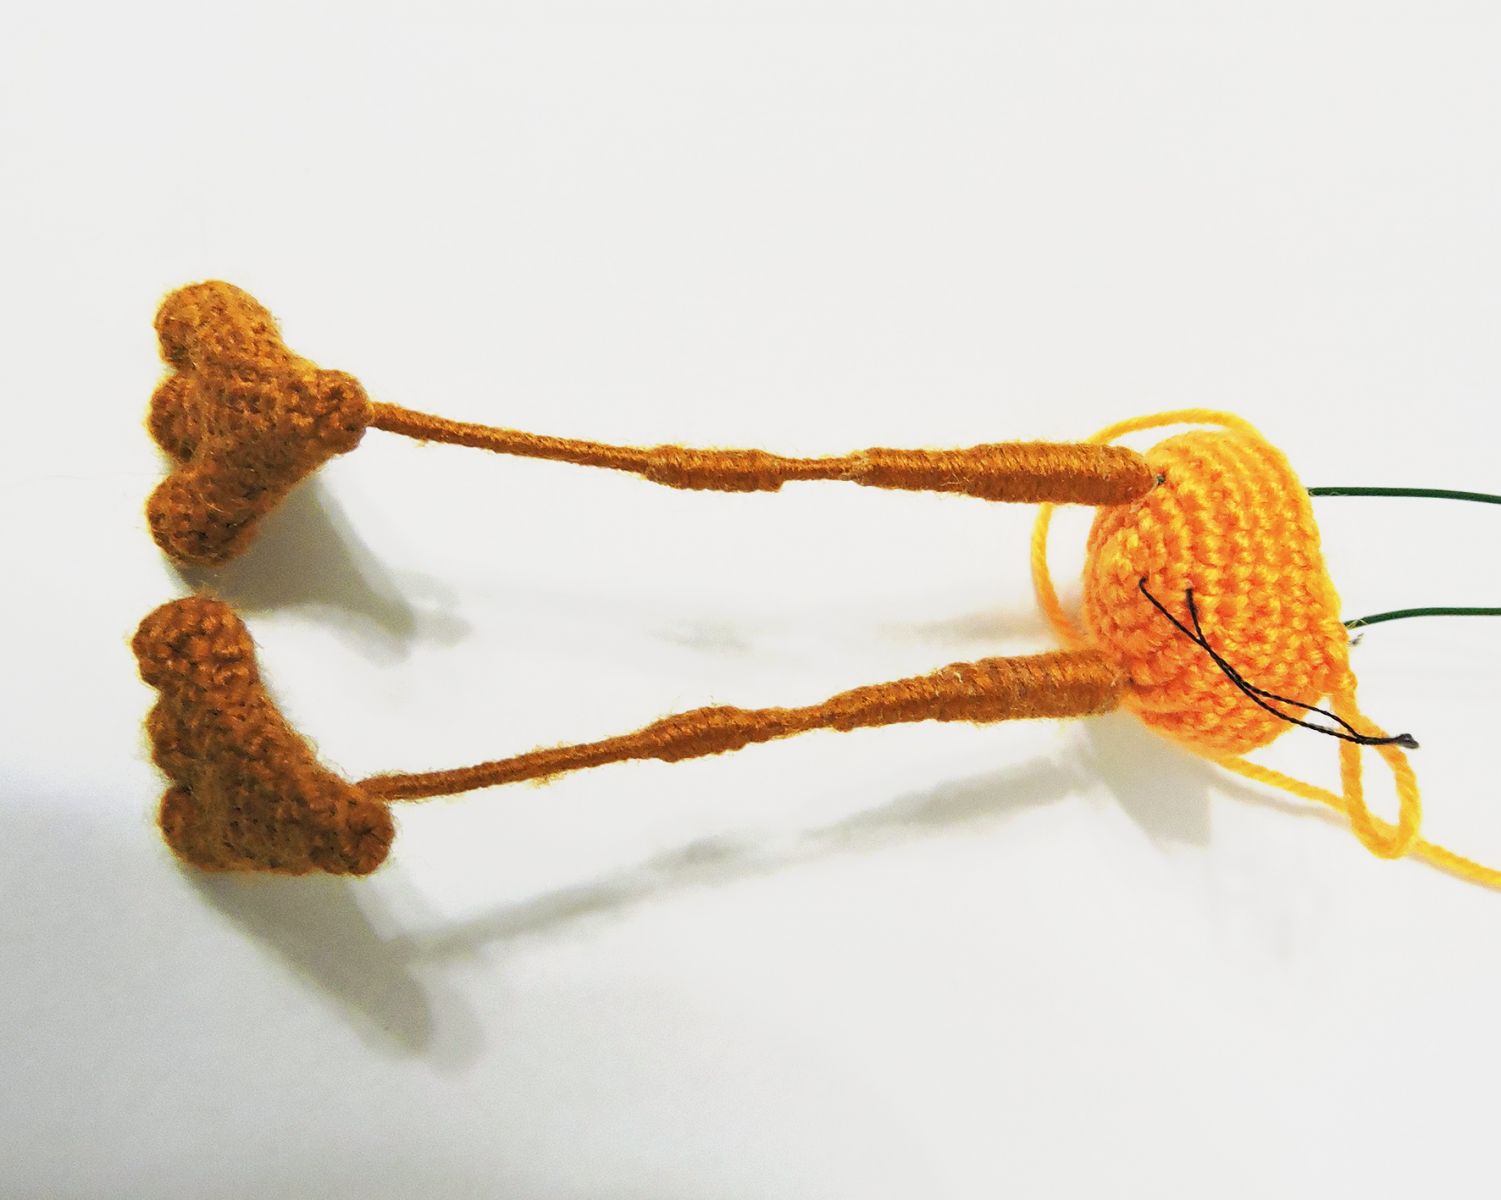
Insert the legs in the marked places. Twist the ends of the wires together. Wrap some adhesive fabric tape around those.
10 Rnd: 27 sc
11 Rnd: (7 sc, dec) х 3 times [24]
In the 12th and 13th rounds, mark the 6th and 18th loops with an additional marker - the place of attachment of the arms.
12 – 13 Rnd: 24 sc
To make the head, do not cut off the thread and continue crocheting. The marker runs along the centre of the back of the head, align as and when required.
14 Rnd: Into the front loops only: (3 sc, inc) х 6 times [30]
15 Rnd: (2 sc, inc, 2 sc) х 6 times [36]
16 Rnd: (5 sc, inc) х 6 times [42]
17 Rnd: (3 sc, inc, 3 sc) х 6 times [48]
18 Rnd: (7 sc, inc) х 6 times [54]
19 Rnd: (4 sc, inc, 4 sc) х 6 times [60]
20 – 29 Rnd: 60 sc
Insert the arms in the marked places. Twist the ends of the wires together. Wrap some adhesive fabric tape around those.
Add some hollow fibre.
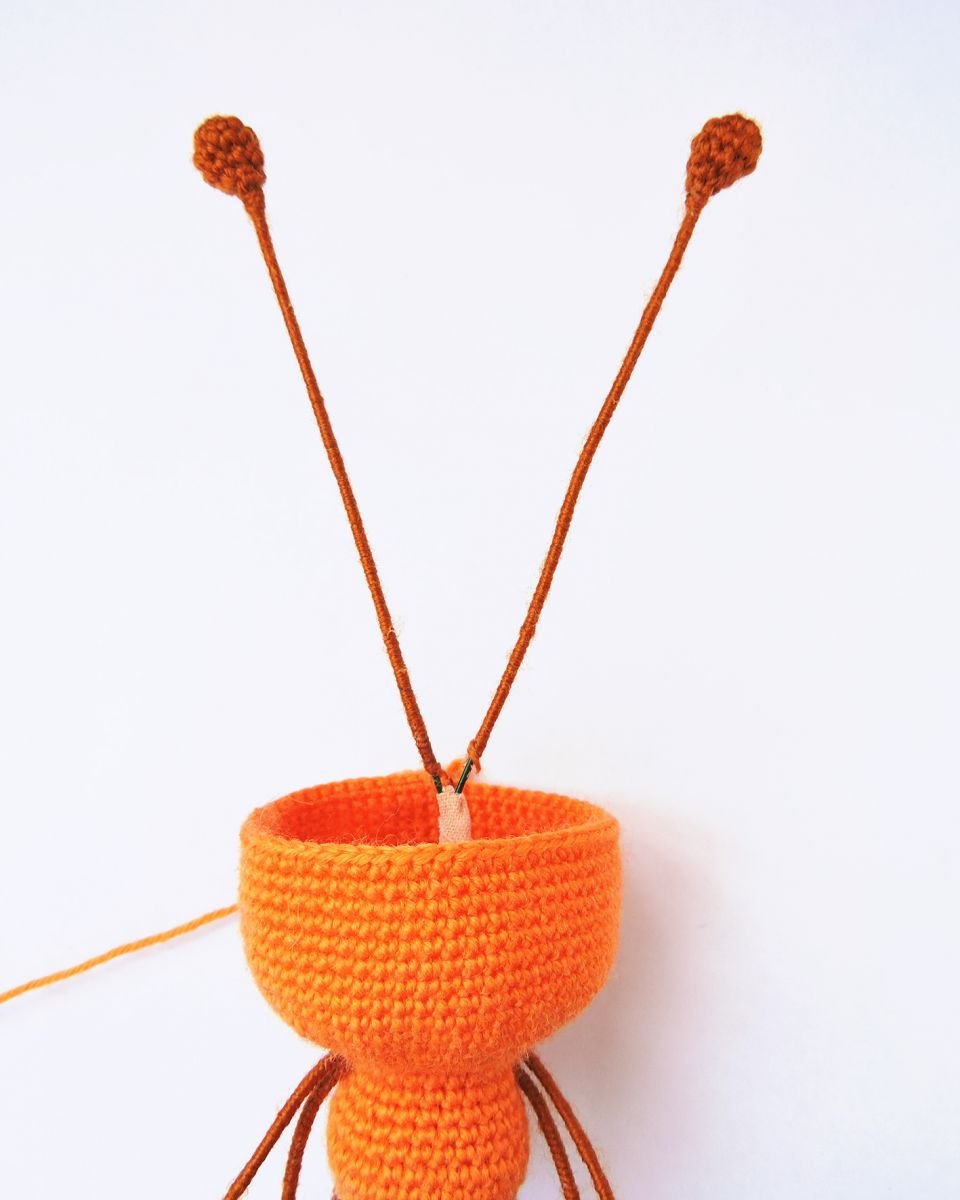
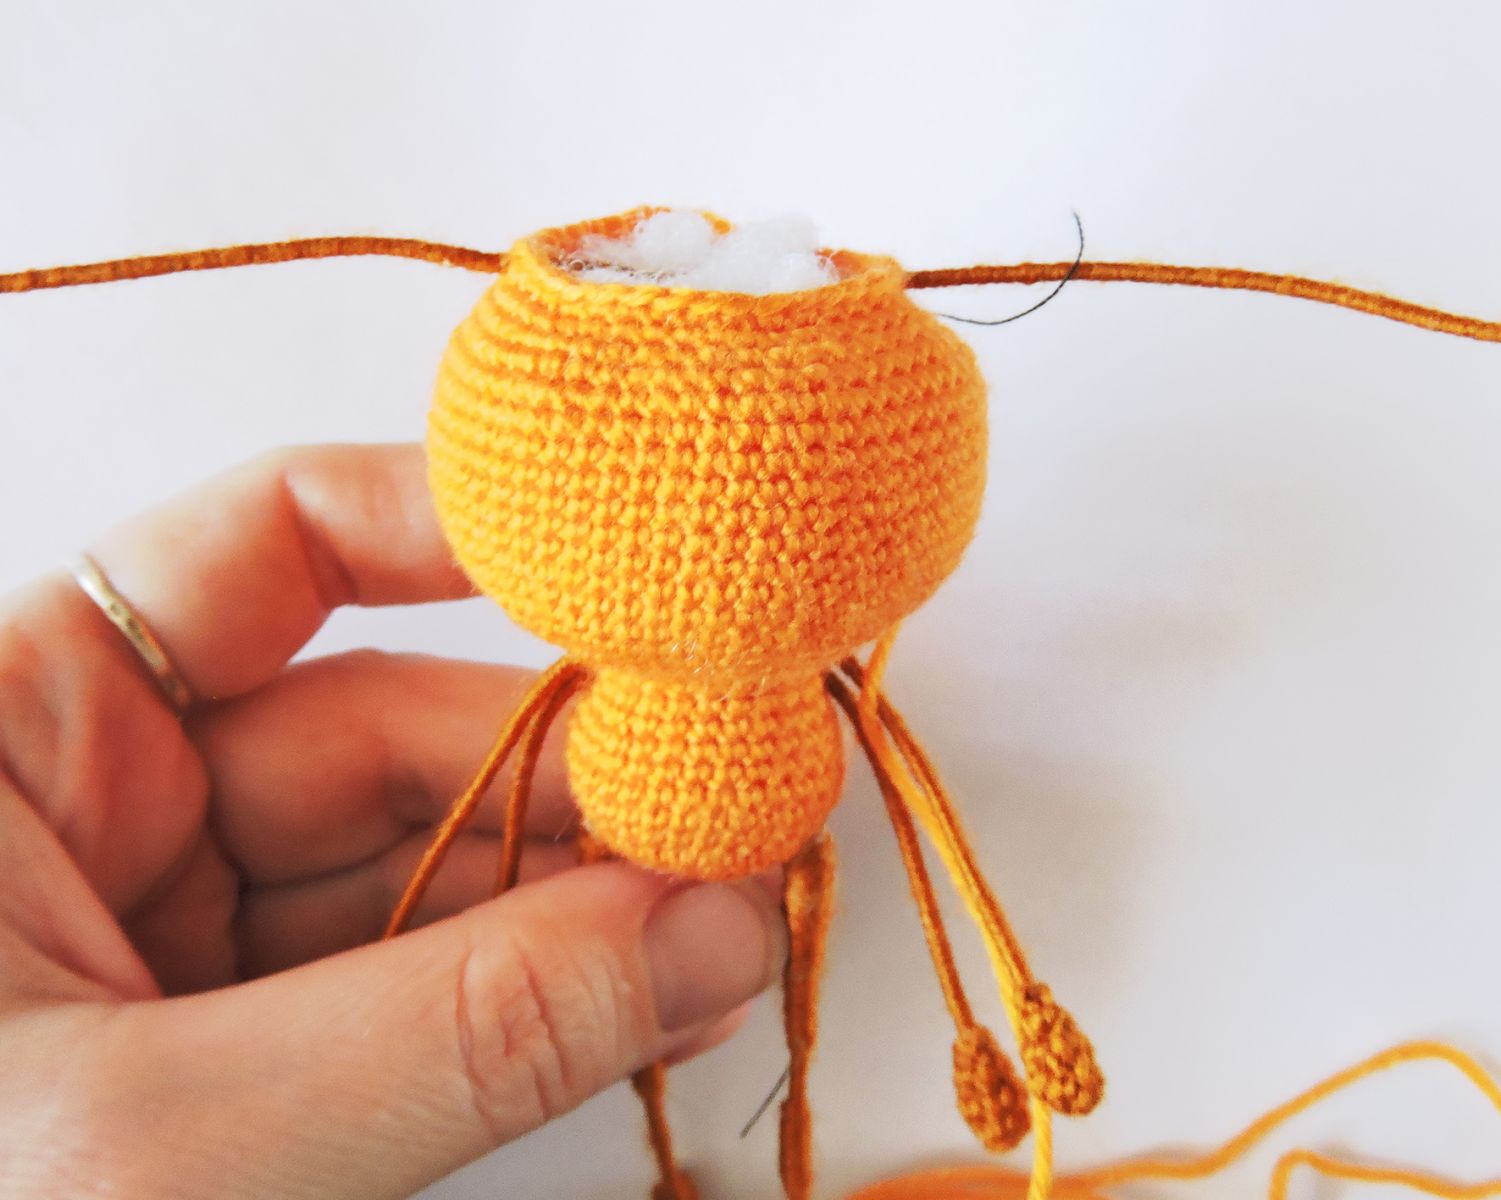
Make a mustache. Apply some transparent glue onto the loop of the wire, insert the tips of the mustache. Pull off loops around the wire.
Apply some transparent glue onto the wire and make neat wraps around it with yarn. (see photo for guidance).
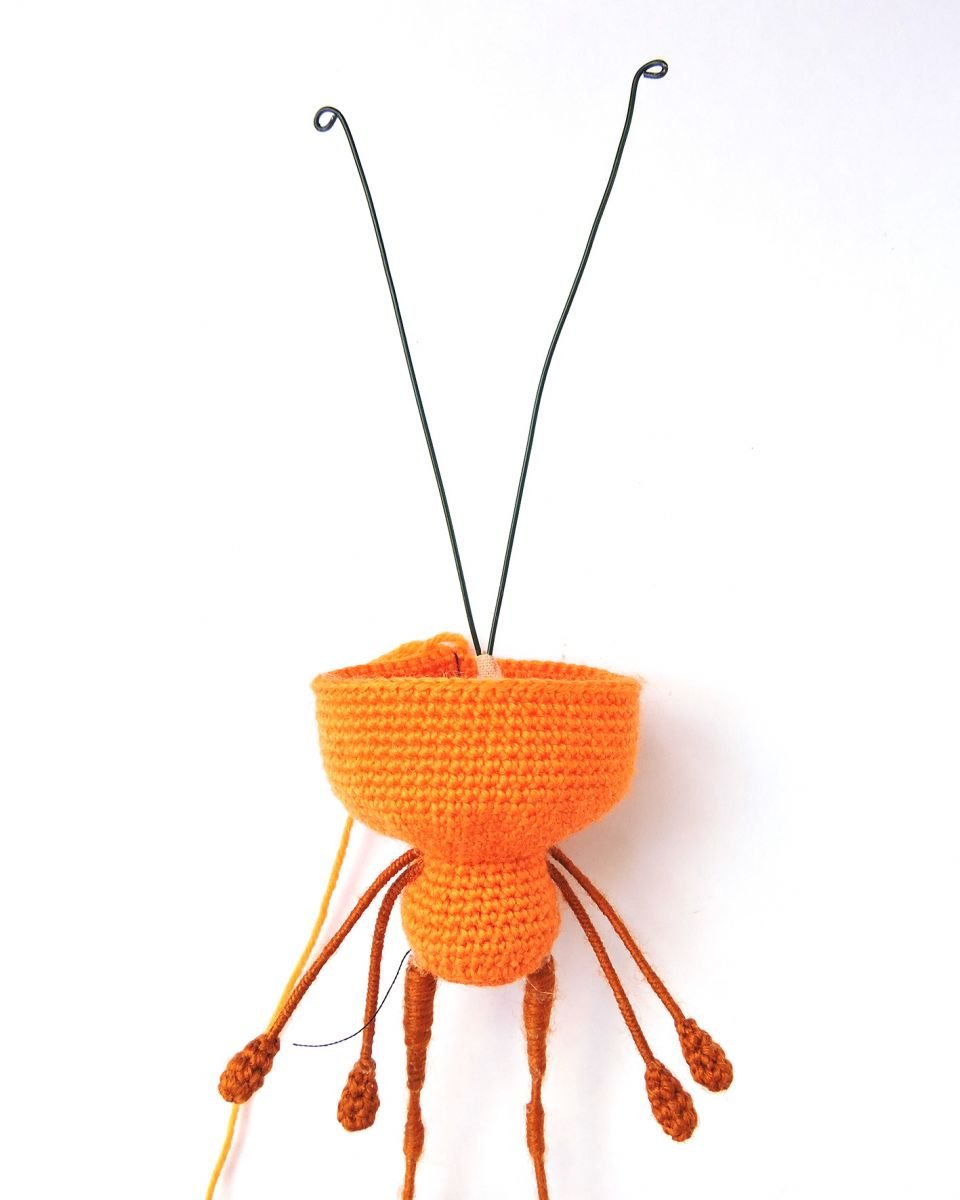
Continue crocheting the head. Stuff as you go.
30 Rnd: (4 sc, dec, 4 sc) х 6 times [54]
31 Rnd: (7 sc, dec) х 6 times [48]
32 Rnd: (3 sc, dec, 3 sc) х 6 times [42]
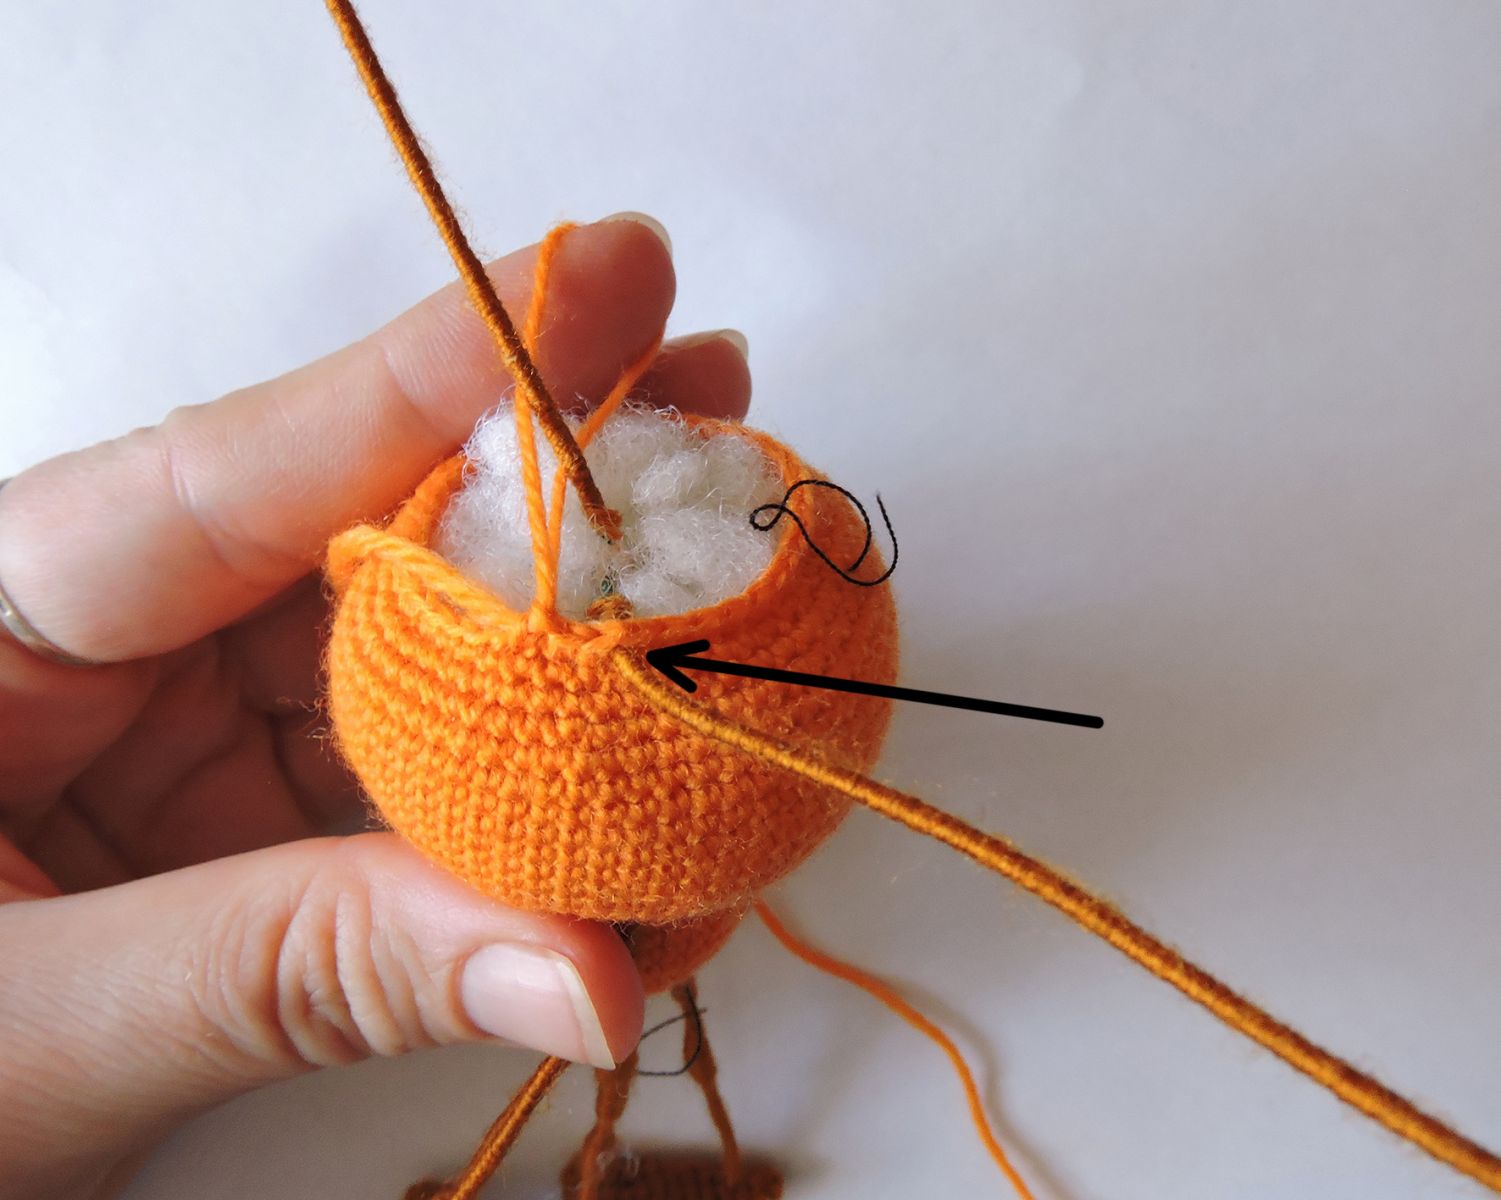
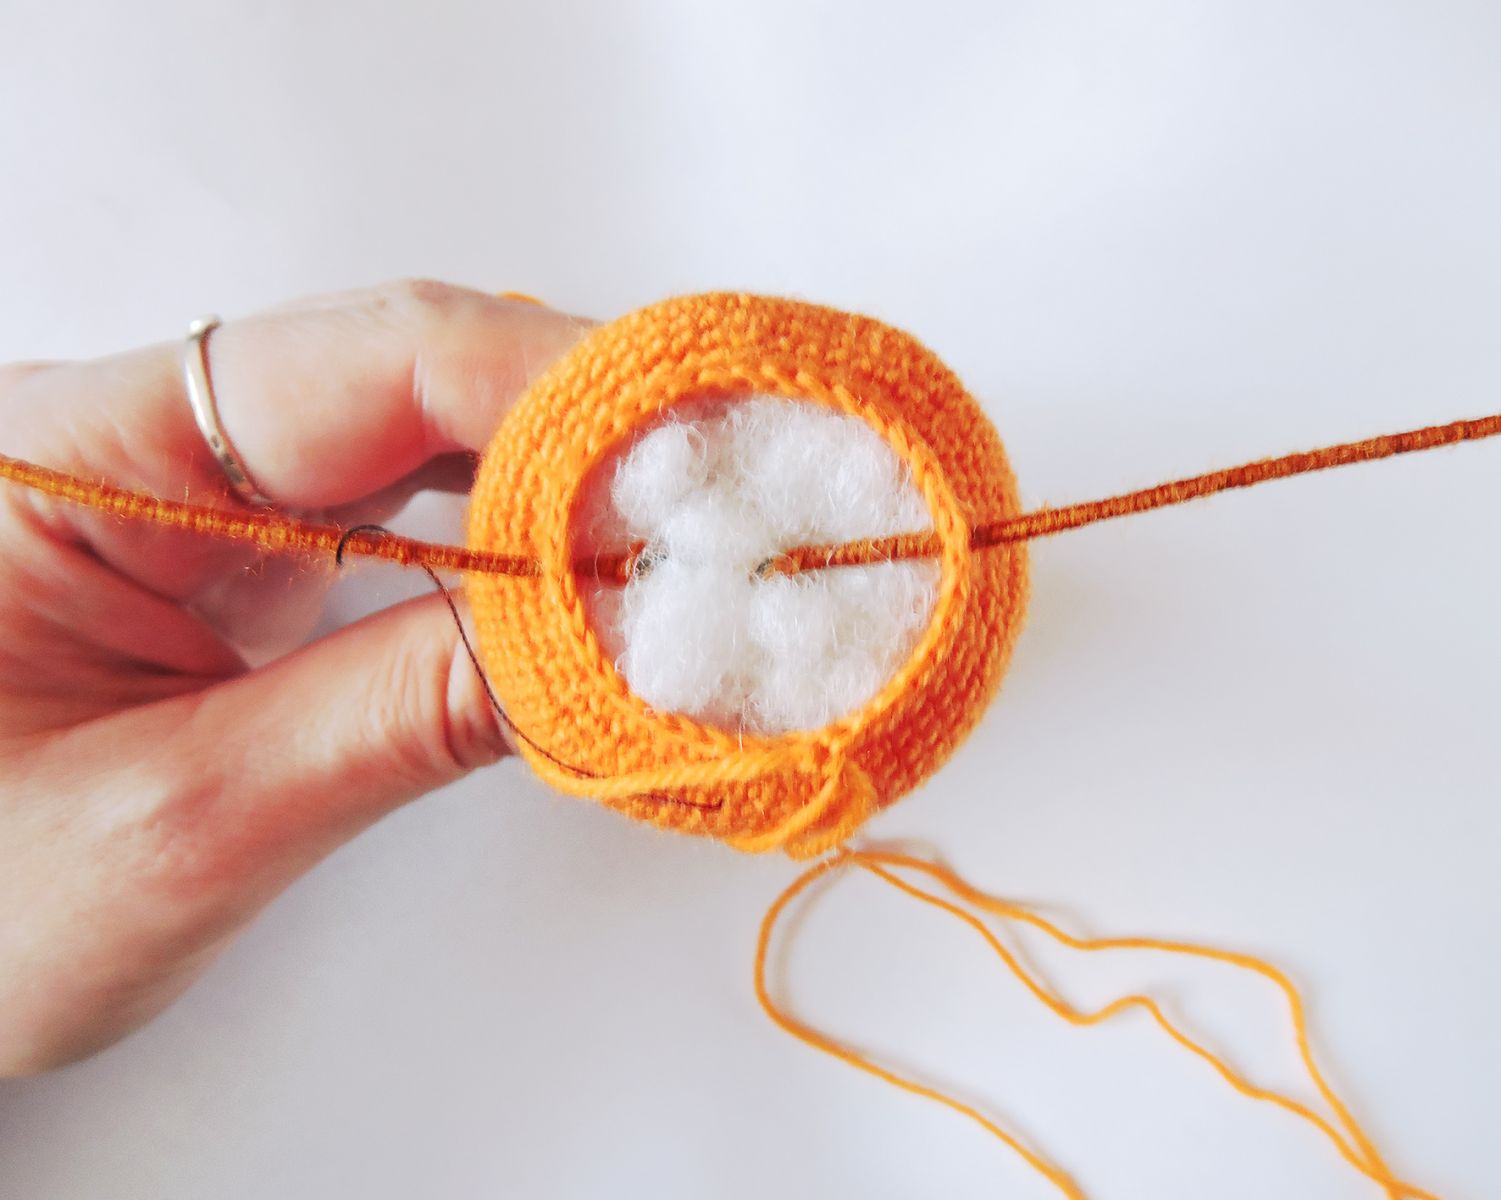
33 Rnd: 5 sc, dec, 3 sc, at this point, bring the wire out (see photo for guidance), 2 sc, dec, (5 sc, dec) х 2 timesа, 3 sc, at this point, bring the wire out, 2 sc, dec, 5 sc, dec [36]
34 Rnd: (2 sc, dec, 2 sc) х 6 times [30]
35 Rnd: (3 sc, dec) х 6 times [24]
36 Rnd: (1 sc, dec, 1 sc) х 6 times [18]
37 Rnd: (1 sc, dec) х 6 times [12]
38 Rnd: dec х 6 times [6]
Fasten off, cut off. Do not close off the loops of the last round just yet, you will do it later!
Sculpturing and decoration
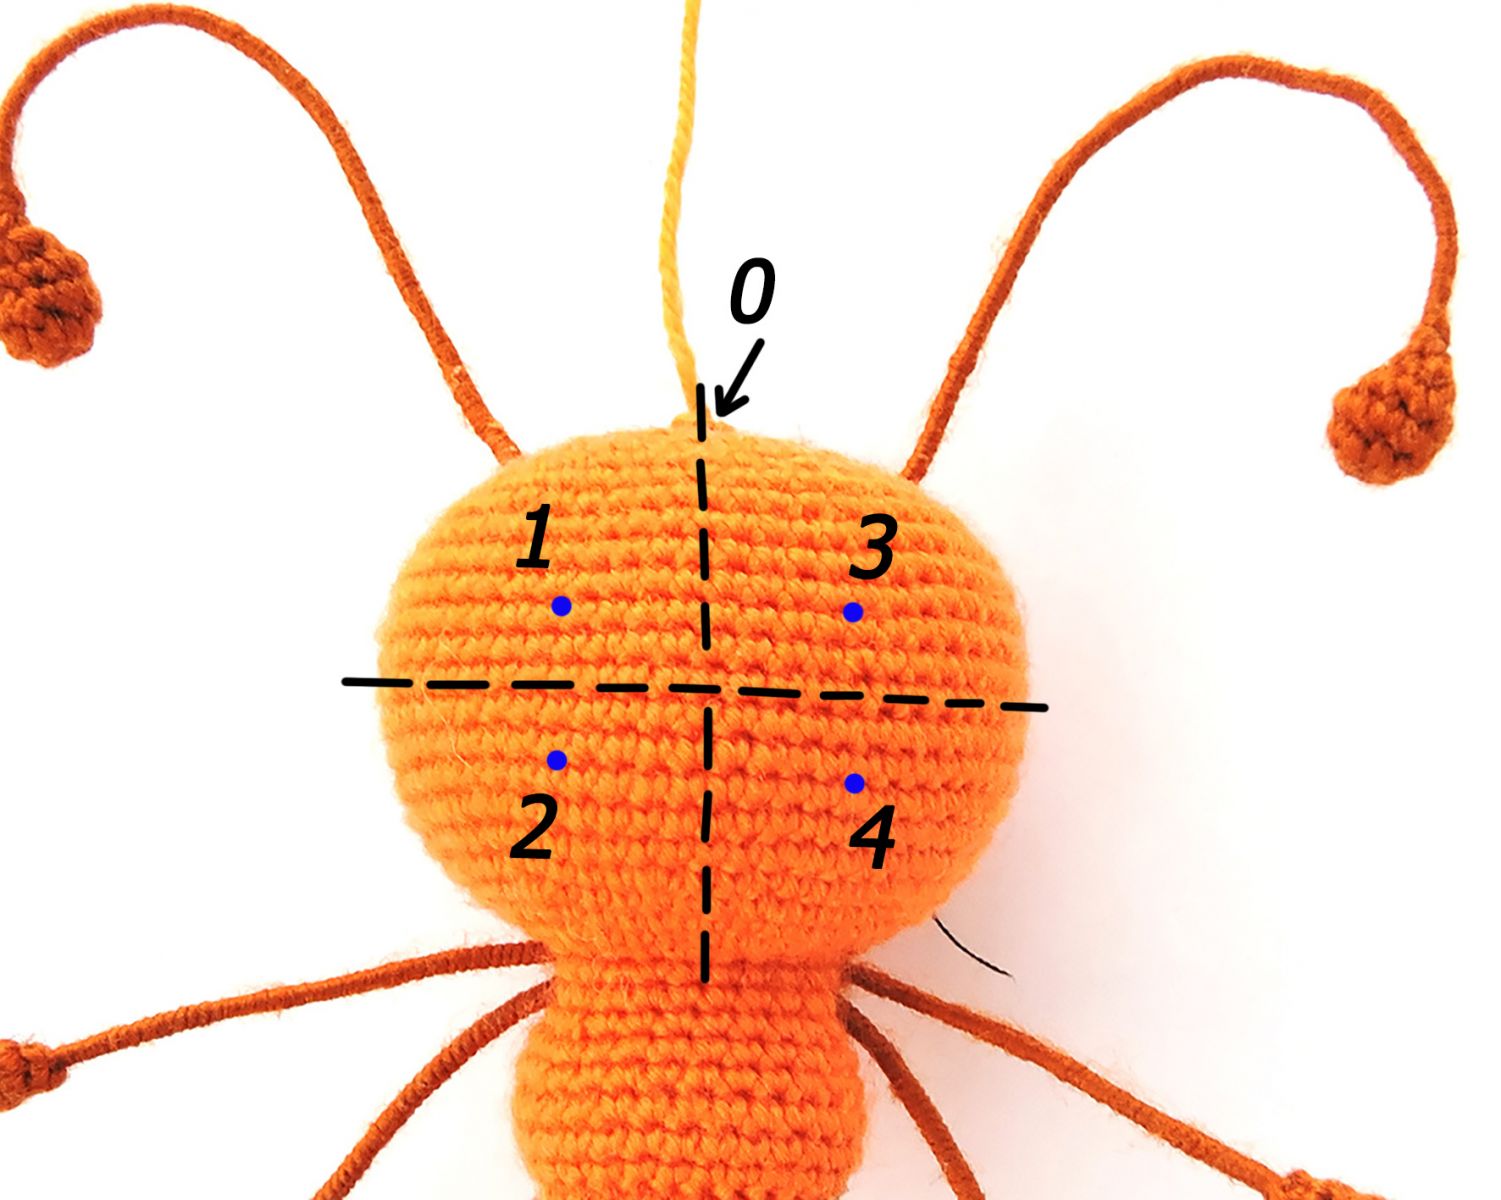
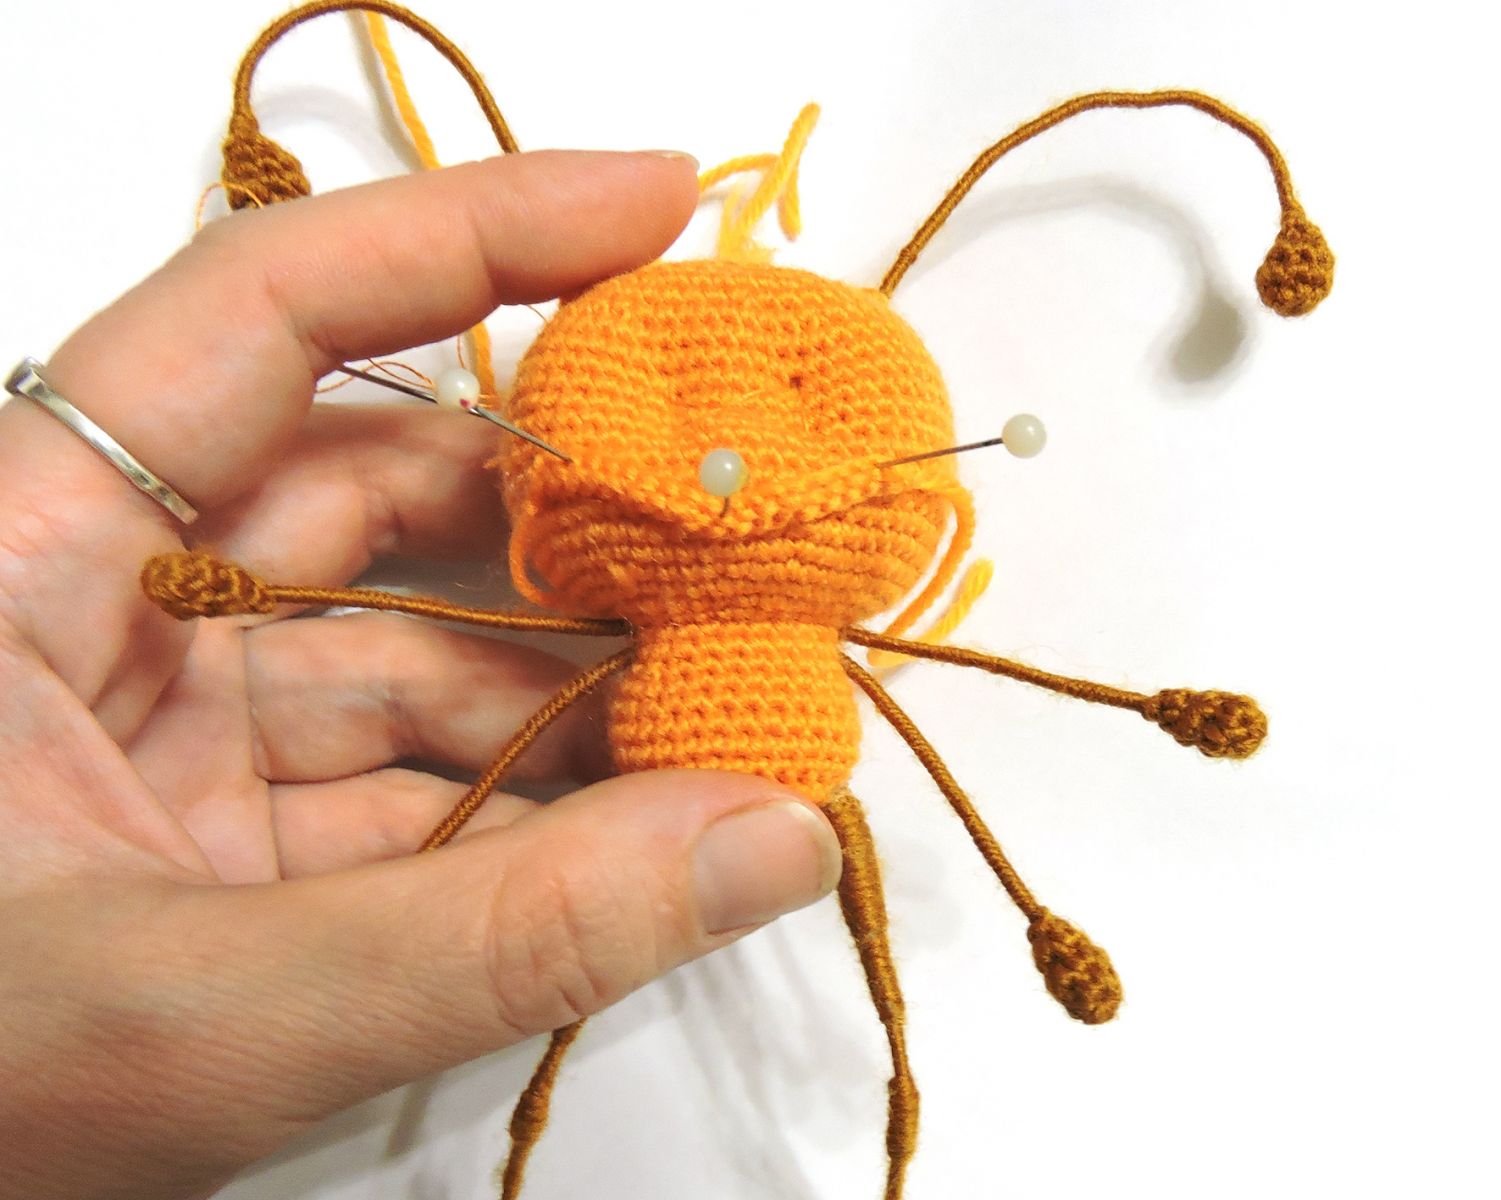
Find the points for sculpting as follows. Divide the head into halves both horizontally and vertically. See the pictures for guidance.
Point 0 is on the top of the head
Points 1 & 2; 3 & 4 - for eye sockets. Distance between points 1 & 2, (3 & 4) – 3 sc, between points 1 & 3, (3 & 4) is 8 sc.
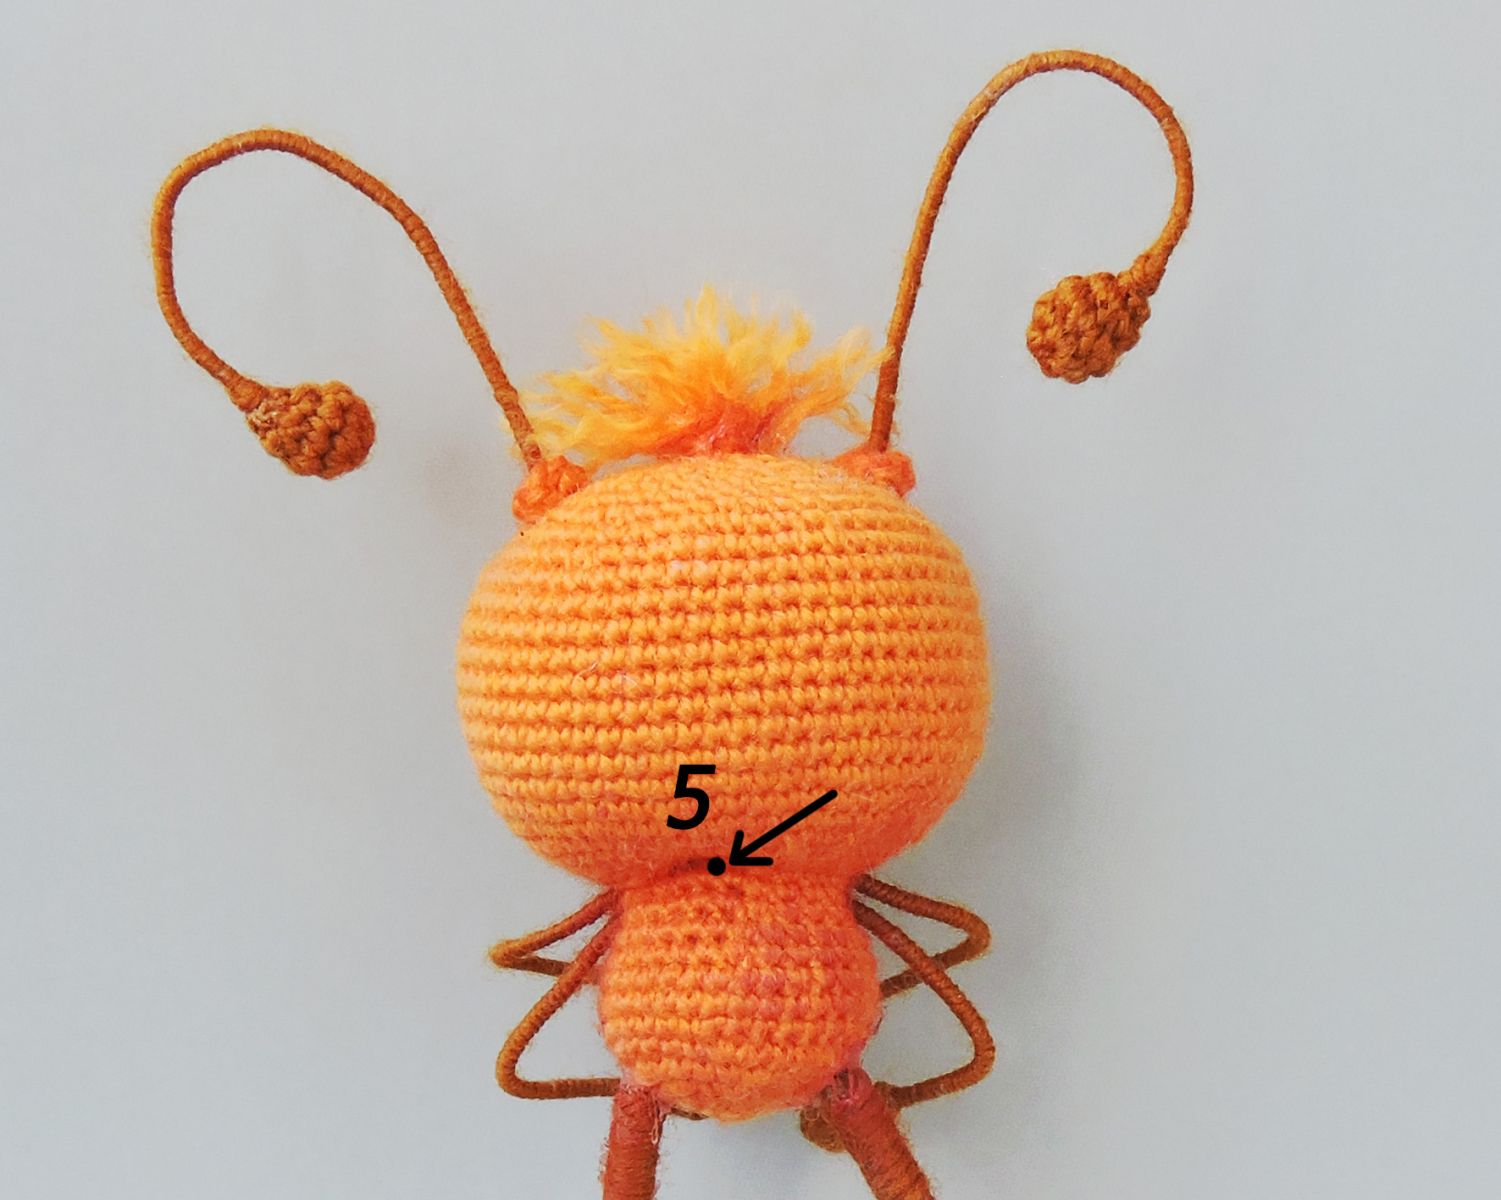
Point 5 - in the middle of the neck from behind.
Prepare a long needle for sculpting and a strong thread, make a knot.
Insert the needle in the opening in the head (point 0), hide the knot in the hollow fibre, take the needle out in spot 5 on the neck. Make a very tiny stitch to fasten the thread.
Insert the needle out in point 5, take the needle out in point 1 (thread runs inside the head). Insert the needle in point 2 (thread runs over the work), take it out in point 5. Tighten the thread, help with the fingers to keep it in place. Make a short stitch and a knot. Repeat the tightening once more.
Repeat sculpting for the left eye socket. Points #5-3-4-5.
Make an additional sculpting between the eye sockets in criss-cross technique.
Points #5-2-3-5. Make a short stitch. Points #5-1-4-5. Tighten the thread, help with the fingers to keep it in place. Make a short stitch and a knot. Hide the end.
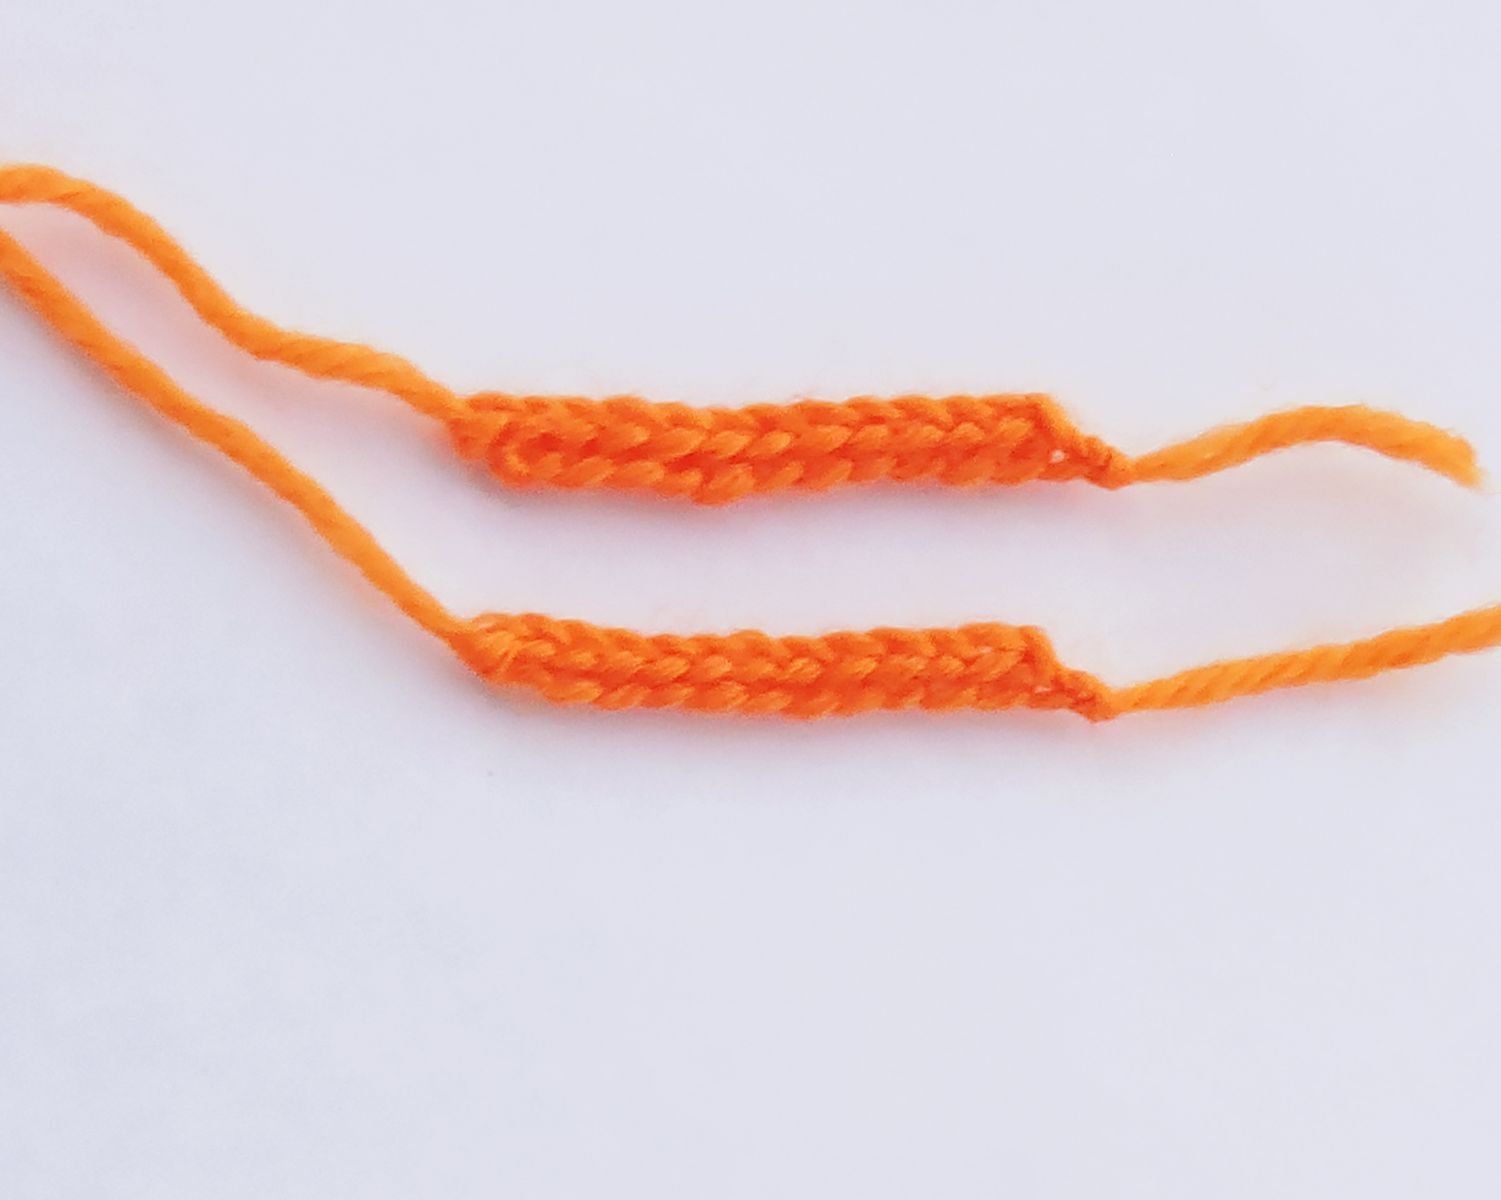
Stripes around the moustache (make 2)
Work with the colour A.
1 Rnd: 7 ch, starting from 2nd ch from hook: 6 sl st
Fasten off, cut off.
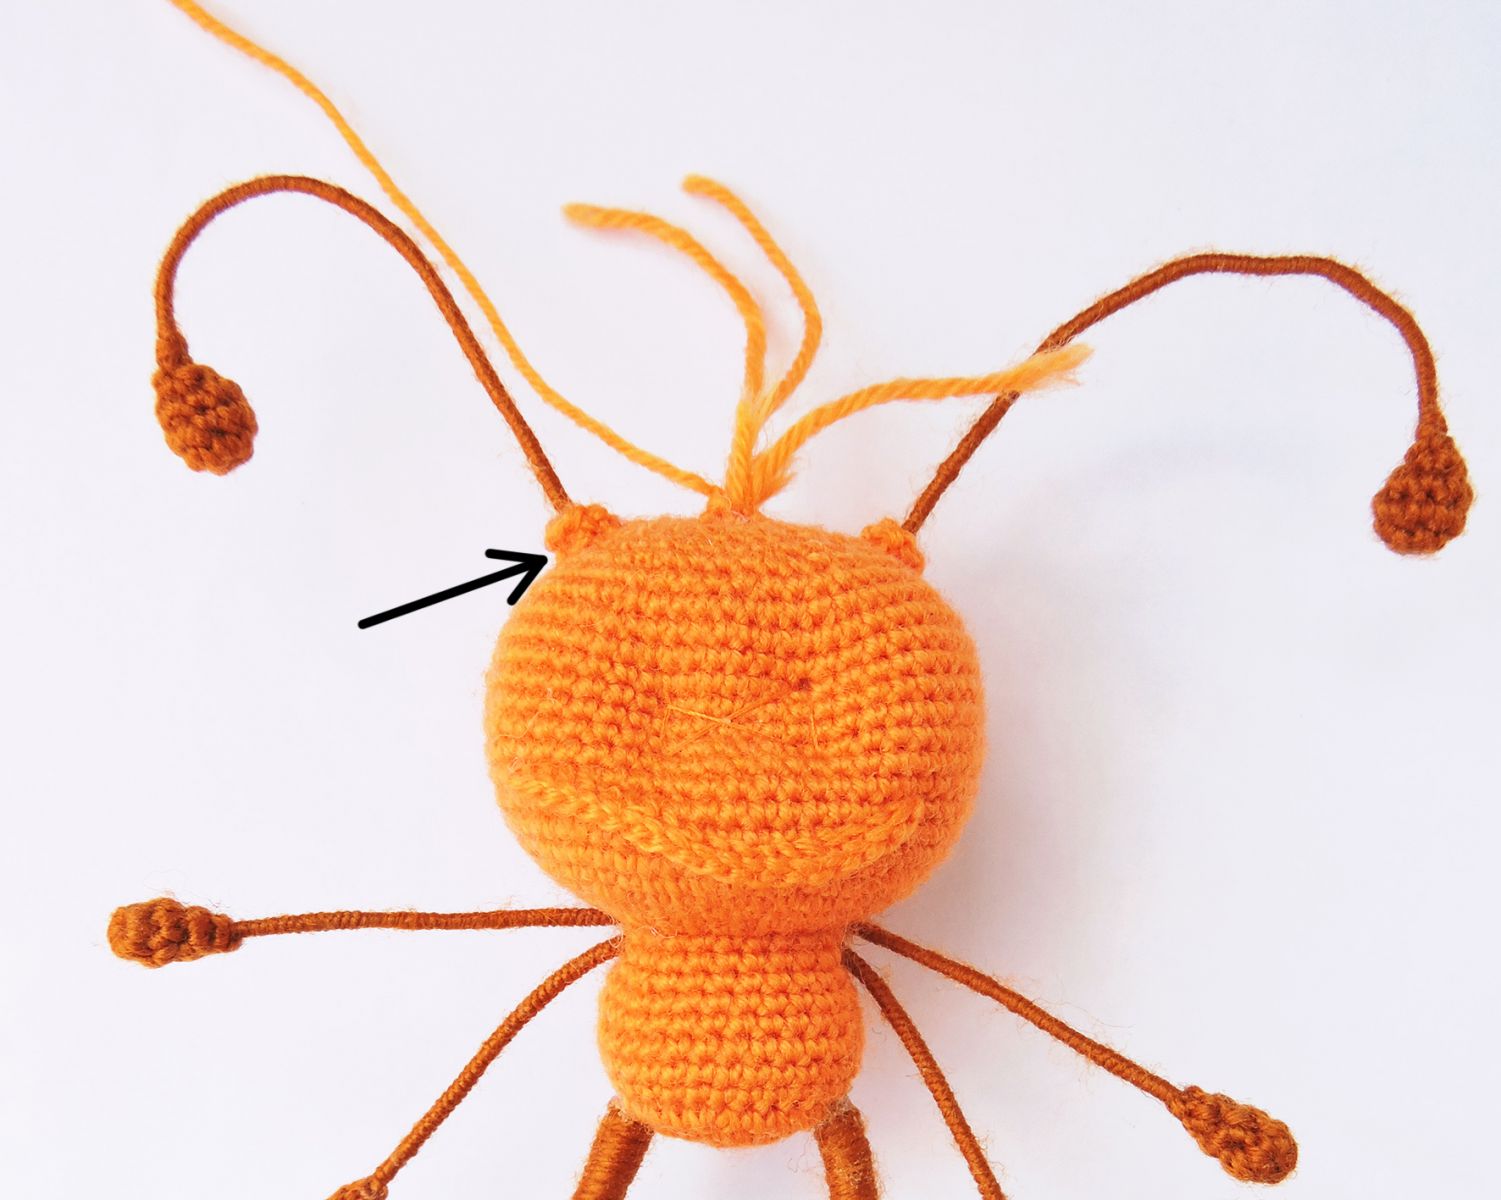
Sew the stripes to the head where the moustache starts.
Mouth
Work with the colour А
1 Rnd: 20 ch, starting from 2nd ch from hook: 19 sl st
Fasten off, cut off.
Sew the mouth on in the centre or on the side (at your own discretion).
Attach a few short threads to make a forelock (see photo). Brush the forelock to make it fluffy and trim it.
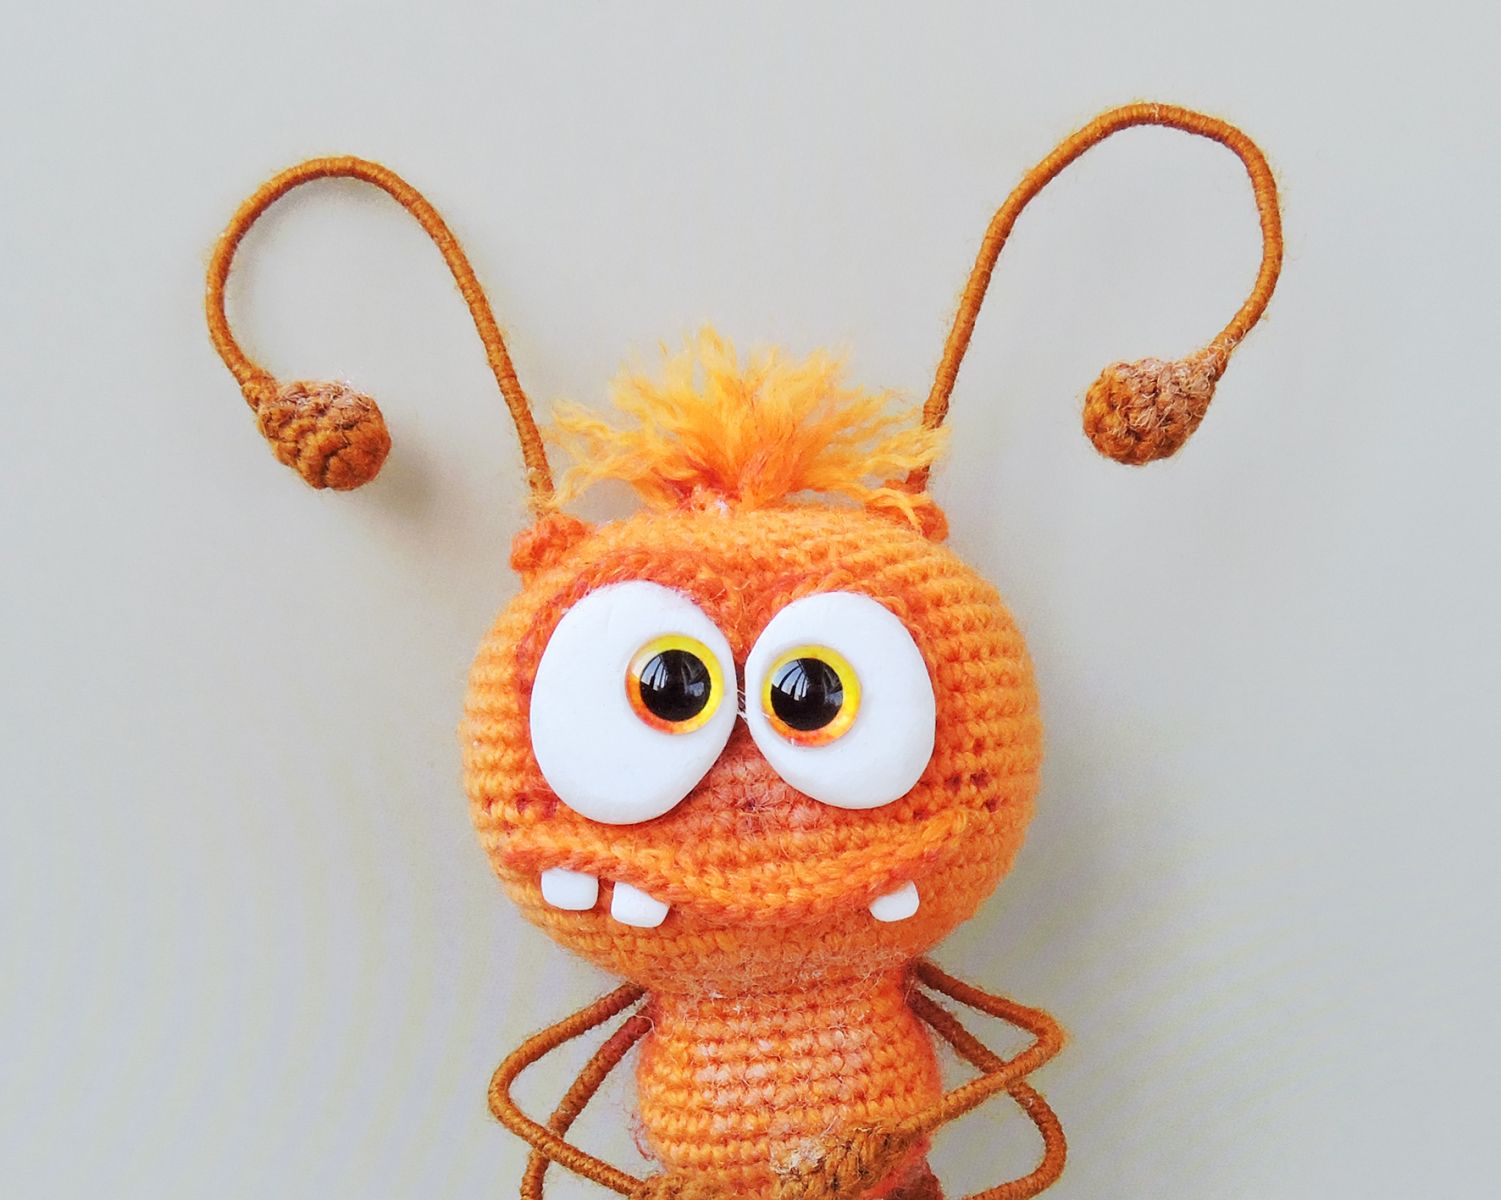
Make eyes and teeth out of polymer clay. Put them in a pre-heated oven and bake following the instructions. Let them cool down, then cover it with varnish and glue on.
You can use ready-made eyes. You may choose to embroider teeth with white yarn or use a few tiny seed beads.
Eyelids (make 2)
Work with the colour А. The length of the strips will depend on the size of the eyes you use.
1 Rnd: 7 ch, starting from 2nd ch from hook: 6 sl st.
Fasten off, cut off.
Sew the eyelids on.
Optional: tint with dry soft pastels as follows: using dark colour pastel tint the area around the eyes, around the moustache, legs, eyelids and mouth. With light colour pastel tint the chest and toes.
The cockroach is completed!
