A New Year's snake.
The size of your snake will depend on the yarn you use. The thicker the yarn, the bigger the toy you will get.
The height of my snake is 12 cm. I used 100% acrylic yarn, 400 m/100 g, 1,5 mm crochet hook.
Materials:
You can choose yarn at your discretion, with similar color, composition and thickness. Acrylic, cotton will do. Yarn consumption depends on its thickness and a crochet hook size. My snake consumed: around 5g of main colour yarn, 2g of other colours.
Choose 2 matching colours for the snake. Yellow for the crown, red and white fluffy for the Santa's Hat.
- Crochet hooks in two sizes. I used No.1.5 and No. 2.0;
- Hollow fibre, toy/cushion filling
- A sewing needle, matching sewing threads
- A piece of wire approx. 1,0-1,5 mm thick and 20 cm long for the frame. The length is determined individually. Use the wire that bends easily but keeps its shape, e.g. florist wire.
- 1 pair of ready-made eyes. I painted the eyes with acrylic paints
- Transparent glue
- False eyelashes (optional)
Abbreviations:
ch – chain
st –stitch
sl st – slip stitch
sc – single crochet
hdc – half double crochet
dc - double crochet
tr - treble crochet
inc – increase (2 sc in 1 st)
3 inc, 6 inc – 3, 6 increases in sequence
dec – decrease (single crochet two stitches together)
3 dec, 6 dec – 3, 6 decrease in sequence
(...) x N times – repeat instructions in brackets N times
Use yarn of any colour for the snake.
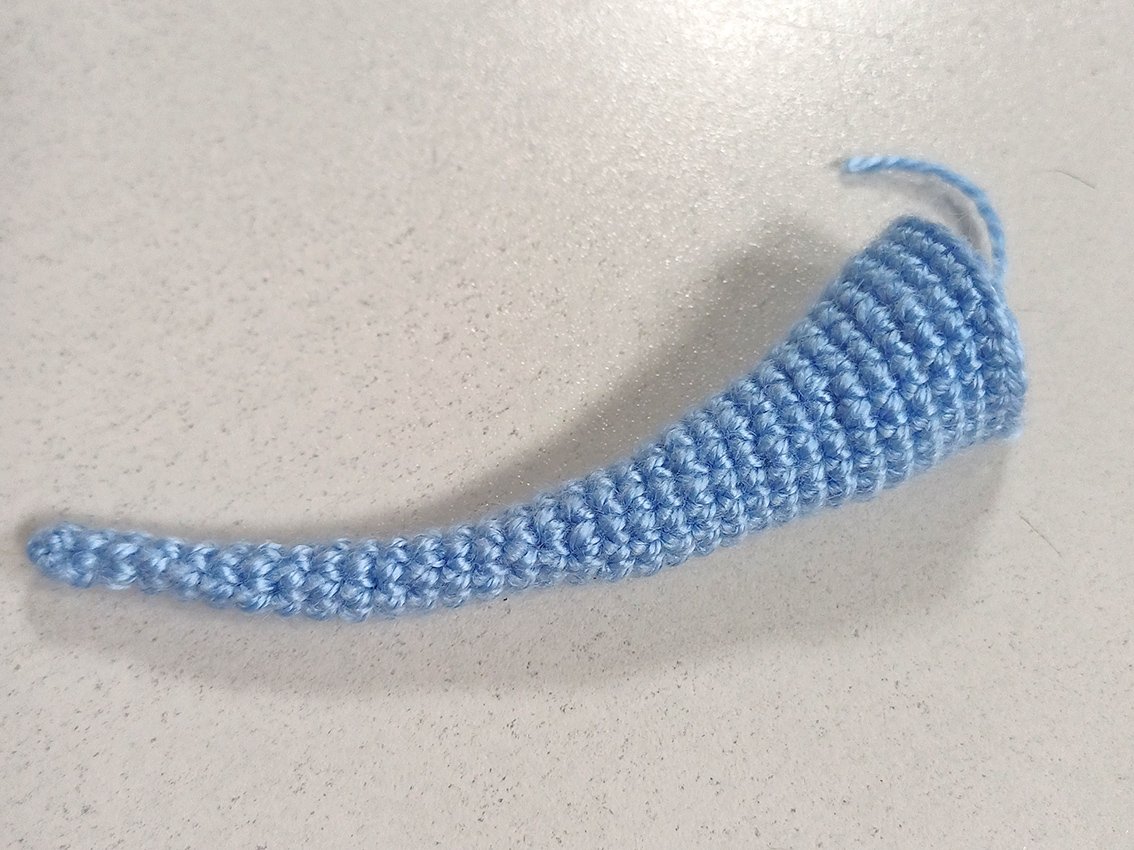
Tail
Rnd 1. 4 sc in a Magic Ring
Rnd 2-3. (2 rounds) 4 sc
Rnd 4. 1 inc, 3 sc = 5
Rnd 5-6. (2 rounds) 5 sc
Rnd 7. 1 inc, 4 sc = 6
Rnd 8-9. (2 rounds) 6 sc
Rnd 10. 1 inc, 5 sc = 7
Rnd 11-12. (2 rounds) 7 sc
Rnd 13. 1 inc, 6 sc = 8
Rnd 14-15. (2 rounds) 8 sc
Rnd 16. 1 inc, 7 sc = 9
Rnd 17. 9 sc
Rnd 18. 1 inc, 8 sc = 10
Rnd 19. (1 inc, 4 sc) х 2 times = 12
Rnd 20-21. (2 rounds) 12 sc
Rnd 22. 4 sc, 1 inc, 2 sc, 1 inc, 4 sc = 14
Rnd 23-24. (2 rounds) 14 sc
Rnd 25. 4 sc, 1 inc, 4 sc, 1 inc, 4 sc = 16
Rnd 26-27. (2 rounds) 16 sc
Work 1sc, transfer your place marker here.
Rnd 28. 4 sc, 1 inc, 2 sc, 1 inc, 2 sc, 1 inc, 5 sc = 19
Rnd 29-30. (2 rounds) 19 sc
Rnd 31. 6 sc, 1 inc, 2 sc, 1 inc, 2 sc, 1 inc, 6 sc = 22
Rnd 32-34. (3 rounds) 22 sc
Mark the 4th loop.
Bind off, cut off any excess yarn.
Head - body
Rnd 1. 7 sc in a Magic Ring
Rnd 2. 7 inc = 14
Rnd 3. (1 sc, 1 inc) х 7 times = 21
Rnd 4. (1 sc, 1 inc, 1 sc) х 7 times = 28
Rnd 5. (1 inc, 3 sc) х 7 times = 35
Rnd 6. 3 sc, (1 inc, 4 sc) х 6 times, 1 inc, 1 sc = 42
Rnd 7-12. (6 rounds) 42 sc
Rnd 13. 11 sc, 3 inc, 14 sc, 3 inc, 11 sc = 48
Rnd 14-17. (4 rounds) 48 sc
Work 1sc, transfer your place marker here.
Rnd 18. (2 sc, 1 dec, 2 sc) х 8 times = 40
Rnd 19. (1 dec, 3 sc) х 8 times = 32
Rnd 20. (1 sc, 1 dec, 1 sc) х 8 times = 24
Rnd 21. (1 dec, 1 sc) х 8 times = 16
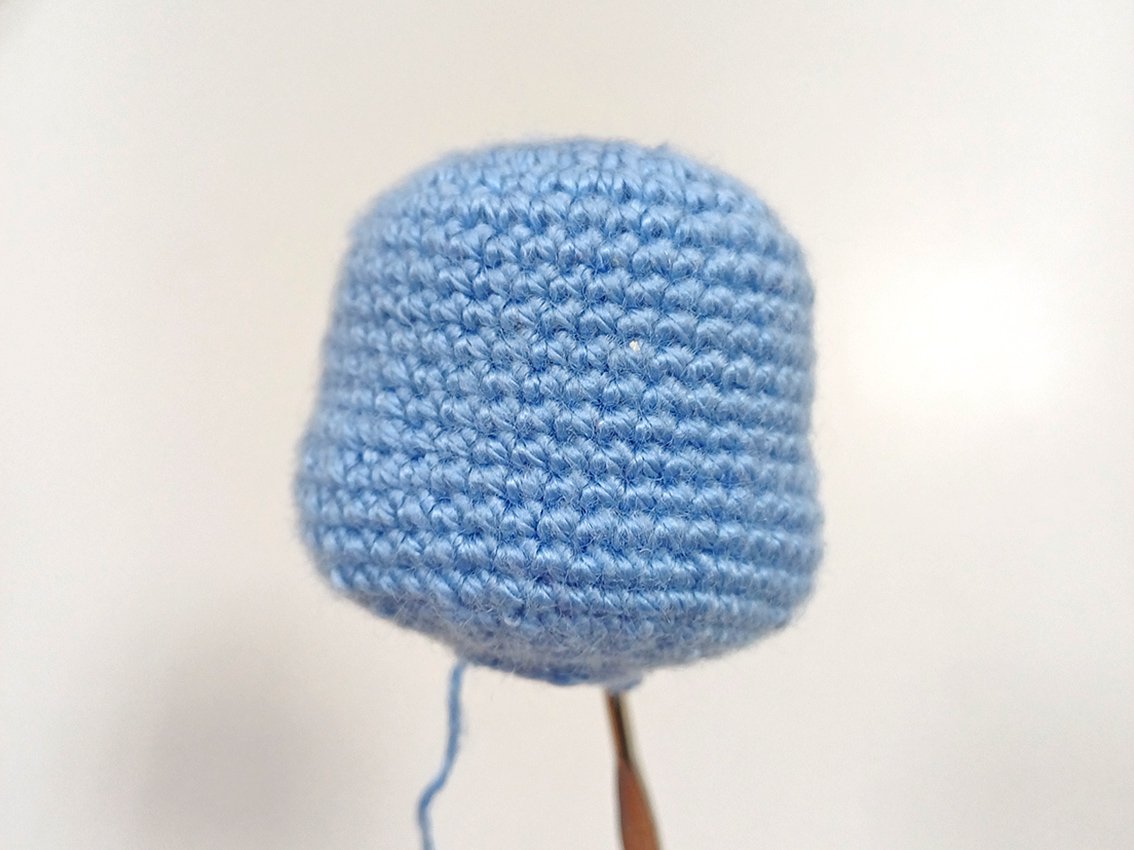
Rnd 22. 2 sc, 2 dec, 4 sc, 2 dec, 2 sc = 12
Rnd 23-27. (5 rounds) 12 sc
Add some hollow fibre.
Rnd 28. 3 sc, 1 inc, 5 sc, 1 inc, 2 sc =14
Work 1sc, transfer your place marker here.
Rnd 29-30. (2 rounds) 14 sc
Rnd 31. (3 sc, 1 dec) х 2 times, 3 sc, into the front loops only: 3 sc in 1 st = 14
Rnd 32. into the front loops only: 1 inc, continue into the both loops: 1 sc, 1 dec, 4 sc, 1 dec, 2 sc, 1 inc, 1 sc = 14
Rnd 33. 1 inc, 13 sc = 15
Rnd 34. 3 sc, 1 dec, 4 sc, 1 dec, 3 sc, 1 inc = 14
Rnd 35. 14 sc
Rnd 36. 9 sc, 1 inc, 4 sc = 15
Rnd 37-38. (2 rounds) 15 sc
Rnd 39. 10 sc, 1 inc, 4 sc = 16
Rnd 40-41. (2 rounds) 16 sc
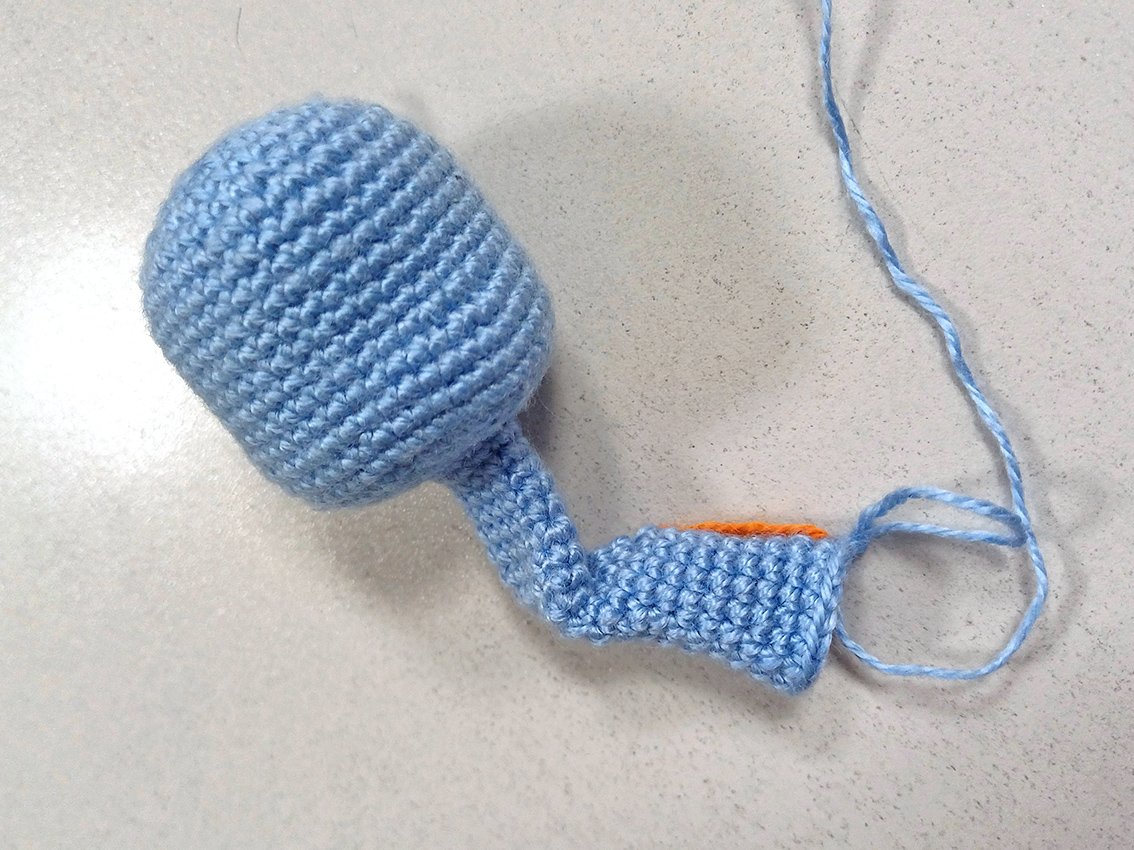
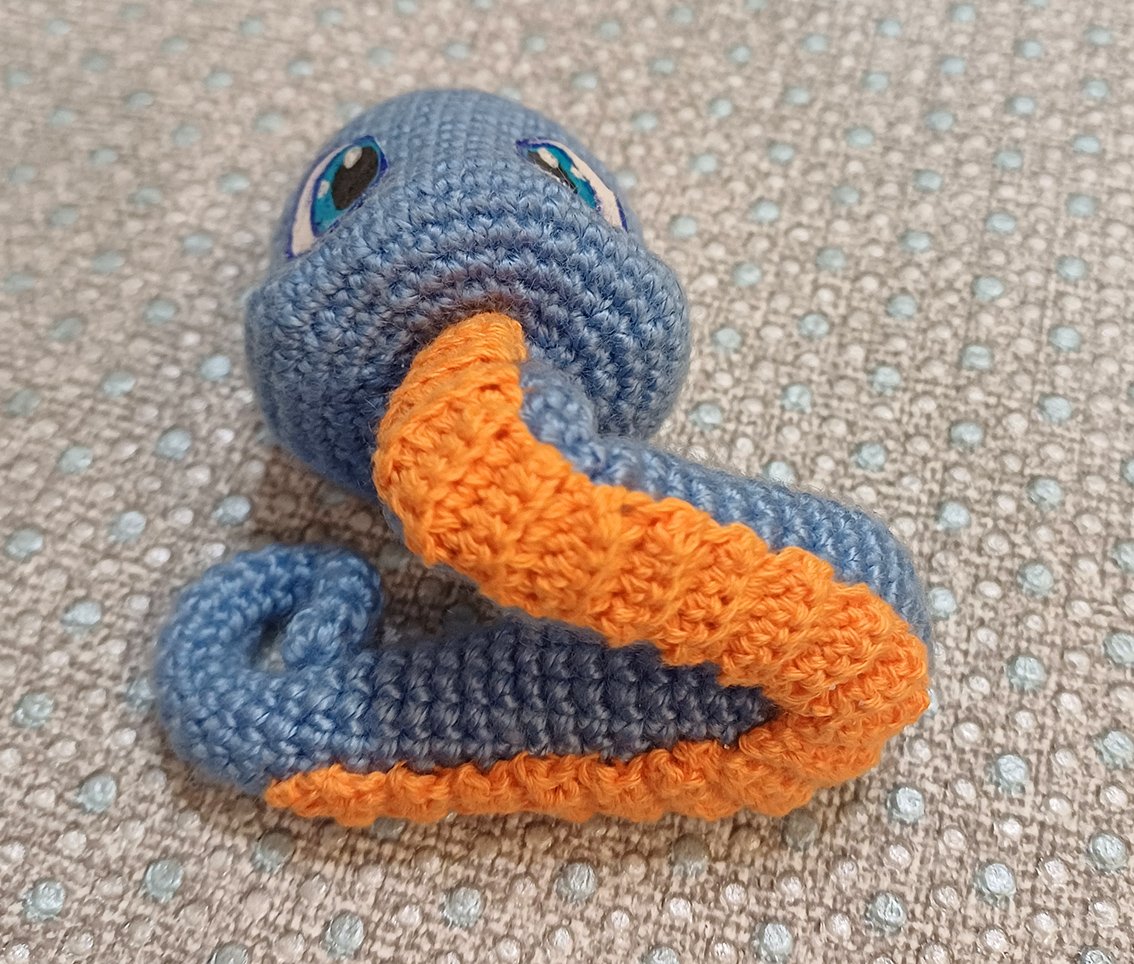
Rnd 42. 2 sc, attach the tail, work the loops of the tail and body together, start from the loop with a marker on: 4 sc, work into loops of the body: 10 sc = 16
Please note! Crocheting direction is marked with an arrow on the photo.
Rnd 43. work into loops of the body: 1 dec, work into loops of the tail: 1 dec, 16 sc, work into loops of the body: 10 sc = 28
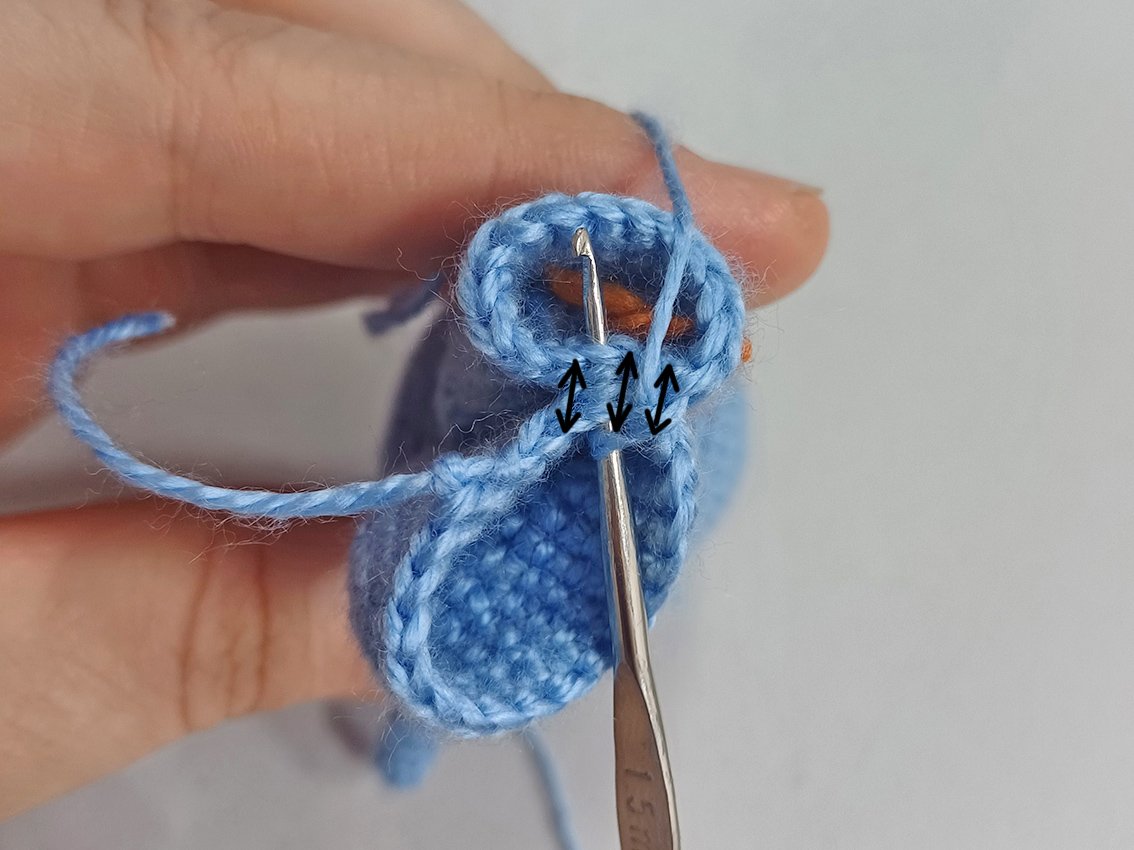
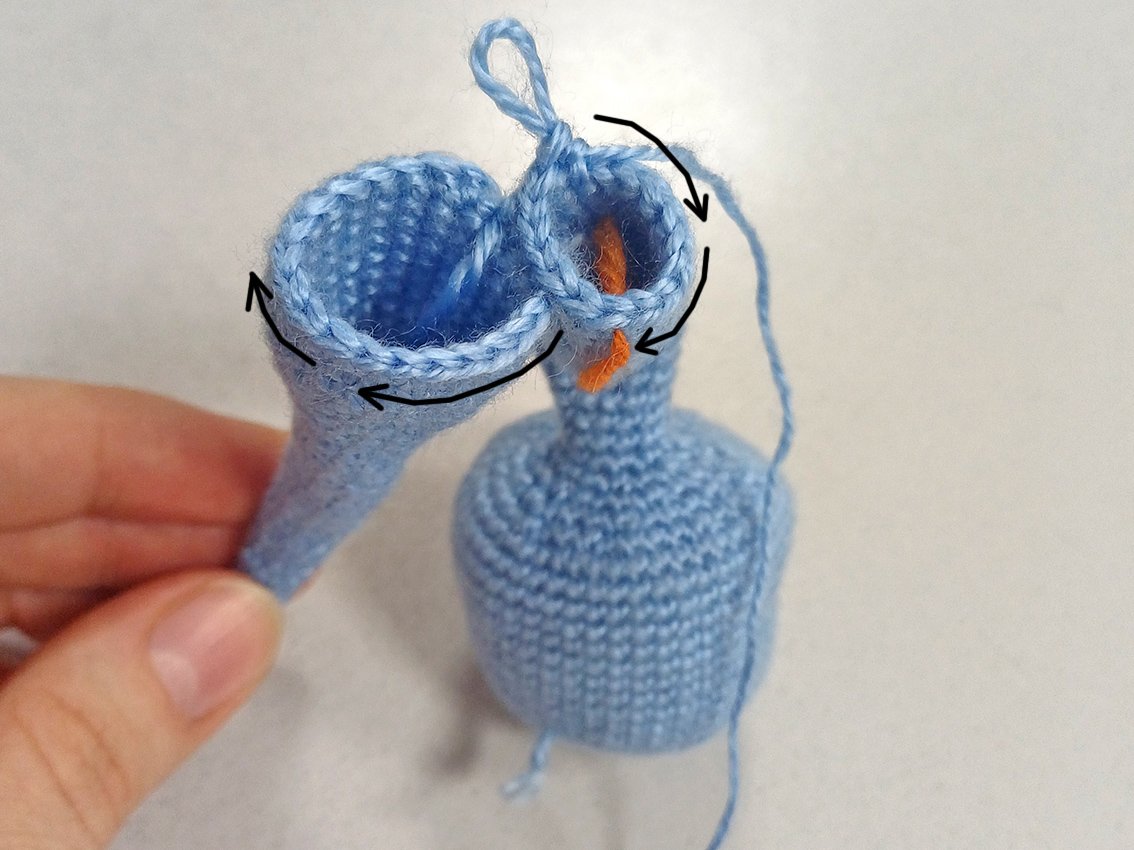
Prepare a piece of wire of the desired length for the frame (see the pictures for guidance). Make loops on the ends of the wire and secure it with a band-aid. Insert the frame inside. Add some hollow fibre.
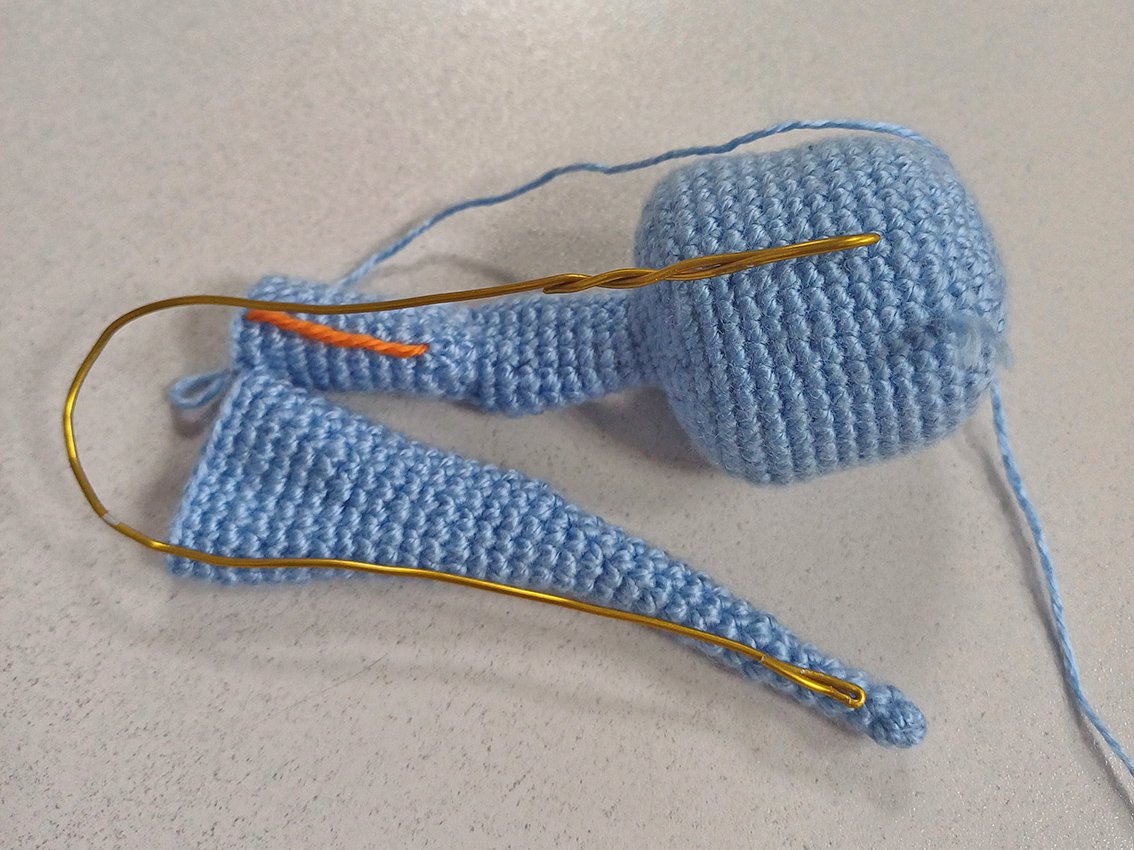
Continue crocheting:
Rnd 44. (1 dec, 5 sc) х 2 times, (1 dec, 3 sc) х 2 times, 1 dec, 2 sc = 23
Rnd 45. (4 sc, 1 dec) х 3 times, 2 sc, 1 dec, 1 sc = 19
Rnd 46. (3 sc, 1 dec) х 3 times, 4 sc = 16
Rnd 47. 8 dec = 8
Pull off the loops. Cut the thread, hide the end.
Sculpturing and decoration
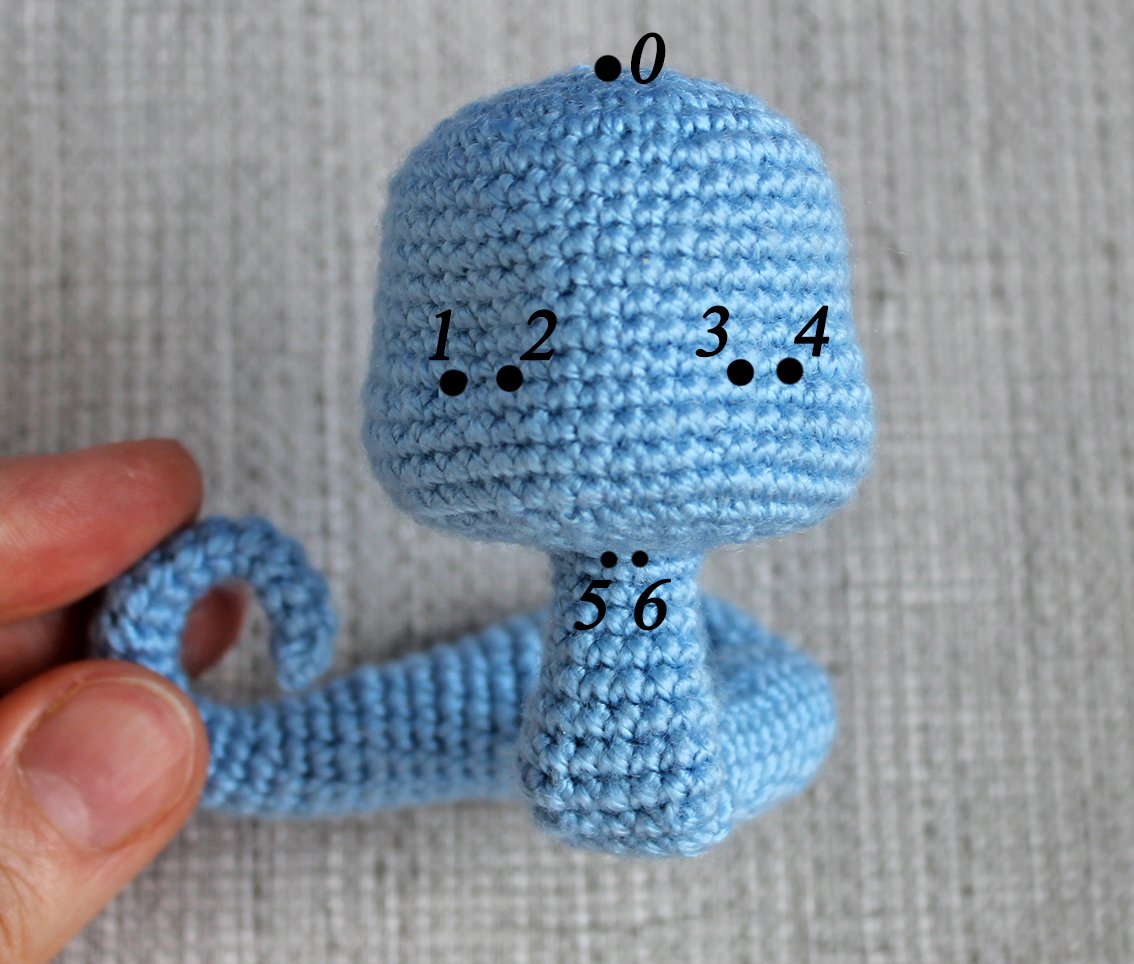
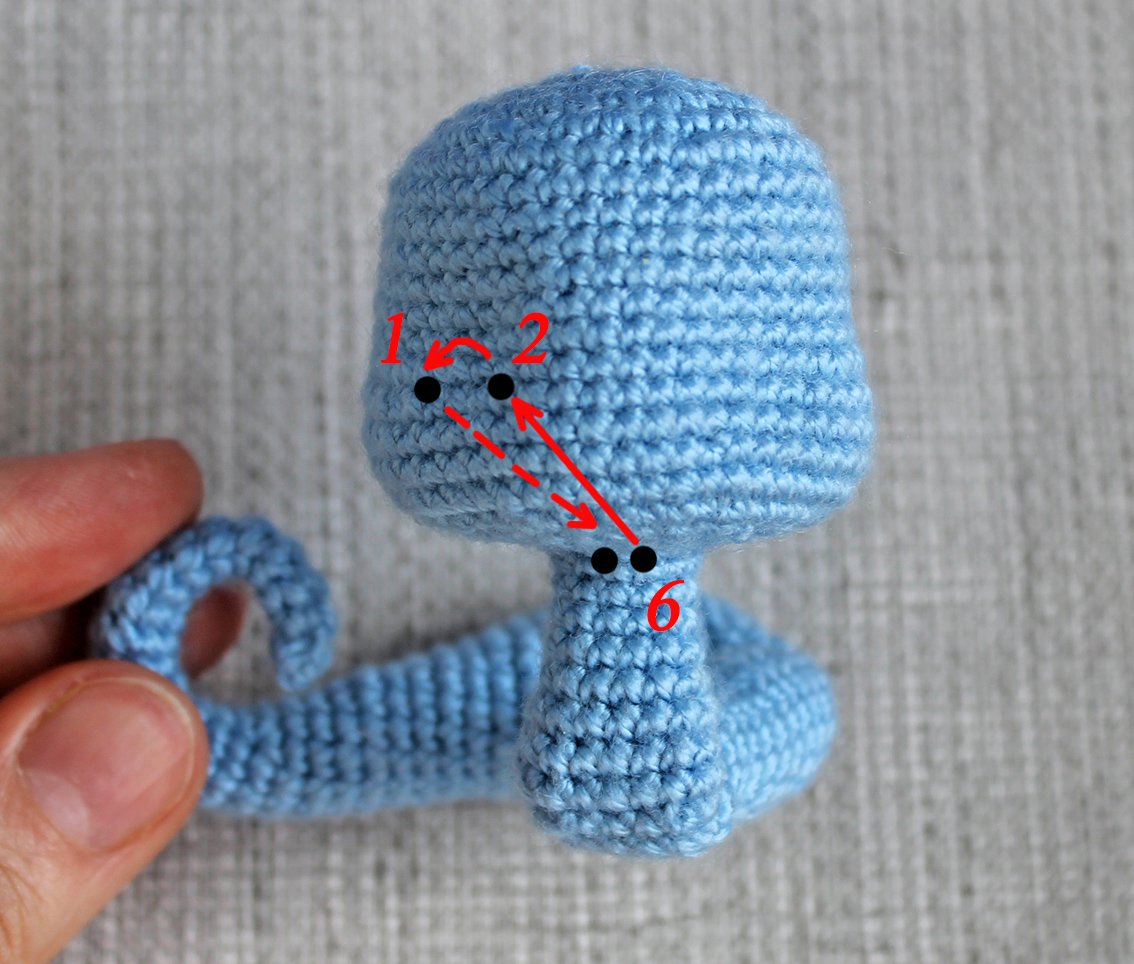
Find the points for sculpting as follows. Divide the head into halves both horizontally and vertically. See the pictures for guidance.
Point 0 is on the top of the head.
Points 1 & 2; 3 & 4 - are in Rnd 12. Distance between points 1 & 2, (3 & 4) – 3 sc, between points 2 & 3 is 8 sc.
Points 5 & 6 is in the centre of the neck.
Prepare a long needle and a strong thread for sculpting, and make a knot.
Insert the needle in the Magic Ring in the head (point 0), hide the knot in the hollow fibre, take the needle out in point 5 on the neck. Make a very tiny stitch to fasten the thread.
Insert the needle out in point 6, take the needle out in point 2 (thread runs inside the head). Insert the needle in point 1 (thread runs over the work), take it out in point 6. Tighten the thread, help with the fingers to keep it in place. Make a short stitch and a knot. Repeat the tightening once more.
Repeat sculpting for the left eye socket. Points #5-3-4-5. Hide the end.
Choose the right eyes. You can choose ready-made eyes, make them out of polymer clay, paint with paints, crochet or embroider with yarn. I painted the eyes on the fabric with acrylic paints. Stages of drawing on my photos.
Prepare a piece of thick white cloth and acrylic paints. Draw an eye template on paper. Attach it to a piece of cloth, circle it. This way you will get the same eyes.
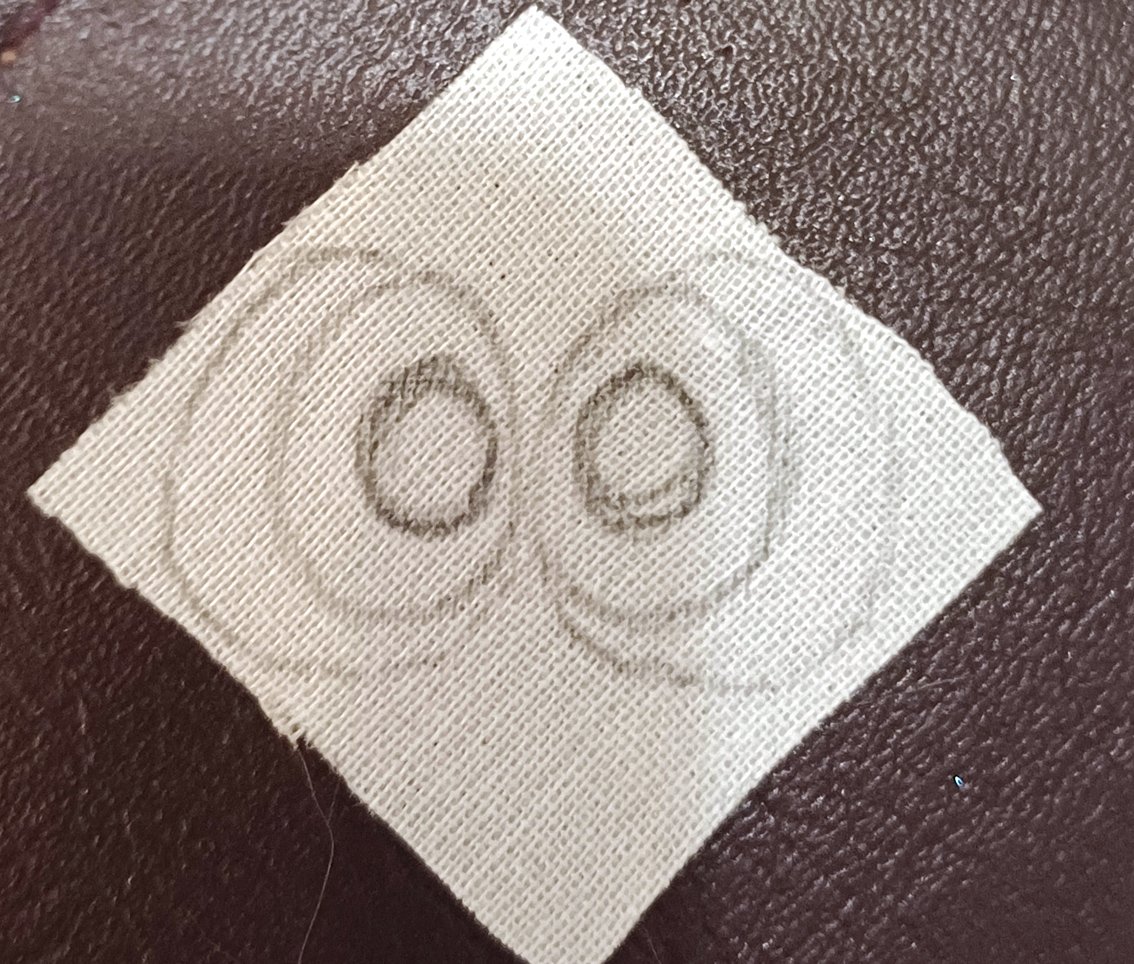
Fill it in white. Let it dry. Draw an iris. Let it dry. Draw black pupils.
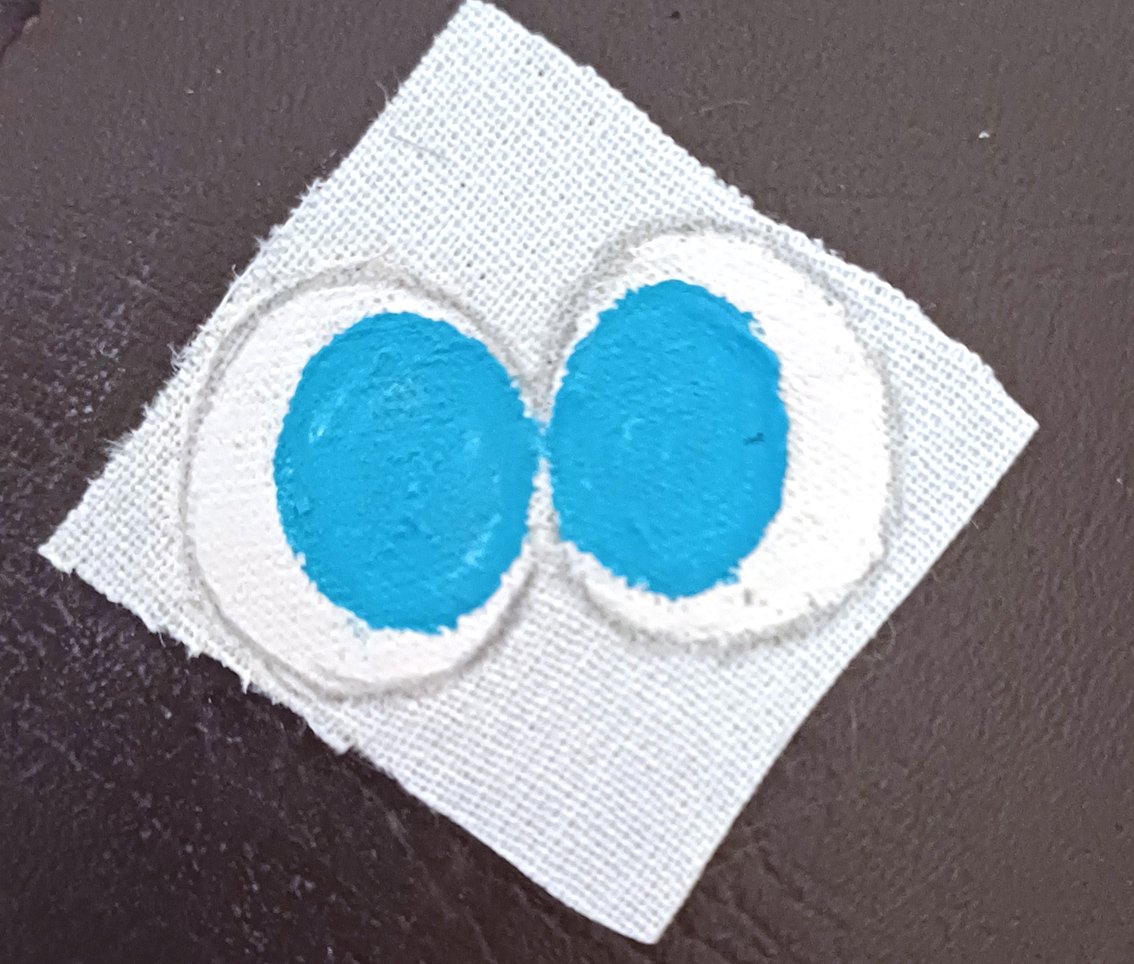
Wait for it to dry. Use white paint to put highlights.
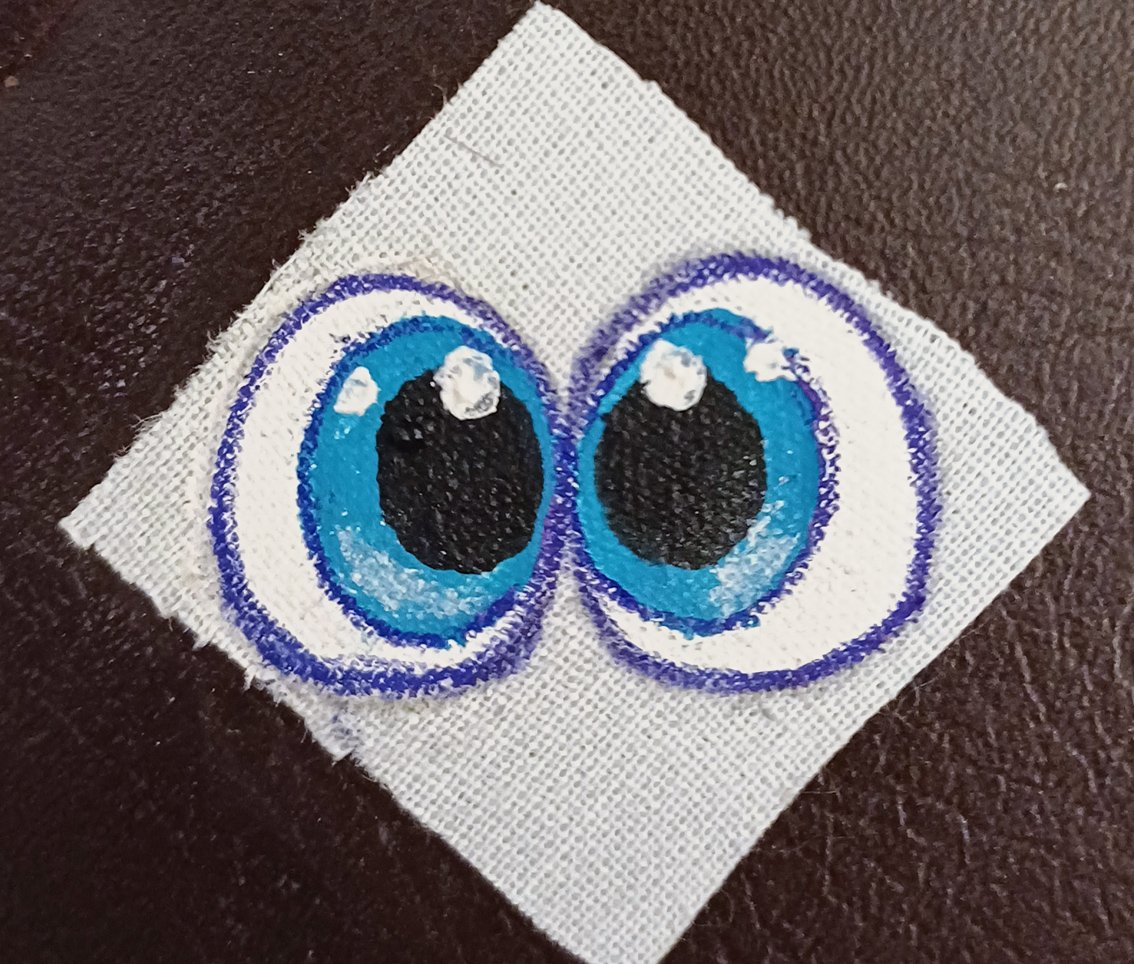
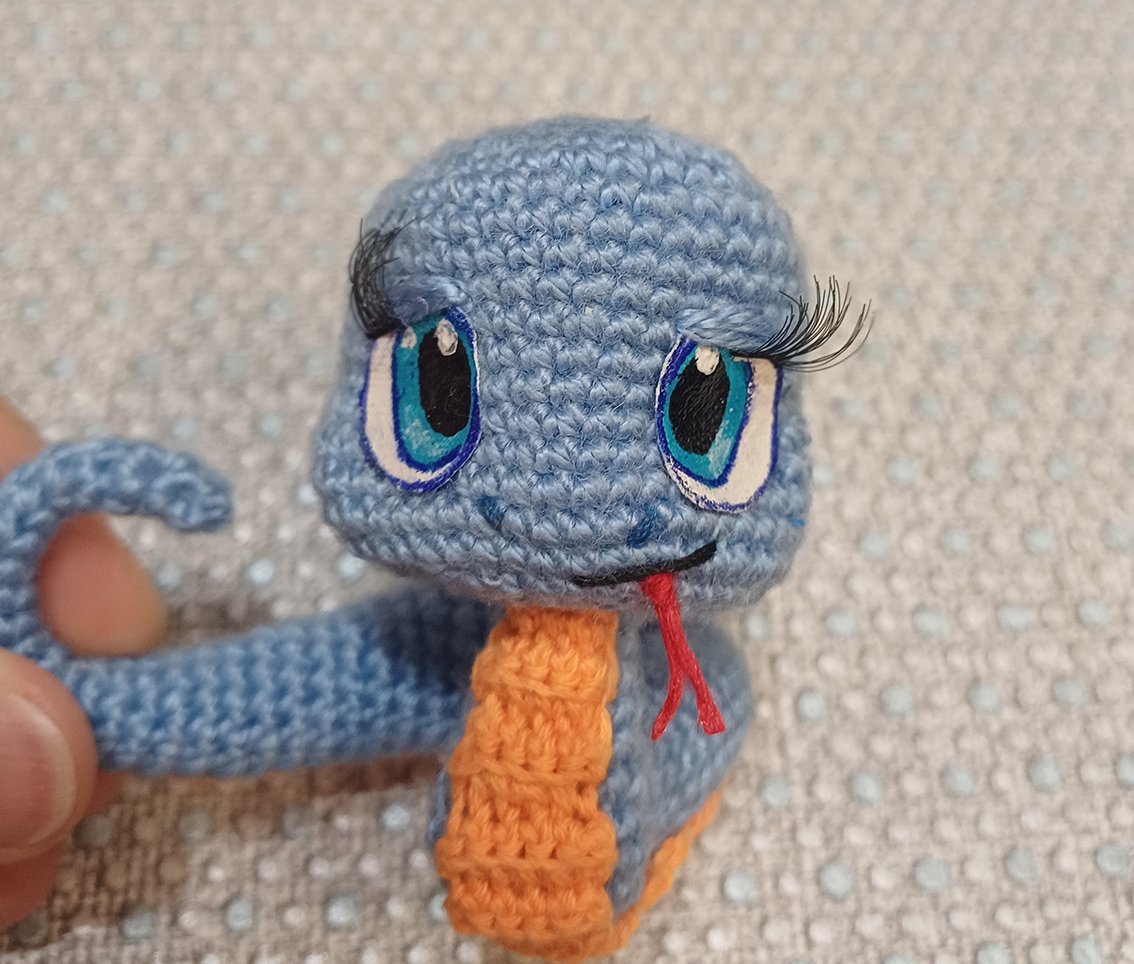
Glue on the eyes. Embroider upper eyelids. Glue eyelashes onto the eyes – optional.
Embroider a mouth. Tie a piece of pink thread inside the mouth, this will be the snake's tongue. Embroider nostrils.
Chest pad
Work with contrasting colour yarn. Crochet in rows.
Work 6 ch
Row 1. starting from 2nd ch from hook: 5 sc, 1 ch. turn = 5
Furter crochet all rows into the back loops only.
Row 2-29. (28 rounds) 5 sc, 1 ch. turn = 5
Row 30. Skip 1 loop, 4 sc, 1 ch. turn = 4
Row 31- 35. (5 rounds) 4 sc, 1 ch. turn = 4
Row 36. Skip 1 loop, 3 sc, 1 ch. turn = 3
Row 37- 41. (5 rounds) 3 sc, 1 ch. turn = 3
Row 42. 3 sc together = 1
Bind off, cut off any excess yarn.
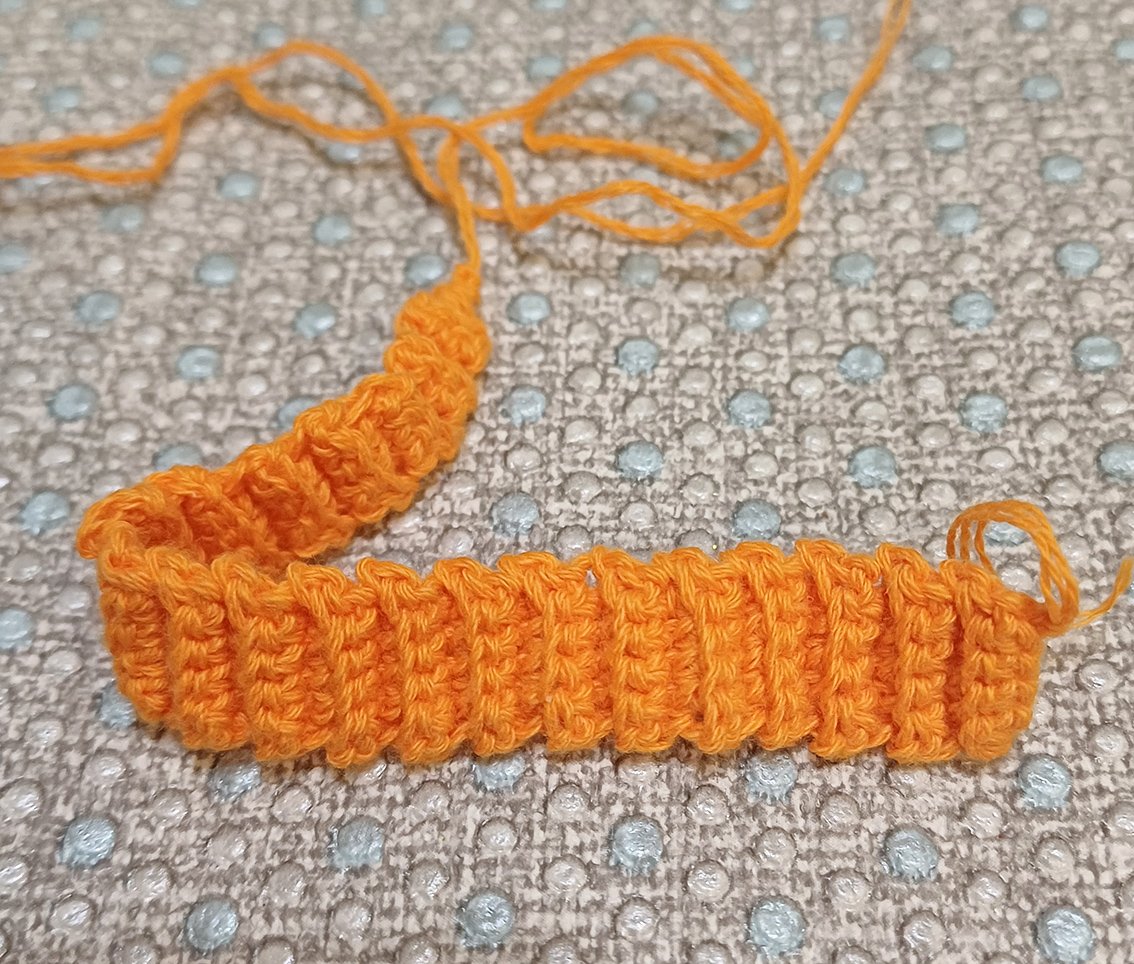
Sew the pad to the chest. Take a cotton matching sewing threads, make invisible stitches.
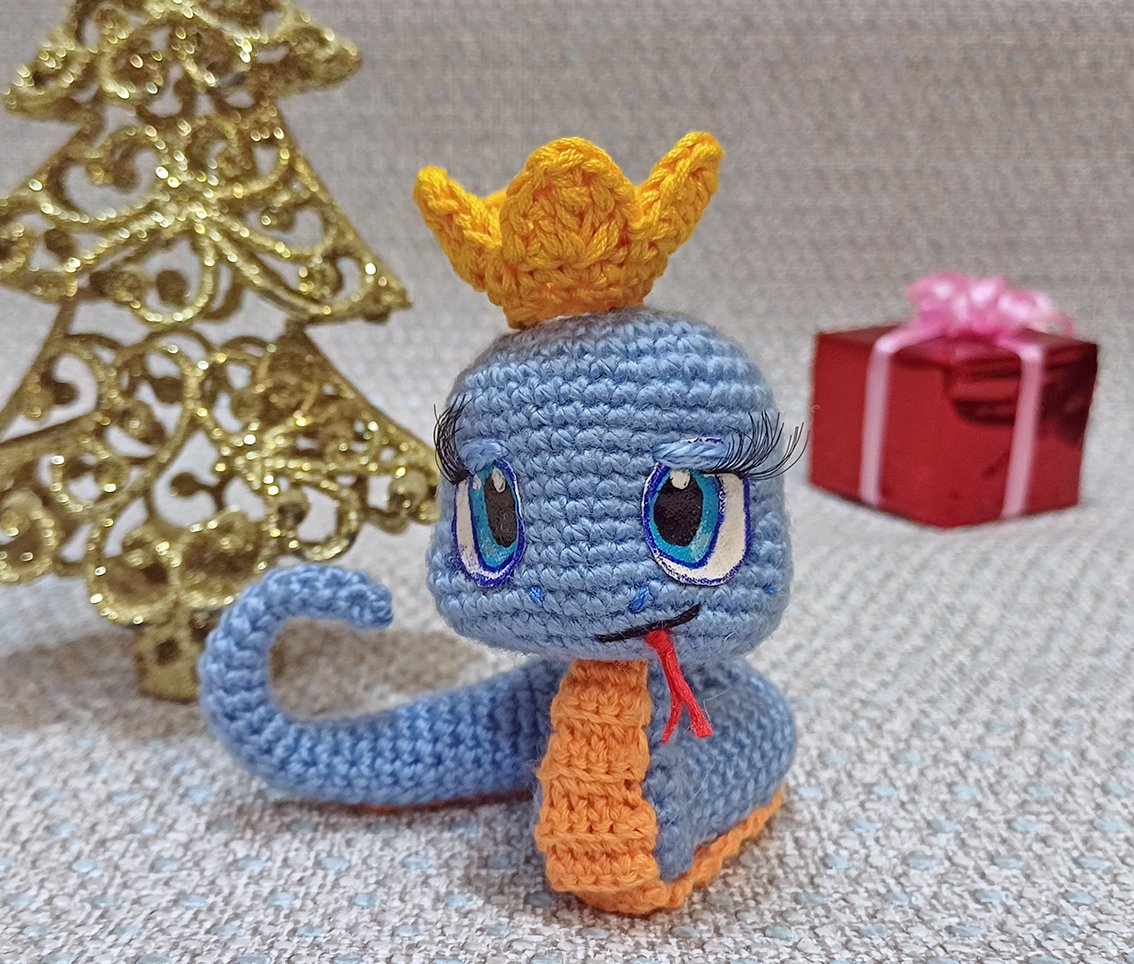
A headdress for a snake of your choice – a crown or a Santa hat.
Crown
Crochet with yellow colour yarn.
Work 16 ch, join into a ring with a sl st.
Rnd 1. 16 sc
Rnd 2. (1 inc, 3 sc) х 4 times = 20
Rnd 3. (skip 1 st, in next loop: 1 hdc, 1 ch, 1 dc, 1 ch, 1 tr, 1 ch, 1 dc, 1 ch, 1 hdc, skip 1 st, 1 sl st) х 5 times – this creates 5 cloves
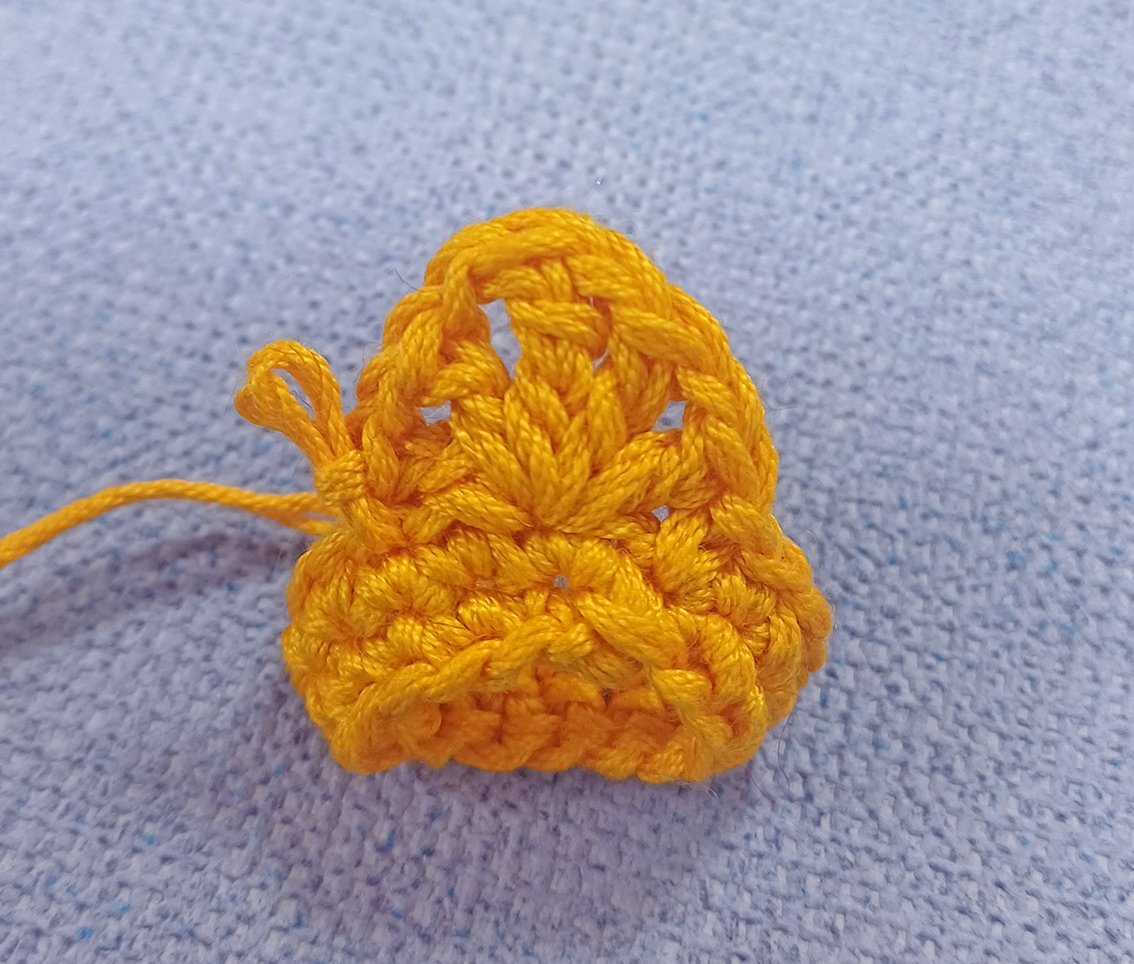
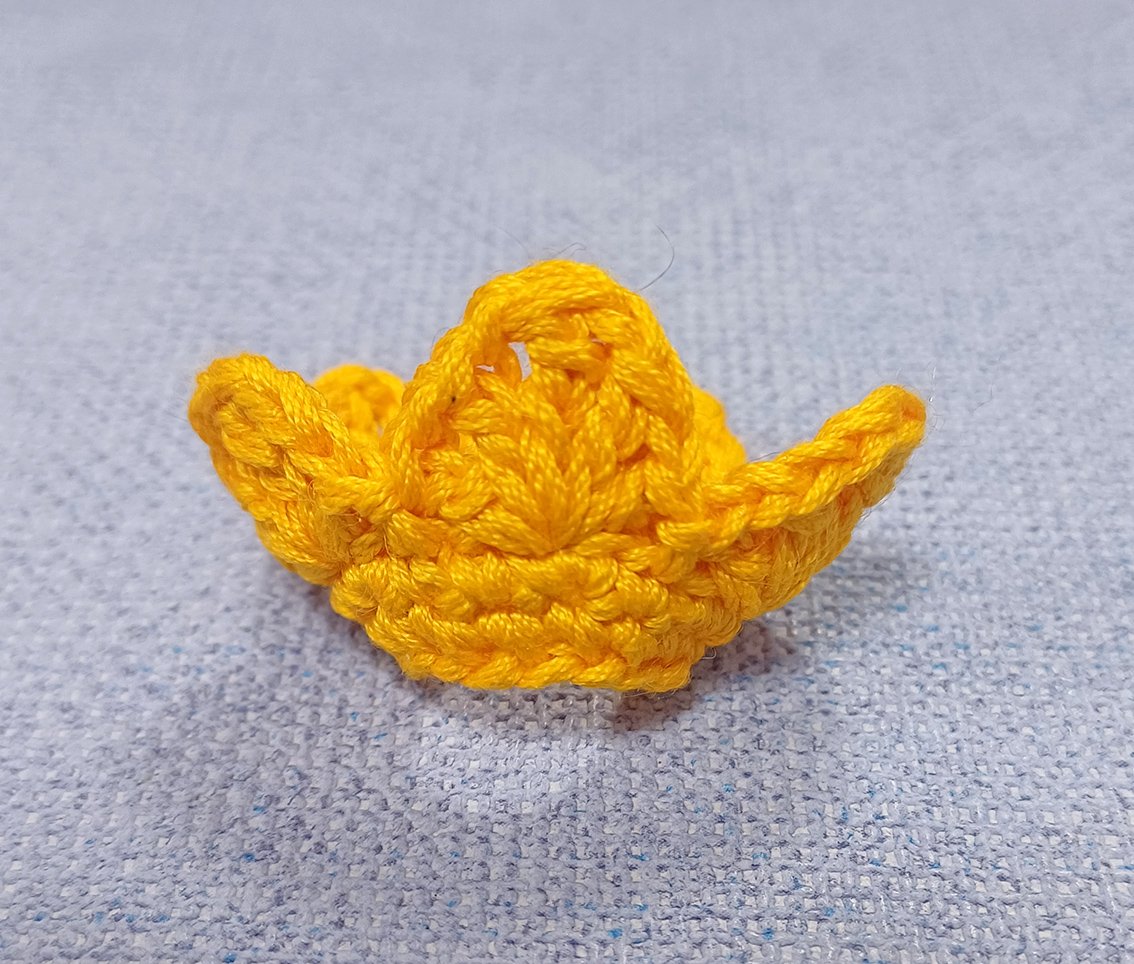
Fasten off, cut off any excess yarn, hide the end.
Attach the crown to the head with a few stitches.
Santa's Hat
Start with red colour yarn.
Rnd 1. 6 sc in a Magic Ring
Rnd 2. (1 inc, 2 sc) х 2 times = 8
Rnd 3-4. (2 rounds) 8 sc
Rnd 5. (3 sc, 1 inc) х 2 times = 10
Rnd 6-7. (2 rounds) 10 sc
Rnd 8. (4 sc, 1 inc) х 2 times = 12
Rnd 9-10. (2 rounds) 12 sc
Rnd 11. (5 sc, 1 inc) х 2 times = 14
Rnd 12-13. (2 rounds) 14 sc
Rnd 14. (6 sc, 1 inc) х 2 times = 16
Rnd 15. 8 sc, into the front loops only: 8 sl st = 16
Rnd 16. (3 sc, 1 inc) х 2 times, into the front loops only: (3 sc, 1 inc) х 2 times = 20
Rnd 17. 20 sc
Rnd 18. (4 sc, 1 inc) х 4 times = 24
Rnd 19. (2 sc, 1 inc) х 8 times = 32
Rnd 20. 32 sc
Rnd 21. (3 sc, 1 inc) х 8 times = 40
Rnd 22. 40 sc
Rnd 23. (4 sc, 1 inc) х 8 times = 48
Rnd 24. 48 sc
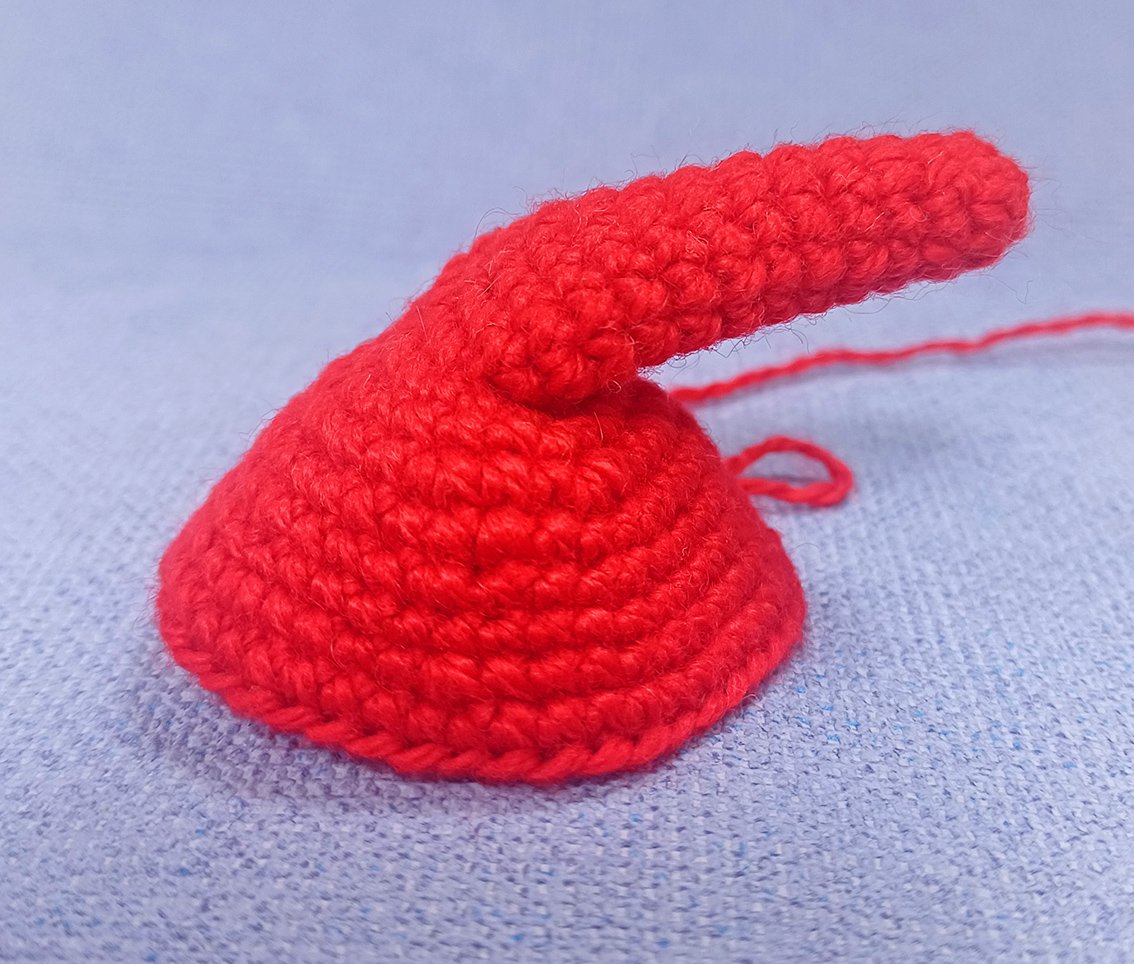
Change to white fluffy yarn. Change your hook to a larger size hook. My yarn was thicker than the main yarn. Therefore I had to make a few equal decreases to make it fit. Try it on as you go. You may need to make 6-8 decreases. If the yarn you use is of the same thickness as the main yarn, then make 3 rounds of 48sc each.
I crocheted in this way:
Rnd 25. (skip 1 st, 2 sc) х 16 times = 32
Rnd 26-27. (2 rounds) 32 sc
Fasten off, cut off any excess yarn, hide the end.
Pompom
Work with white fluffy yarn.
Rnd 1. 6 sc in a Magic Ring
Rnd 2. 6 inc = 12
Rnd 3-4. 12 sc
Rnd 5. 6 dec = 6
Add some hollow fibre. Cut off yarn, leave a tail for further operation. Pull off the loops.
Sew the pompom on. I decided to leave a short piece of thread between the end of the cap and the pompom.
Fold the top part of the cap and fix it in the desired position by sewing the tip of the cap to the white fluffy edge part.
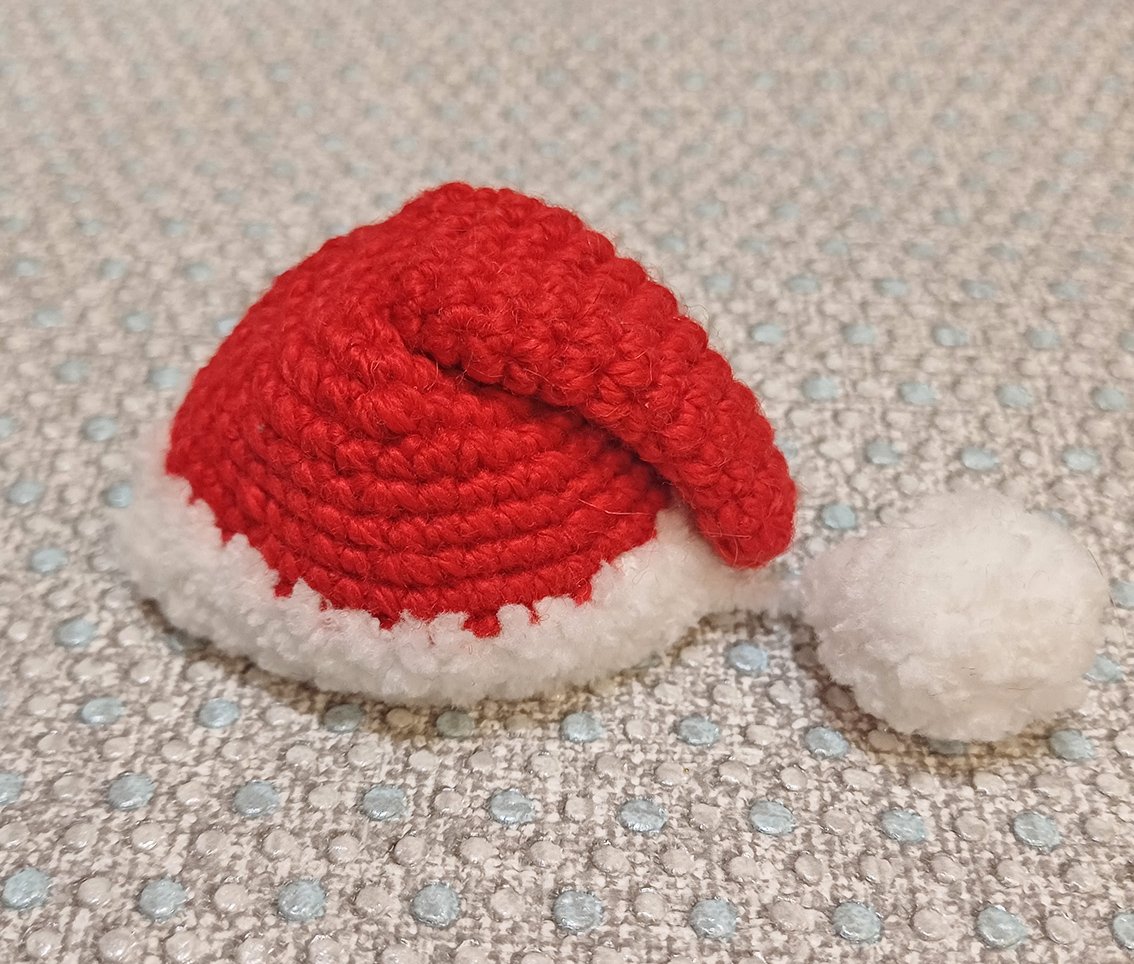
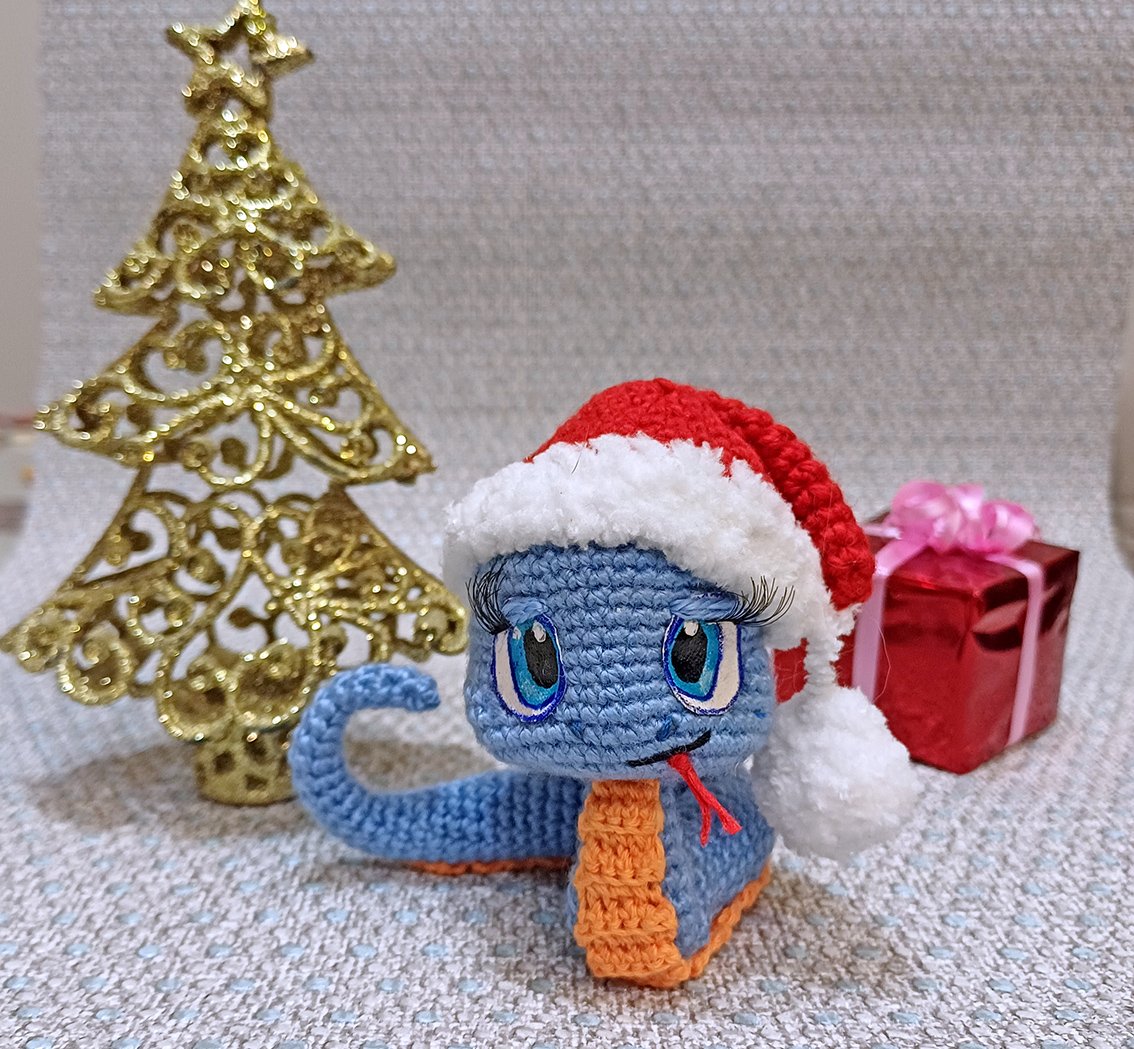
The snake symbol of the new year is complete!
.JPG)


