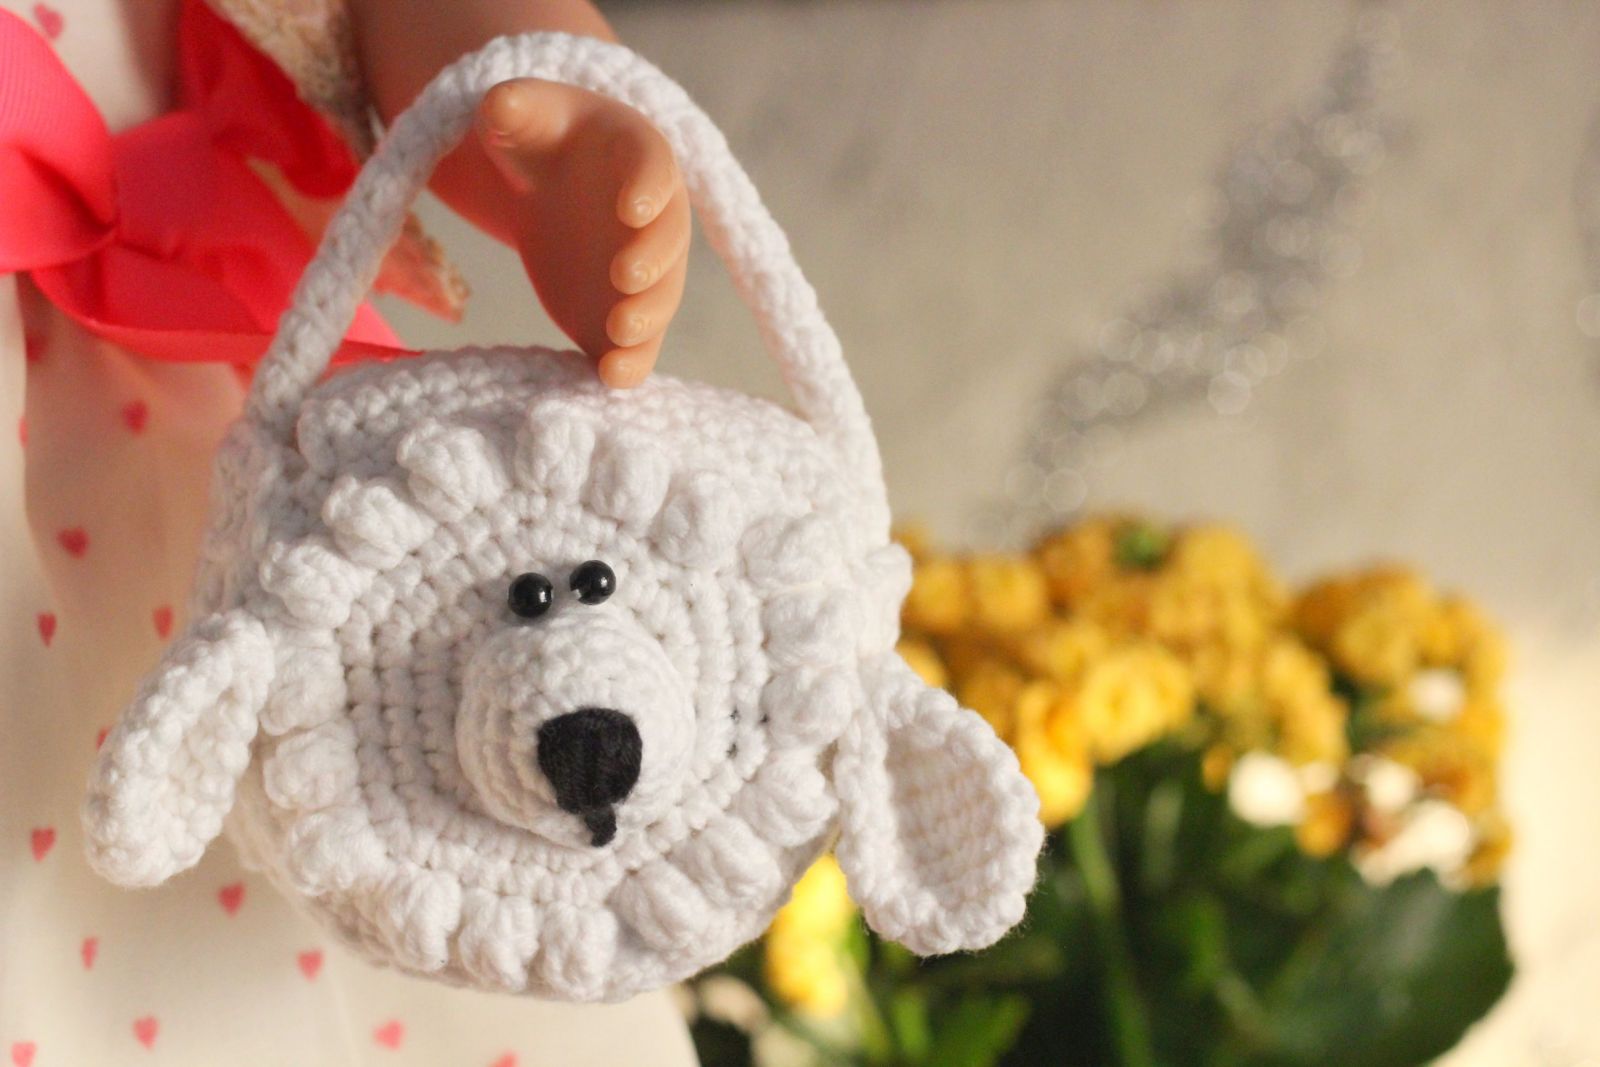
This lovely purse is perfectly suited for 12-14 as well as 18 inches dolls like American Girl or Paola Reina. It is just the right size for holding dolls accessories. You can crochet such a lovely handbag in any desired colour. A great Easter gift! This free crochet pattern is very detailed. It comes with easy to follow written instructions and photo tutorial..
SUPPLIES
cotton yarn (e.g. Schachenmayr Catania 125m/50g) in two colors: light brown and a bit of beige and yellow for the basket, light blue for the rabbit and a bit of pink for the nose and black for eyes, crochet hook 3,5 mm and 2,5 mm, Polyester fiberfill stuffing, 2 black beads or safety eyes, scissors, yarn needle.
SKILL LEVEL
Intermediate
SIZE
approx. 9 cm across. You can make the pattern larger (or smaller) by changing the yarn weight and/or hook size or by adding rounds
SKILLS YOU NEED
chain, single crochet, double crochet, half double crochet, slip stitch, increase, decrease
ABBREVIATIONS
Ch =chain
St = stitch
Sc =single crochet
Sl st = slip stitch
dec = decrease stitch (two single crochets together)
inc = increase stitch (two single crochets into one stitch)
Dc = double crochet
hdc = half double crochet
Rnd = Round
TIPPS
- Do not join rounds, work in a continuous spiral.
- Use a stitch marker or a piece of yarn to mark the end or the beginning of a round
- All stitches are worked into both loops, unless stated otherwise in the pattern.
- You can use any type of yarn as long as you have a corresponding crochet hook size (check yarn label for recommendations)
- Numbers at the end of each round in parentheses ( ) = total number of stitches for that round or row.
- Please note that I use US crochet terms.
- Can be made in any desired colours.
Seamsless way of changing color when working in the round
Pick up the new color at the end of the round: inset your hook into the stitch, yarn over the new color and pull through the stitch and the loop on your hook to complete the stitch.
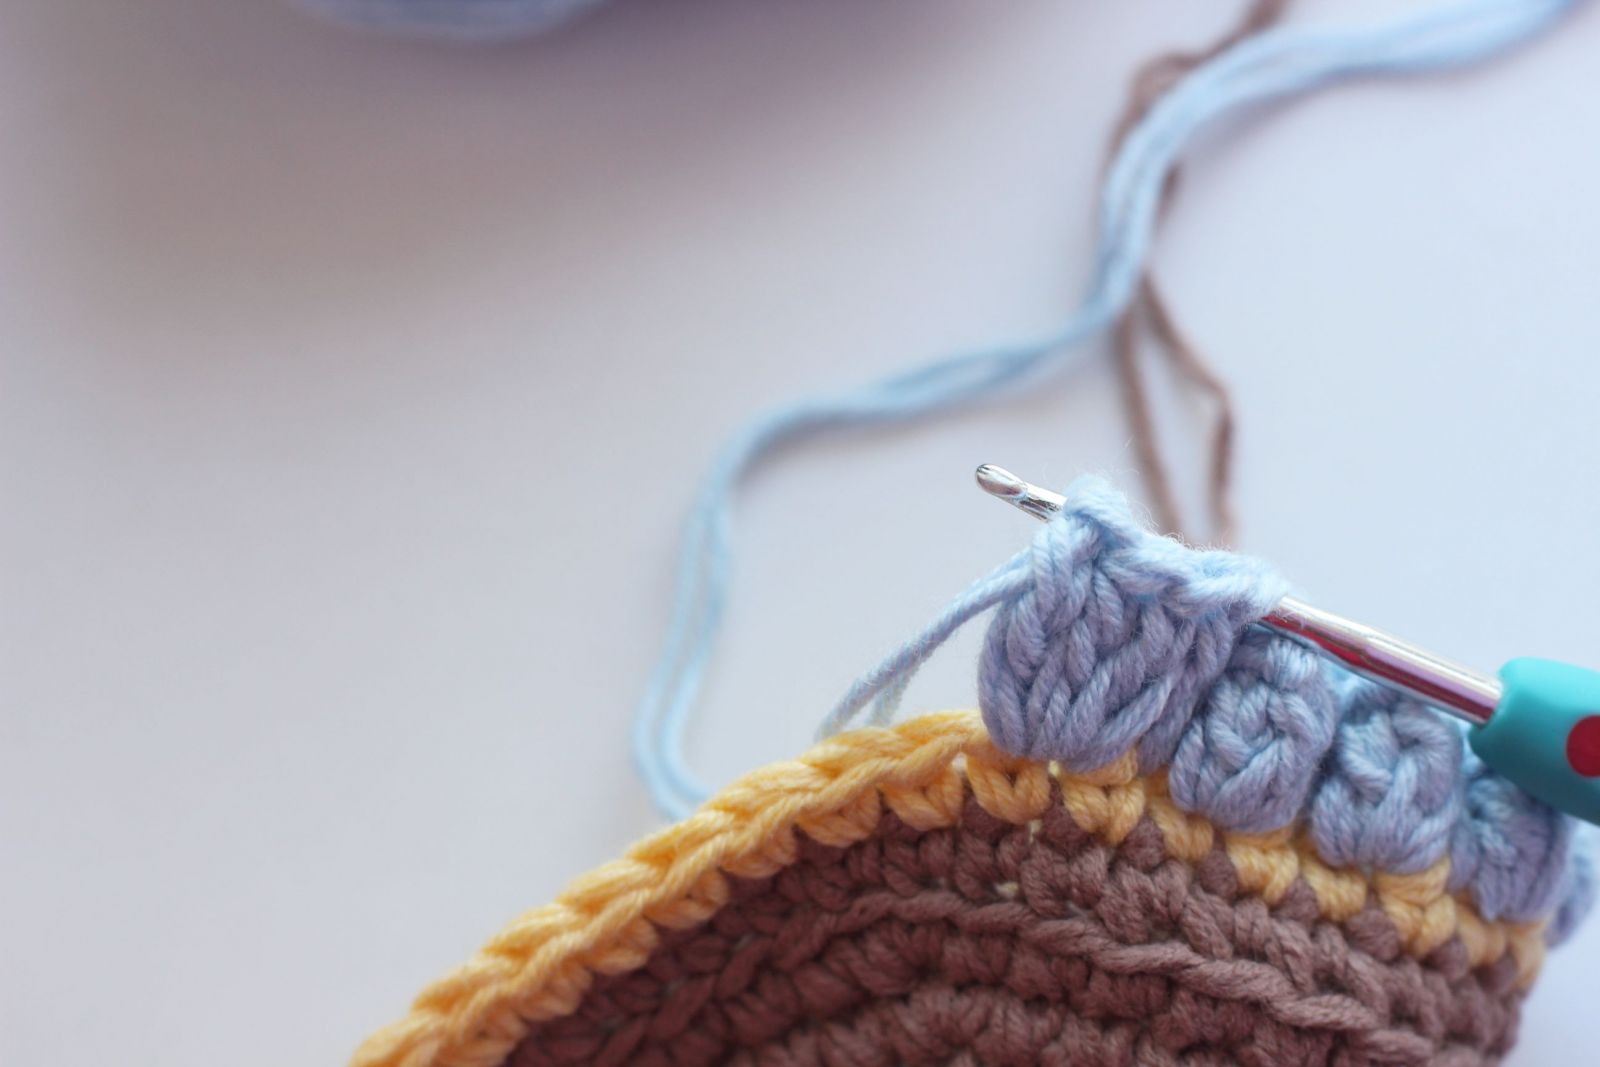
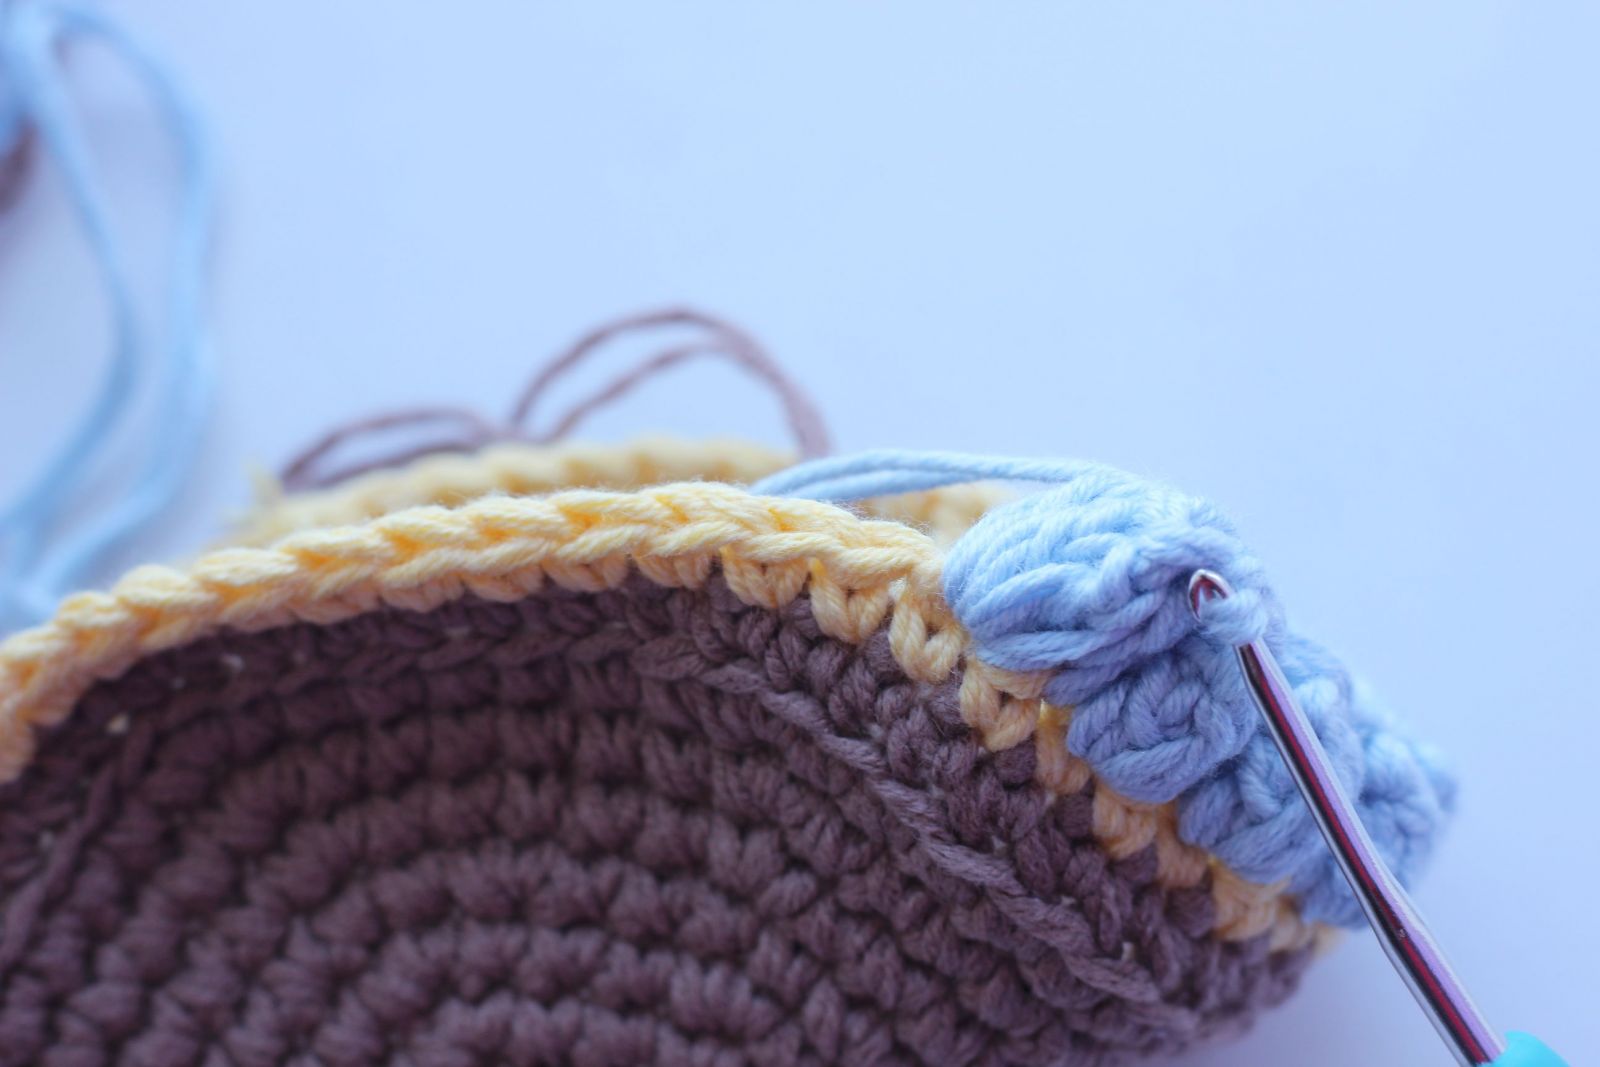
Popcorn Stitch:
4 dc in next st, drop the loop from the hook, insert the hook into first st from four dc´s,
grab the dropped loop and pool it through the st.
INSTRUCTIONS
BACK
Use white color yarn or the one you wish and begin with a magic ring.
Rnd 1: 6 sc into Magic Ring.
Rnd 2: inc 6 times (12 stitches).
Rnd 3: *sc in next st, inc* (18 stitches).
Rnd 4: *sc in each of next 2 sts, inc* (24 stitches).
Rnd 5: *sc in each of next 3 sts, inc* (30 stitches).
Rnd 6: *sc in each of next 4 sts, inc*: (popcorn stitch into the next stitch,1 dc in the next stitch) repeat twice, popcorn stitch into the next stitch, 2 dc in the next stitch (36 stitches)
Rnd 7: *sc in each of next 2 sts, inc* (54 stitches)
Du kannst Design und Größe ganz nach Belieben auf Ihre Wünsche anpassen. Falls Sie Puppentasche oder für Ihre Tochter solch eine Tasche häkeln möchten, können Sie genauso nach dieser Anleitung häkeln, die Tasche lässt sich Runde für Runde anpassen. Häkeln Sie einfach alle weiteren Runden (Boden) wie erklärt immer mit feste Maschen. In der neunten Runde wird jede neunte Masche verdoppelt, in der Zehnten jede zehnte Masche usw. Der Radius des Kreises nimmt auf diese Weise immer mehr zu. Sie können den Boden der Häkeltasche demnach ganz individuell gestalten.
Nicht abketten!
FLAP
Die Verschlussklappe wird über die 17 Maschen der oberen Vorderseite-Kante wie folgt gearbeitet:
Reihe 1: je 1FM in die nächsten 17 Maschen, 1LM, Arbeit wenden
Reihe 2-6: je 1FM in die nächsten 17 Maschen, 1LM, Arbeit wenden
Reihe 7: zus ab, je 1FM in die nächsten 13 Maschen, zus ab, 1LM, Arbeit wenden
Reihe 8: je 1FM in die nächsten 15 Maschen, 1LM, Arbeit wenden
Reihe 9: zus ab, je 1FM in die nächsten 11 Maschen, zus ab, 1LM, Arbeit wenden
Reihe 10: je 1FM in die nächsten 13 Maschen, 1LM, Arbeit wenden
Reihe 11: zus ab, je 1FM in die nächsten 9 Maschen, zus ab, 1LM, Arbeit wenden
Reihe 12: je 1FM in die nächsten 11 Maschen, 1LM, Arbeit wenden
Reihe 13: zus ab, je 1FM in die nächsten 7 Maschen, zus ab, 1LM, Arbeit wenden
Reihe 14: je 1FM in die nächsten 9 Maschen, 1LM, Arbeit wenden
Reihe 15: zus ab, je 1FM in die nächsten 5 Maschen, zus ab, 1LM, Arbeit wenden
Reihe 16: je 1FM in die nächsten 3 Maschen, 3LM (Das wird eine Knopfschlaufe. Sie können 4 oder 5 Luftmaschen häkeln (der gewünschten Knopflochbreite entsprechend), nächste Masche überspringen, je 1FM in die nächsten 3 Maschen.
Arbeit beenden aber nicht abketten. Die Außenkante der Klappe mit einer Reihe feste Maschen oder Krebsmaschen umhäkeln ob gewünscht.
RÜCKENSEITE
Crochet with white color yarn and begin with a magic ring.
Rnd 1: 6 sc into Magic Ring
Rnd 2: *inc* 6 times (12 stitches)
Rnd 3: *sc in next st, inc* (18 stitches).
Rnd 4: *sc in each of next 2 sts, inc* (24 stitches).
Rnd 5: *sc in each of next 3 sts, inc* (30 stitches).
Rnd 6: *sc in each of next 4 sts, inc* (36 stitches).
Rnd 7: *sc in each of next 5 sts, inc* (42 stitches).
Rnd 8: *sc in each of next 6 sts, inc* (48 stitches).
Rnd 9: *sc in each of next 7 sts, inc* (54 stitches).
BOTTOM
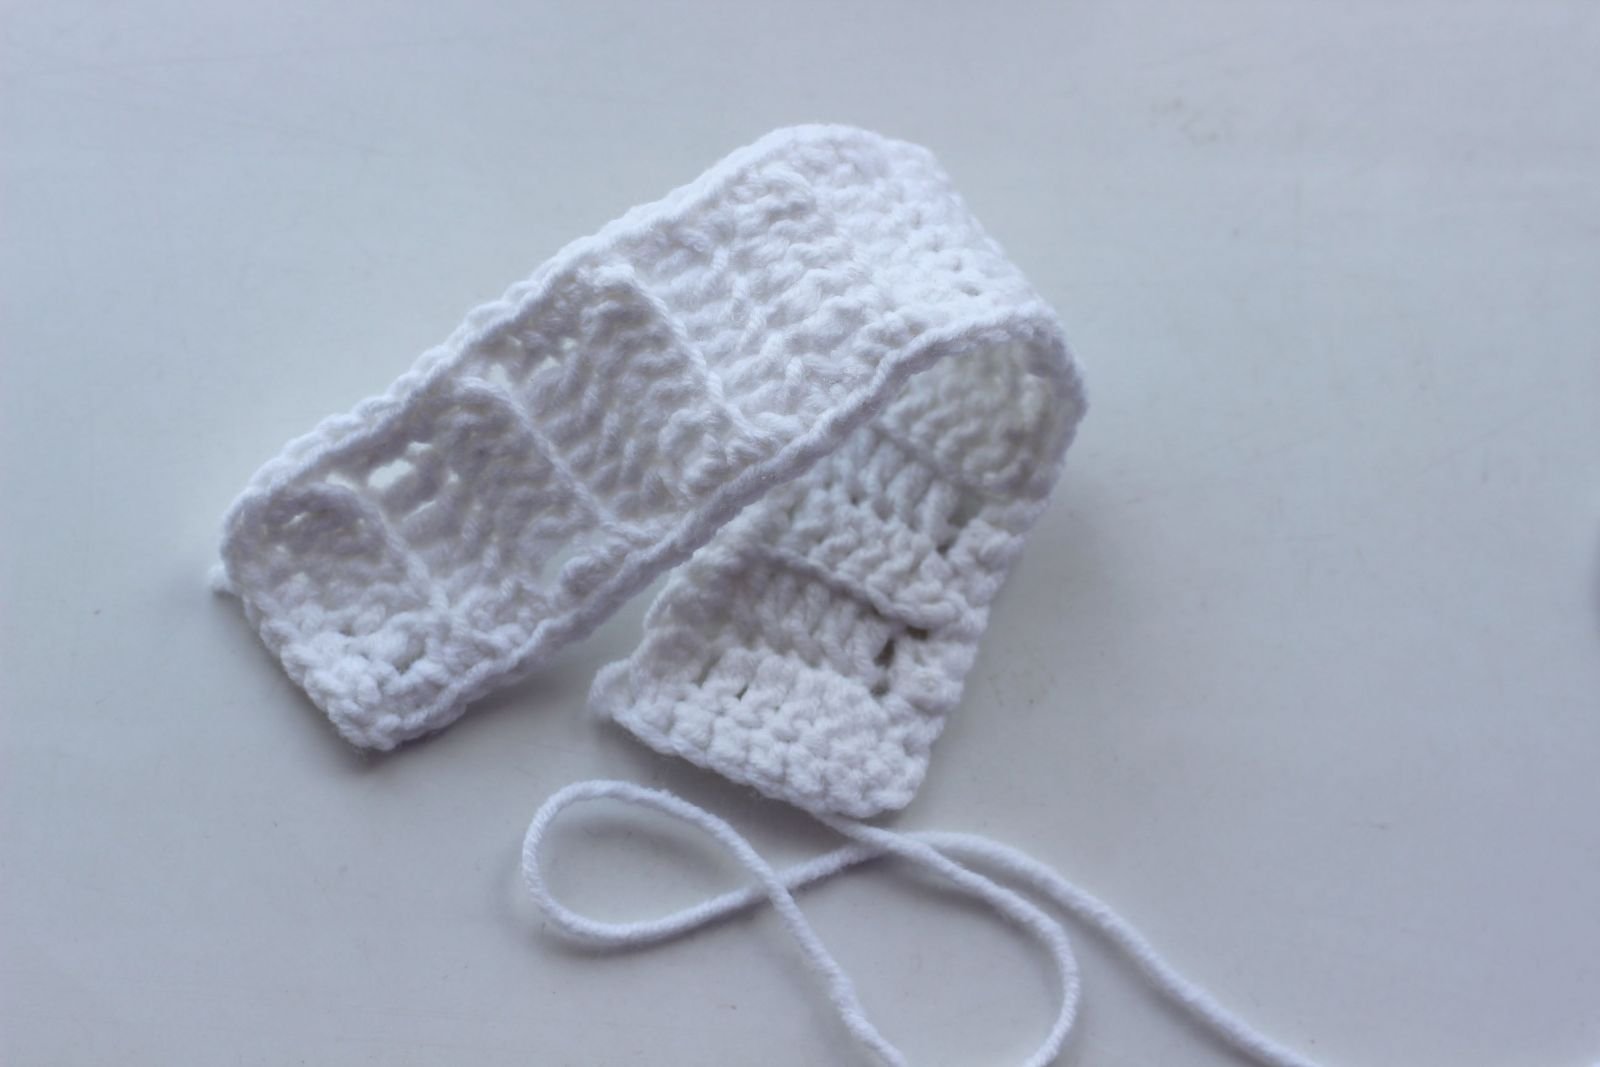
Row 1: ch 9 stitches, dc in the 4th stitch from the hook and each of next 5 stitches, turn the work.
Row 2: (working into the back loop): ch3, dc in each of next 6 stitches, turn.
Repeat row 2 approx. 15 cm (about 16 rows).
All around the bottom crochet one rounds in sc´s. Bind off leaving a long tail for sewing.
HANDLE
Crochet with white color yarn and begin with a magic ring.
Work 6 sc into Magic Ring. Sc in each of next 6 sts (working into the back loop) around until the handle reaches approx 15 cm. You can make it longer or shorter, as desired.
Instead of crocheted handle you can make a twisted cord. First you take a length of yarn approximately twice the length you want your cord to be and fold in half. Start by stretching the yarn out to its full length (still folded in half) and begin twisting in the same direction. Continue to twist consistently in the same direction. As you go, the yarn will tighten up and begin to look more like one piece instead of several strands of yarn being twisted together. The more you twist the yarn, the tighter the cord will be. When you have finished twisting bring the two ends together and the yarn will twist around itself. Finish your twisted cord by threading the yarn ends through the loop and tie it all into a neat little knot. The result is a sturdy thick cord.
MUZZLE
Crochet with white color yarn and begin with a magic ring.
Rnd 1: 6 sc into Magic Ring
Rnd 2: *inc* 6 times (12 stitches)
Rnd 3: *sc in each of next 3 sts, inc* (15 stitches)
Rnd 4:*sc in each of next 4 sts, inc* (18 stitches)
Rnd 5: sc in each of next 18 stitches
Bind off leaving a long tail for sewing.
EAR (2x)
Crochet with white color yarn and begin with a magic ring.
Rnd 1: 6 sc into Magic Ring
Rnd 2: *inc* 6 times (12 stitches)
Rnd 3: *sc in each of next 3 stitches, inc* (15 stitches)
Rnd 4-7: sc in each of next 15 stitches
Rnd 8: *dec, sc in each of next 3 sts* (12 stitches)
Rnd 9: sc in each of next 12 stitches
Bind off leaving a long tail for sewing. Crochet the second ear the same way.
ASSEMBLY
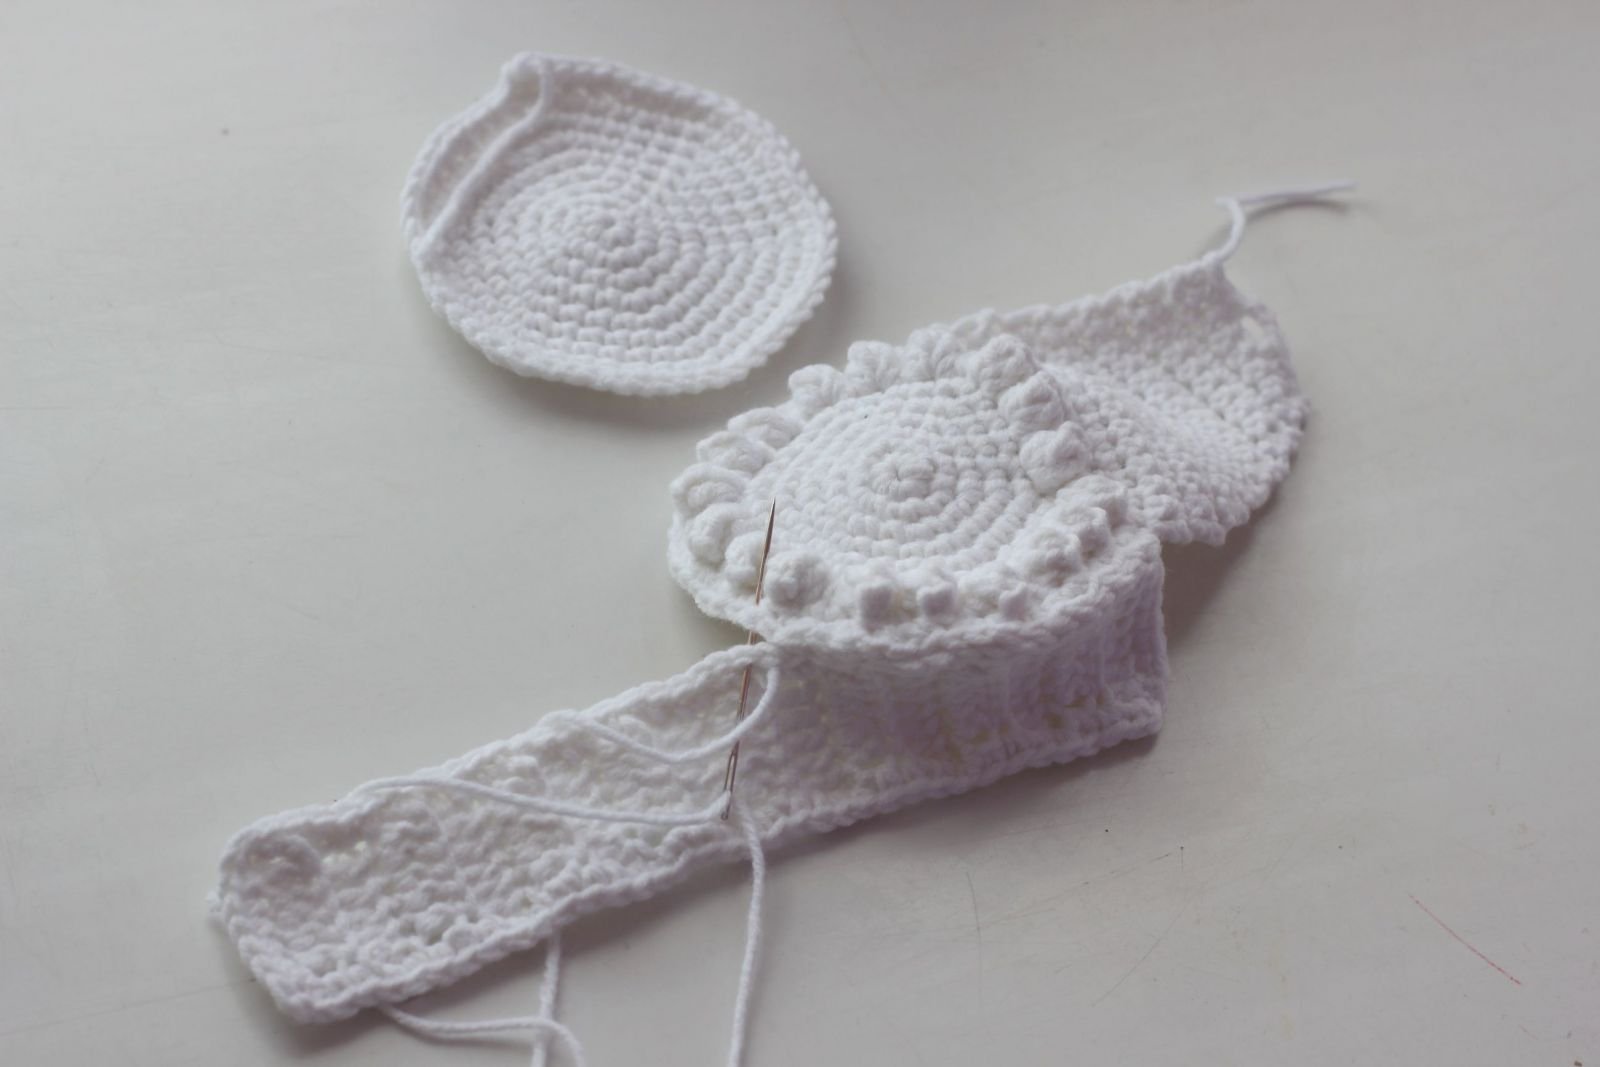
Seam both sides with the bottom of the bag.
Sew handle to the bag. Weave in all ends.
Position ears and sew them to the bag. Use pins to keep it in place. Attach it with the long tail.
Sew on muzzle (stuff slightly before fully sewing shut).
Mark where you want the eyes to be placed with pins and sew them with the distance of 2-3 stitches to the head of the purse.
Embroider nose with black color yarn. Begin with the outline of the upside down triangle. Insert the needle through the top of the head and pull it through leaving a little bit of a tail. Then insert the needle again and pull it through where you want your bunnys nose to be. Fill in the triangle, and finish the uneven lines. At the end pull the needle out the same hole it originally went into, so that both yarn tails are coming out of the same hole. Tie a knot with both yarn tails, as close to the surface of the head as possible. Hide the yarn tails inside the head.
Add a line to the nose using black color yarn. Bind off. Weave in all ends.
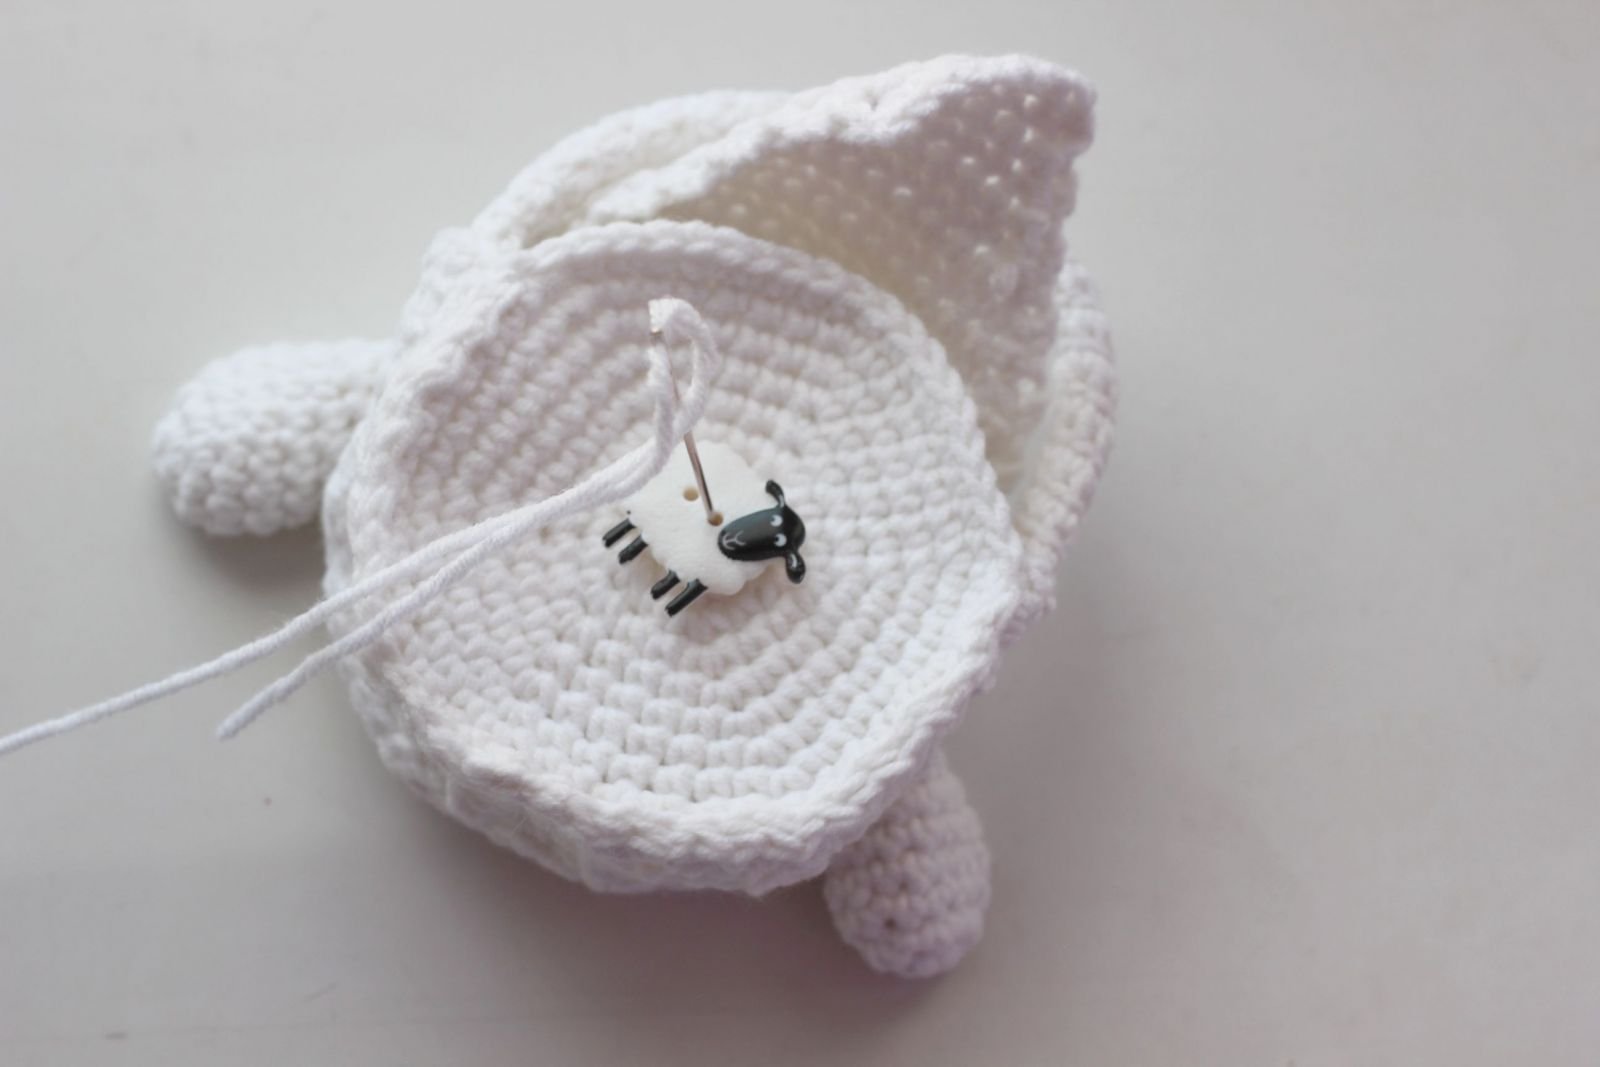
Sew button on and weave in all ends.
Happy crocheting! Feel free to contact me with any questions. Thank you for stopping by and have a lovely day!
.JPG)
.JPG)
.JPG)
.JPG)
.JPG)
.JPG)
.JPG)
.JPG)
.JPG)
.JPG)
.JPG)
.JPG)
.JPG)
.JPG)


