Diamond Log Cabin: Many new possibilities for your quilts
The last Log Cabin blocks I showed you were all in the traditional square design.
Today I will show you how to draw the Diamond Log Cabin. This is a diamond, often called a diamond in patchwork. I love the different possibilities that patchwork patterns offer me.
The stripes in the Log Cabin patterns can be used not only for square shapes, but also for diamonds, triangles, hexagons, etc.
The different possibilities of displaying a Log Cabin pattern within a diamond and filling it with different colors result in completely new possible combinations of Log Cabin patterns in your future quilt.
But let's start from the beginning.
How do you draw the rhombus or diamond?
The diamond shape used in patchwork is a quadrilateral with two 60 degree angles and two 120 degree angles.
Now, of course, you can start measuring the angles with your protractor and drawing them on blank paper. It all works...
I admit, I like it better when I find an easier way 😉
You can find so-called isometric paper online and at your favorite local stationery store.
I have both a pad of A4 tear-off paper and a notebook in A4 format. Both have their advantages. The notebook collects all my ideas, whereas the tear-off pad makes it easier for me to take the pages with me or file them thematically later.
However, in what is probably the largest office supplies store in Cologne, I needed three sales assistants before they could give me the pad I wanted, simply because I didn't know the word "isometric paper" and was looking for a pad with pre-drawn "60 degree triangles". I had completely overwhelmed the sales assistant until he found an "old hand" who understood me 😉.
Because the isometric paper is simply made up of 60 degree triangles...
There are also websites where you can download a template for free and print it out yourself. Simply enter a few keywords, such as "isometric paper" or "isometric paper", possibly in conjunction with the words "free", "print yourself" or "print out" in your favorite search engine.
Triangles of different sizes
The triangles in the isometric paper come in different sizes. In my notebook, the triangles have a side length of 1/2 inch. But there are also templates with 1/4 inch, for example.
The difference is obvious. If you have an A4 sheet in front of you, you will have larger triangles on one paper and your diamond will be nice and big, but you will have less space to draw lots of rounds for your Log Cabin Diamond. You will also use more paint when coloring.
On the other hand, tiny triangles on your A4 sheet will make your drawing look tiny and you will have to look very closely for an accurate drawing.
As always, you are free to choose your paper according to your wishes and preferences.
How to draw your Log Cabin Diamond
The center no. 1
Once you've got the paper from wherever, let's start drawing.
The center of my rhombus consists of a total of 8 small triangles. To draw the rhombus, simply follow the pre-printed lines. In my case, there are 2 triangles on each side, which I have drawn along. The nice thing about this isometric paper is that you automatically get the correct side lengths and angles for your rhombus, as long as you draw the side lengths the same length. I label the center with the number 1.
My rhombus has different colors. I'll paint the center no. 1 pink later.
.jpg)
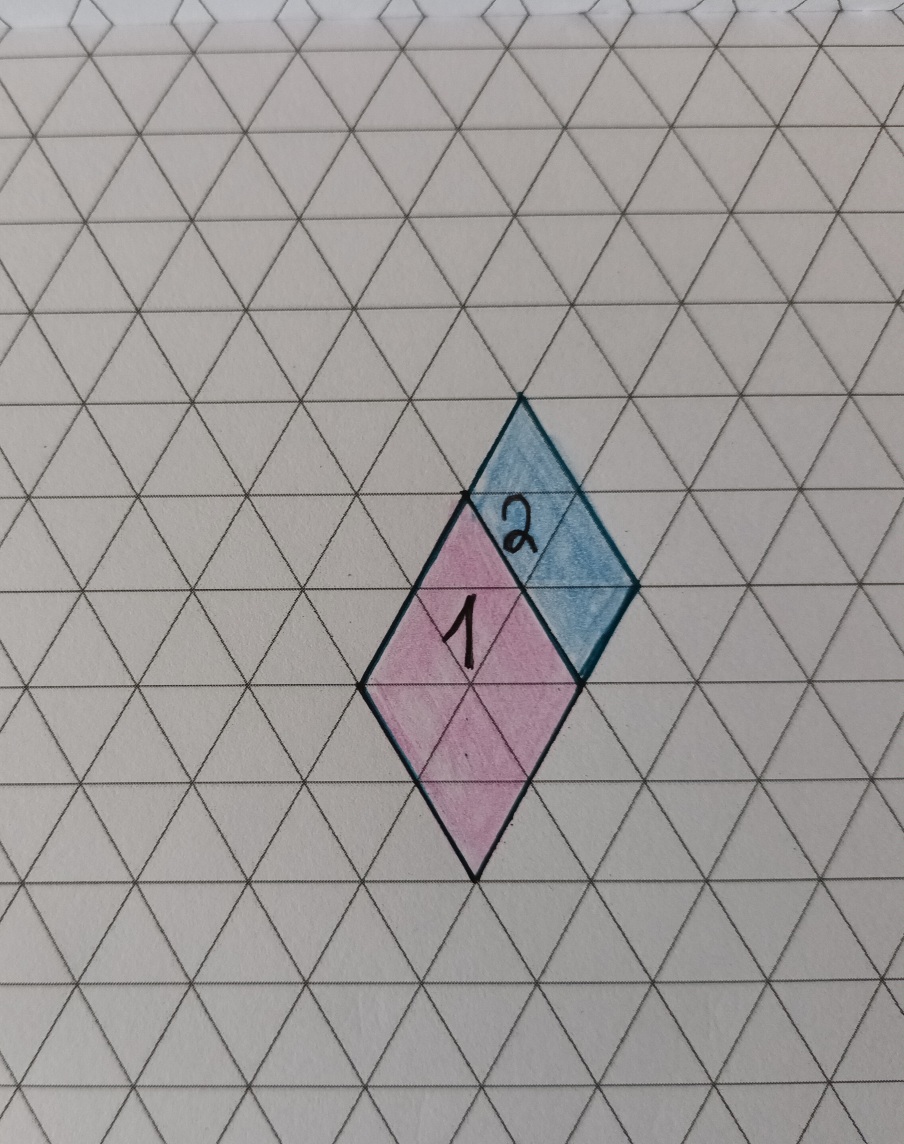
Strip no. 2
I draw the following strips on this center, each of which is as high as a pre-drawn triangle.
The length of the strip is based on your center, because the first strip is the same length as one side of your rhombus.
You can see exactly what I mean in the photo. This stripe is given the number 2.
This stripe gets the contrasting color blue. I will paint all the upper stripes blue later, the lower stripes will all be painted in a shade of pink to match the center.
I find it important with diamonds to number the individual parts (i.e. the center and the stripes) directly, because it is "very easy" to mix up the order of the individual parts when drawing or sewing later. But you will only achieve the desired result if you sew these parts in a continuous sequence. Anything else will result in a chaotic mess...
I won't tell you how many Log Cabin diamonds I threw away in a rage because I got the order wrong for the umpteenth time. I admit, I have a very short patience when it comes to unraveling the incorrectly sewn fabric pieces. 😊
That's probably why I always try to master the patchwork techniques so well that I rarely have to unravel them. 😉
Strip no. 3
Whether you draw the other stripes CLOCKWISE or COUNTERCLOCKWISE is up to you. I like to draw counterclockwise, but maybe that has something to do with the fact that I'm left-handed?
In any case, your decision (CLOCKWISE or COUNTERCLOCKWISE) is binding for THIS diamond. In other words, you'll save yourself a lot of effort and trouble if you stick to your chosen direction...
You're welcome to make a new decision for your next log cabin diamond. 😊
Strip no. 3, like all other strips, has the same height as strip no. 2, namely the height of a triangle in your isometric paper.
You can see the length of the strip in the following photo. The strip length includes both the length of center no. 1 and the height of strip no. 2. Strip no. 3 runs along the length of your isometric paper, creating a new point at the top of your rhombus.
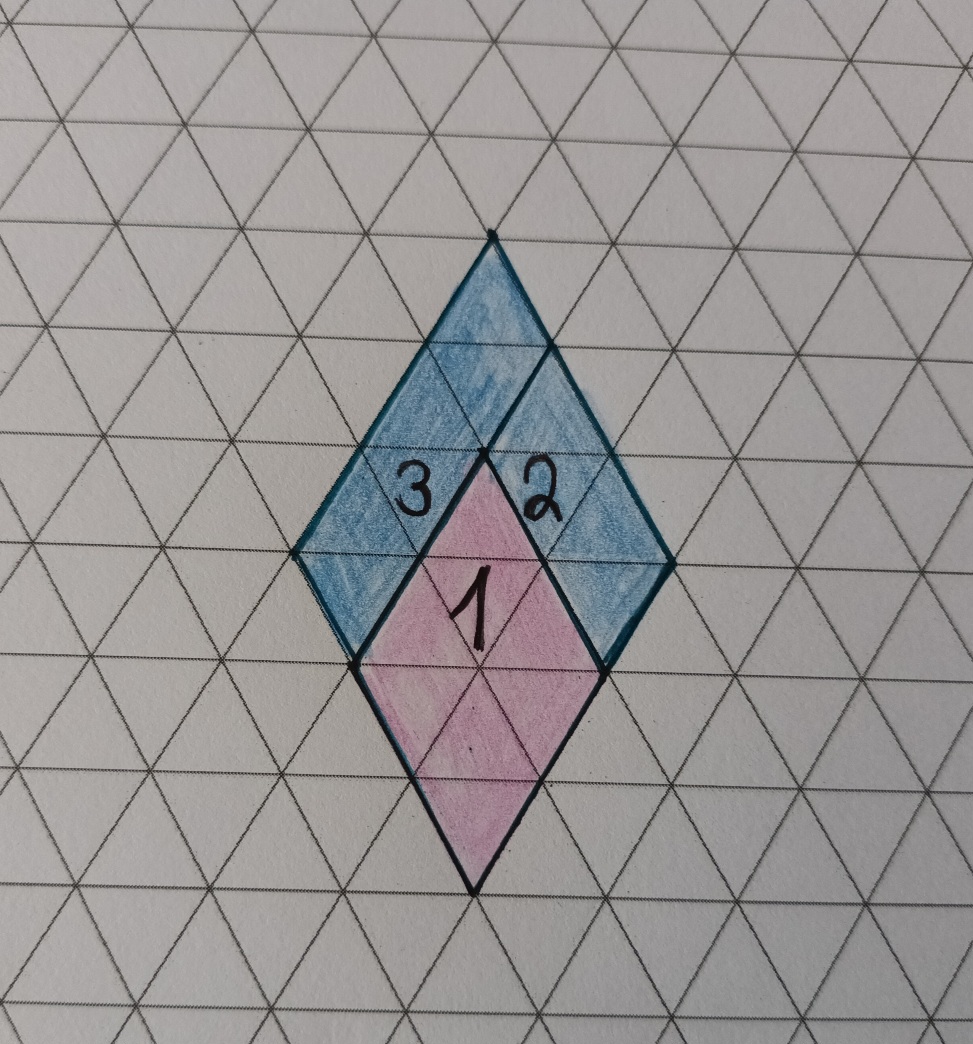
I also paint this stripe in a blue shade.
I now continue my drawing in an anti-clockwise direction and draw the lower stripes.
Strip no. 4
Perhaps you already recognize the similarity to the square Log Cabin? The strips surround the center until the round is complete.
Strip no. 4 ends lengthwise with strip no. 3 and center no. 1. If you imagine sewing the strip, you would simply sew a piece of fabric straight to the existing piece of fabric. The seam would be the same length as your existing piece of fabric. I find that if I imagine it so vividly in between, drawing it is much easier.
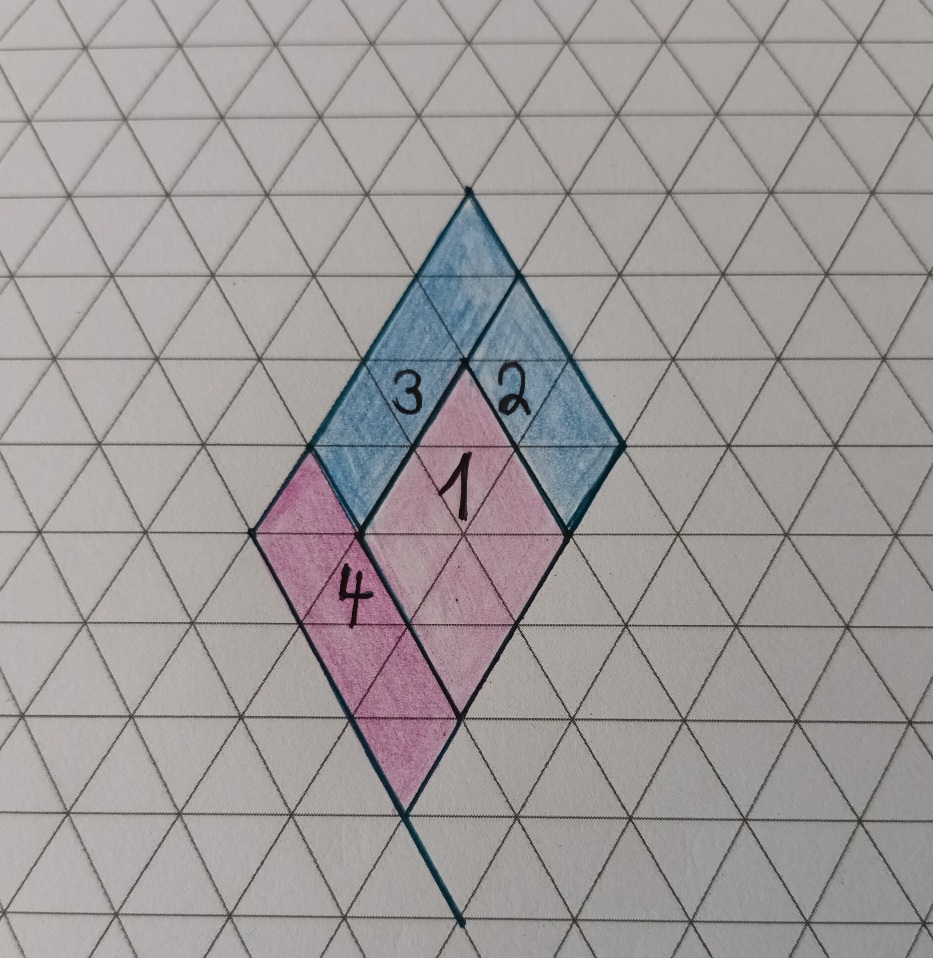
I have already mentioned that this diamond will have differently colored stripes. You can see it now in stripe no. 4, which I have painted in a pink tone to match the pink tone of the center.
Strip no. 5
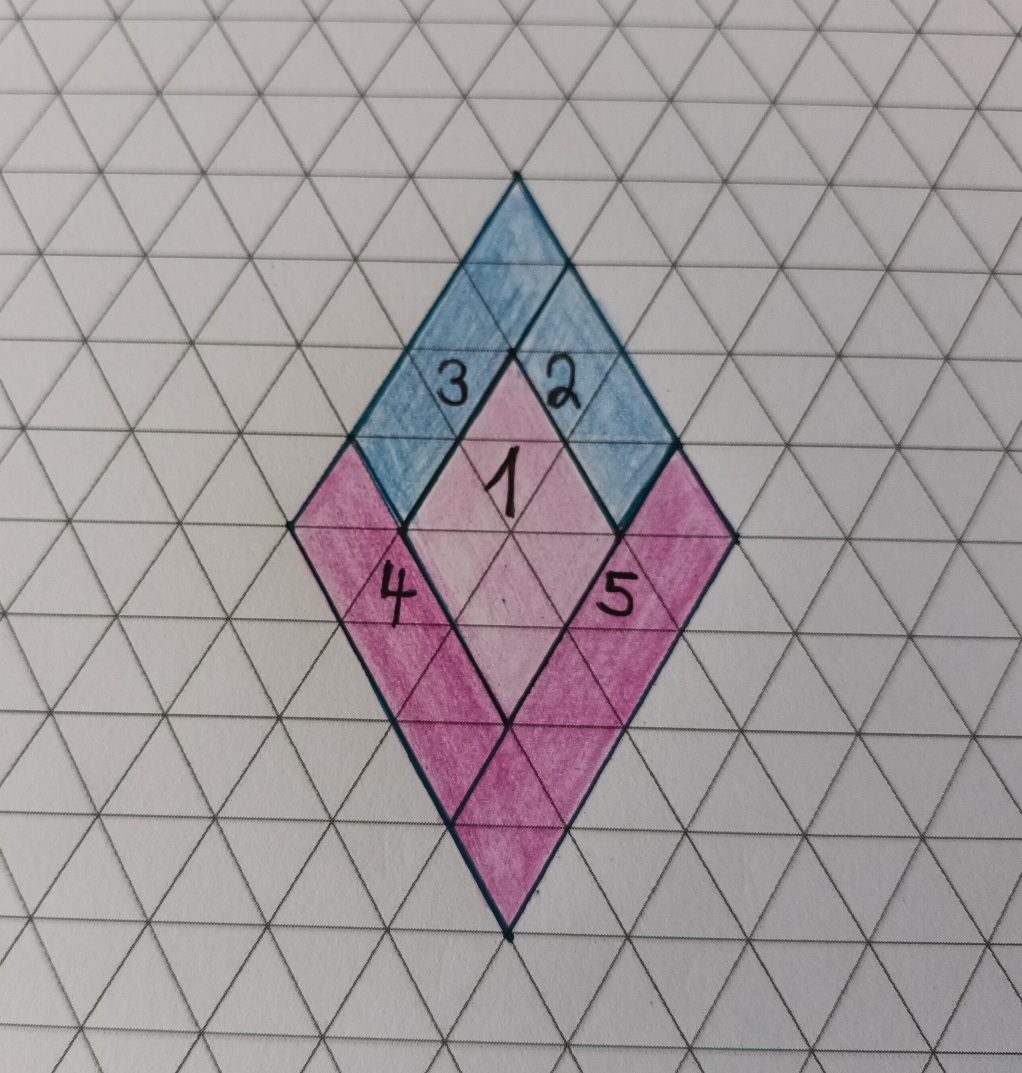
This strip completes the first round of the Log Cabin Diamond. It is the same length as the diamond you have drawn so far. Imagine that you are sewing strip no. 5 onto the existing piece of fabric. Then you can see how long the strip needs to be so that all the existing pieces of fabric are enclosed by the new strip.
Strip no. 6
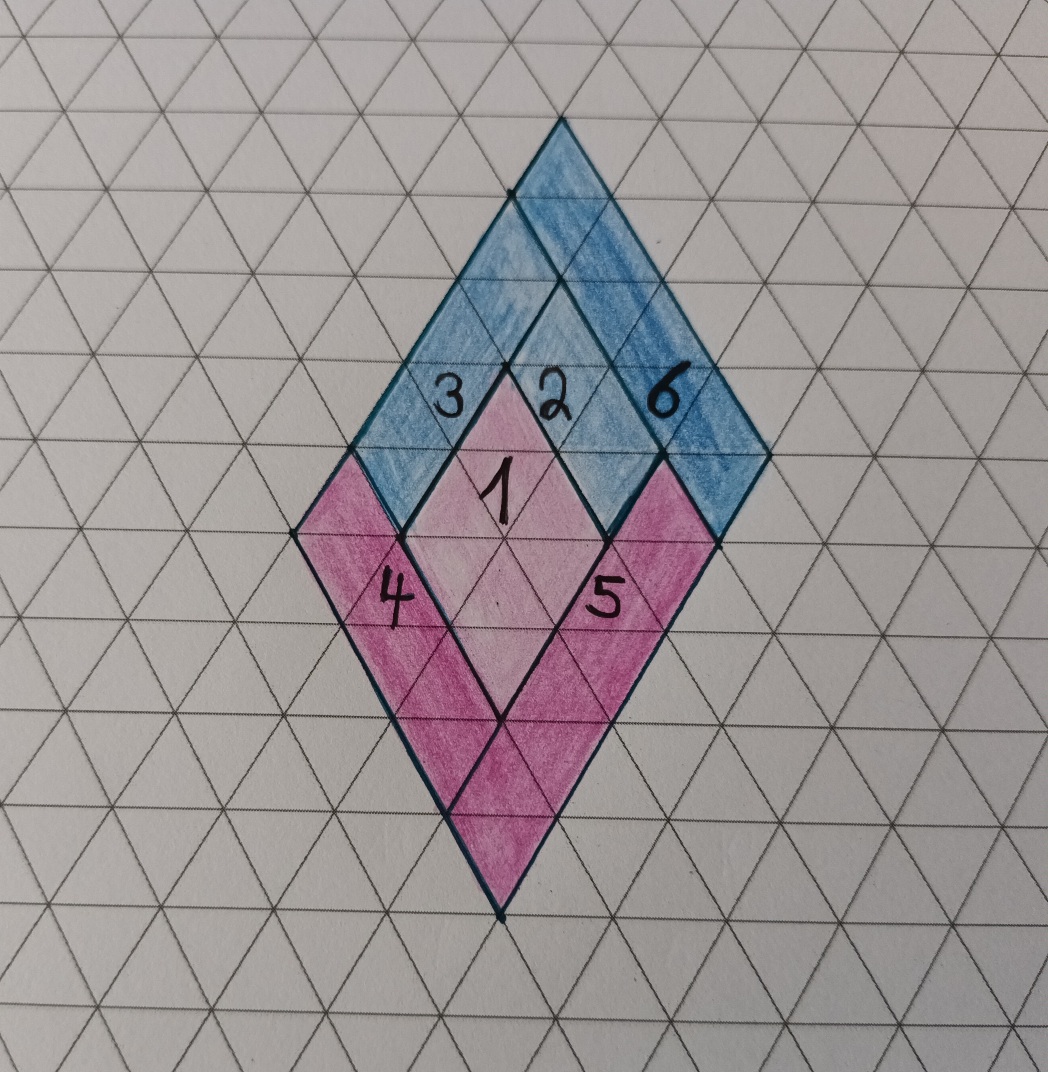
Start the second round of your Log Cabin Diamond pattern with strip no. 6. In my case, it is again at the top right, i.e. above strip no. 2, and is of course a little longer than the latter.
As already mentioned, all the upper stripes in this Log Cabin variant have a blue hue.
Strip no. 7
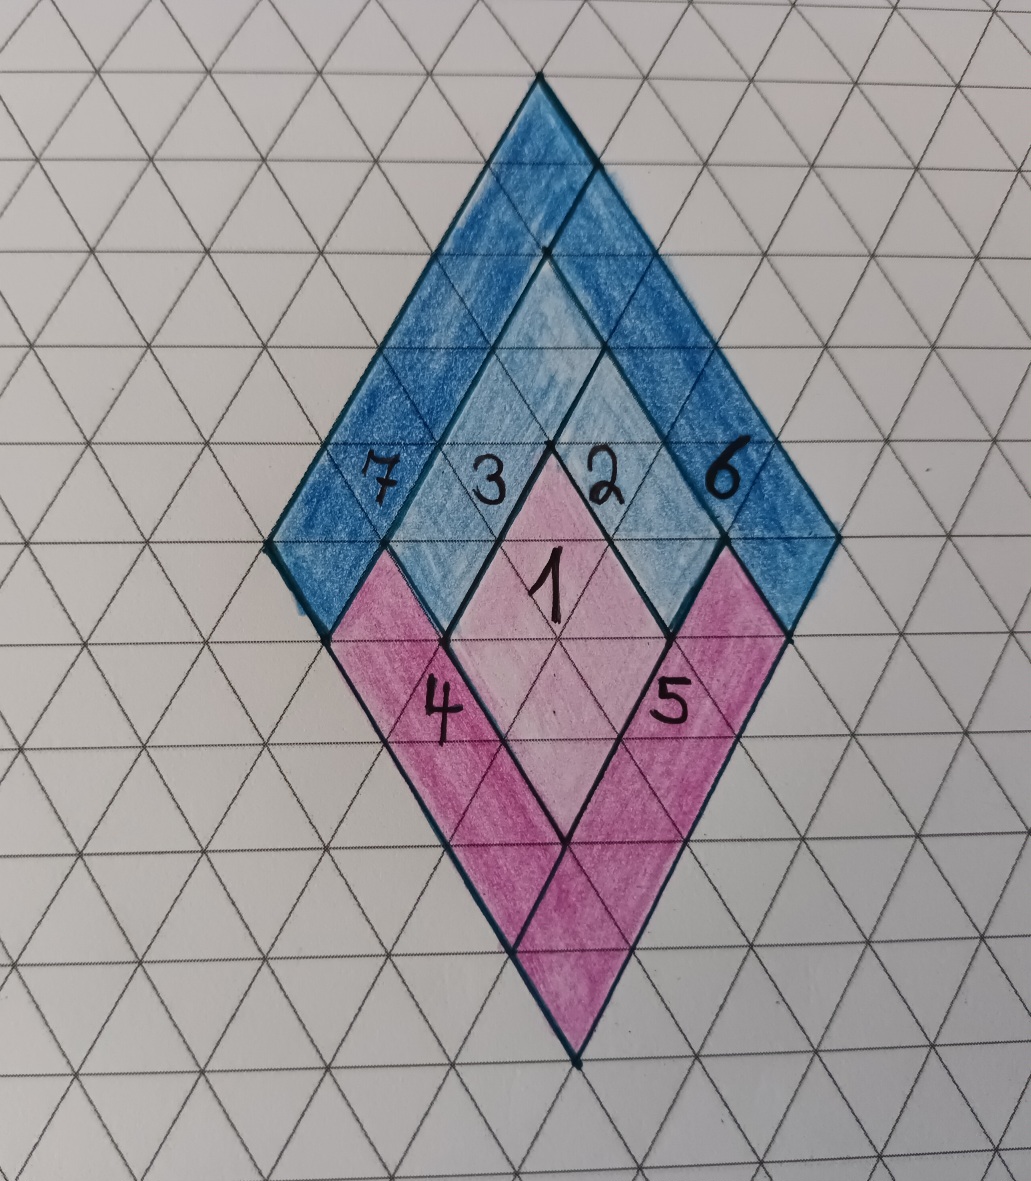
I find that the second stripe in a new round of the Log Cabin Diamond pattern is the moment when I have to concentrate very hard. Yes, I have to concentrate especially here and remember that the next stripe in the round is drawn counterclockwise. In addition, the length must be exactly the same as the length of the lower stripes.
So please look carefully at the photo and imagine that you are sewing strip no. 7 back onto the existing piece of fabric.
The other strips in the second round
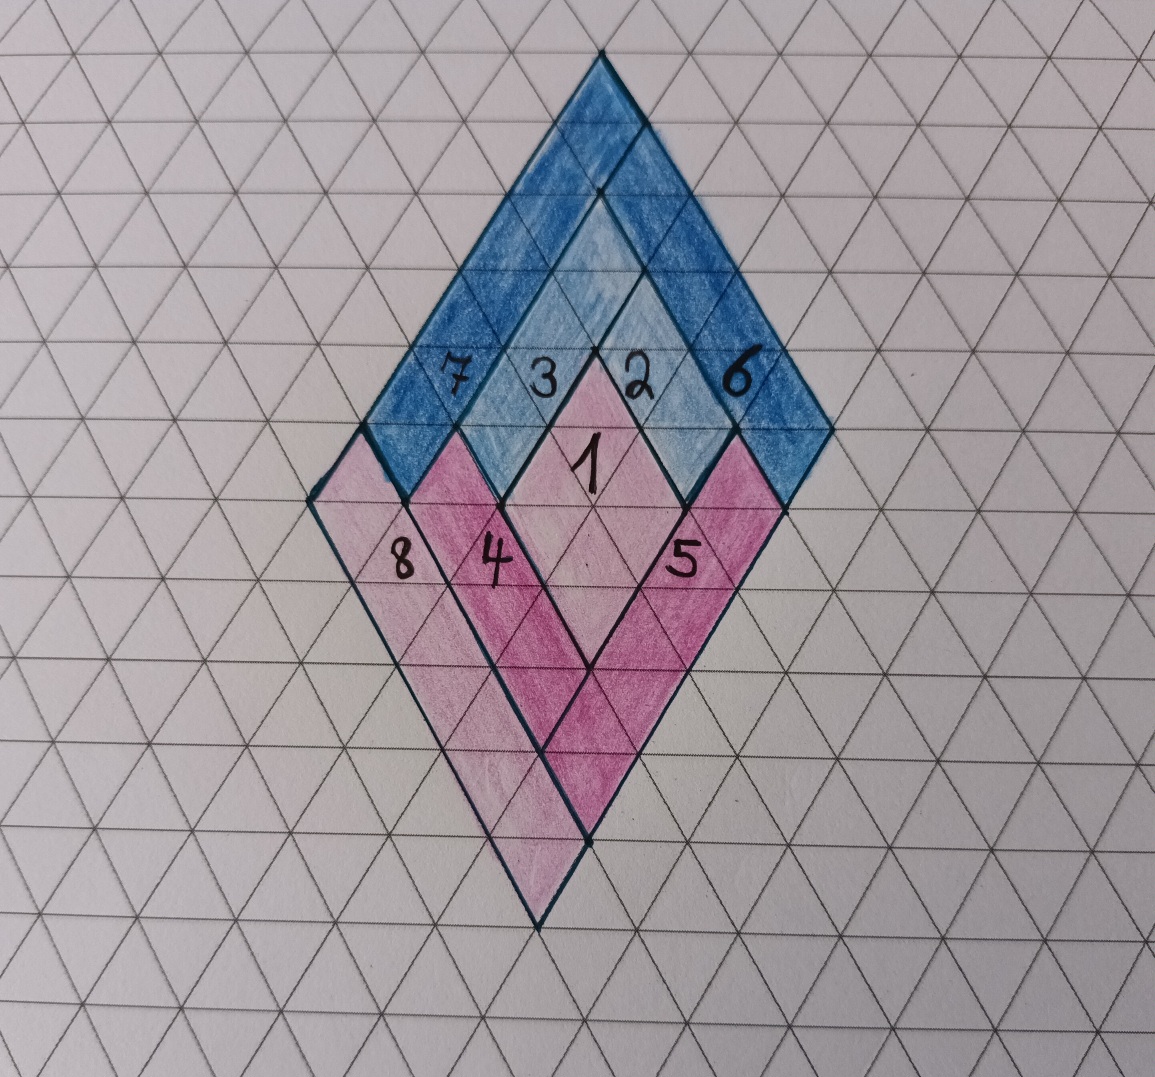
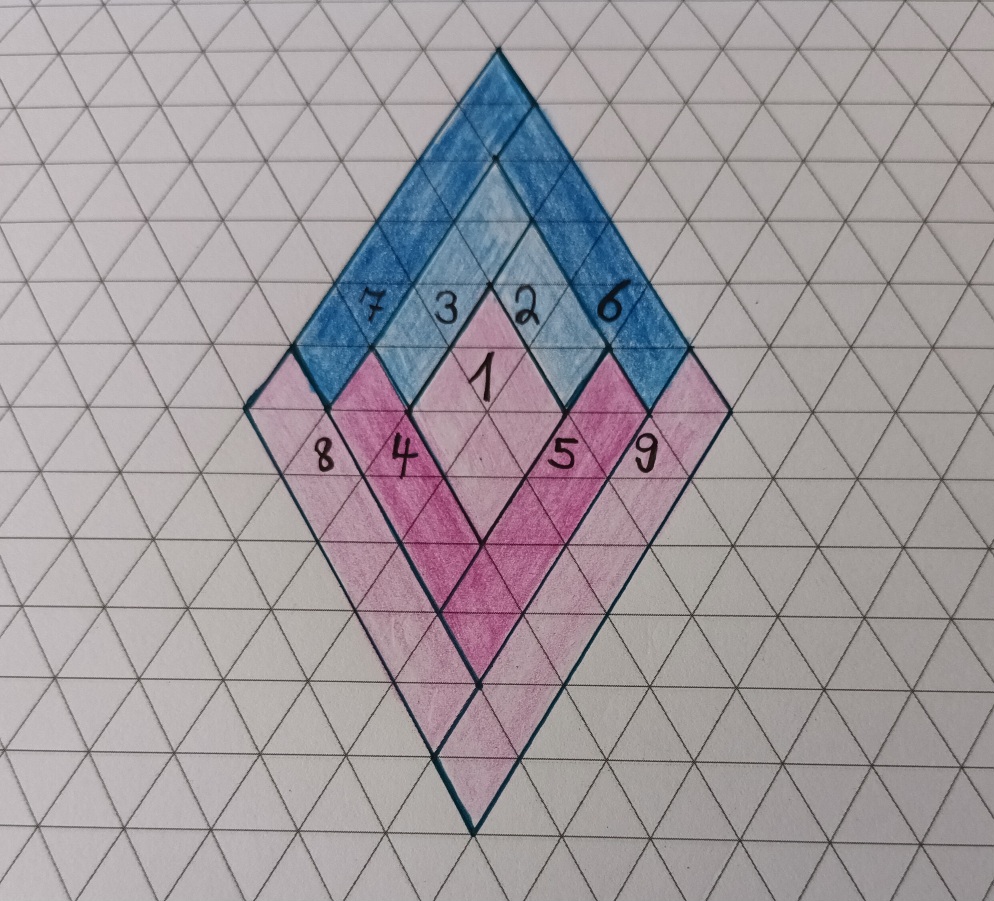
Now add strips no. 8 and no. 9 to the existing diamond.
I think you're in the flow now and don't need any further explanation, do you?
To be on the safe side, you can find the pictures with strips no. 8 and no. 9 here:
A third, fourth and perhaps fifth round?
You decide how many rounds your Log Cabin Diamond should have. I have limited my Diamond to two rounds.
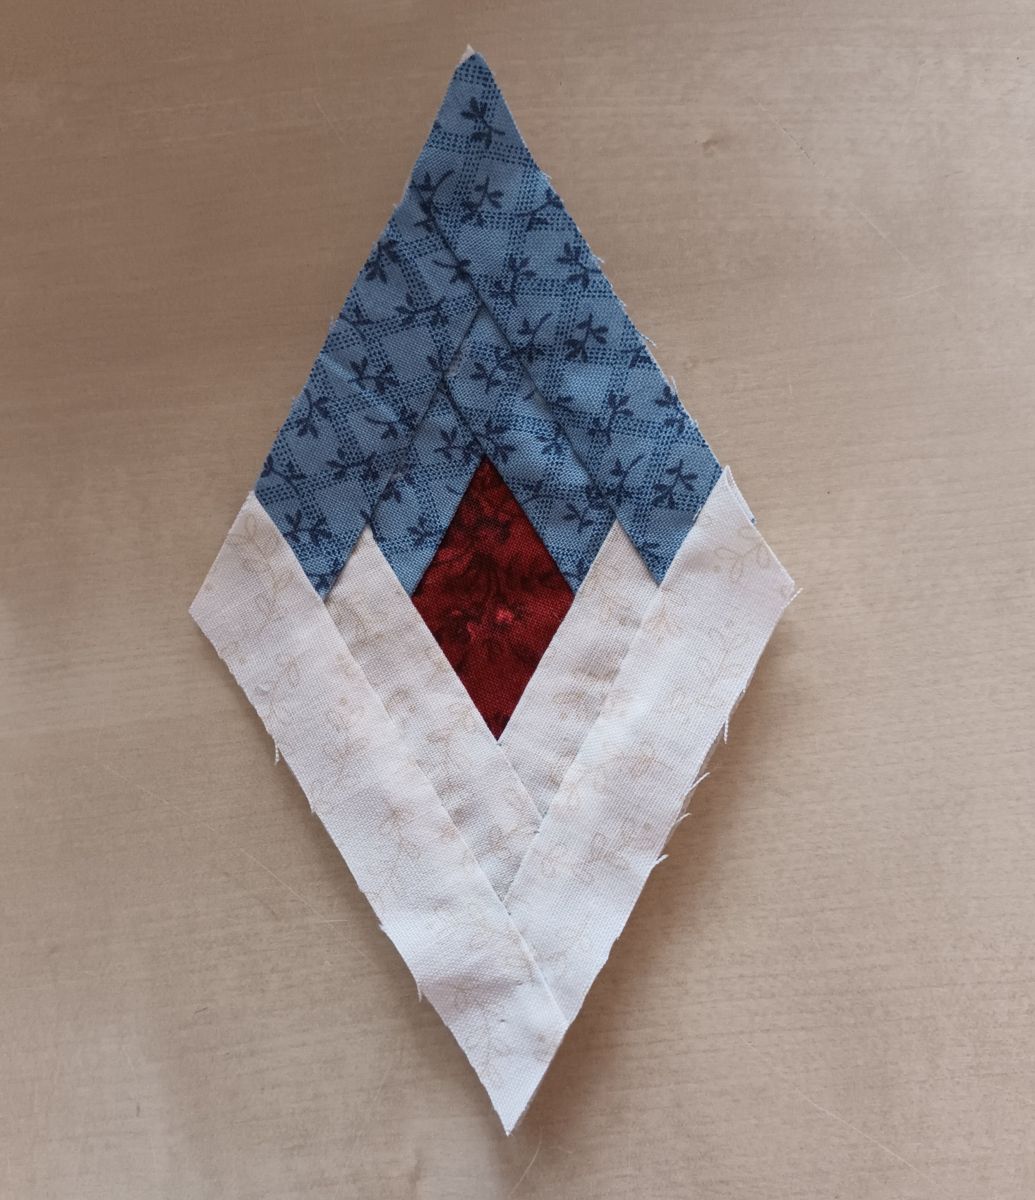
If you not only want to draw the Log Cabin Diamond, but also sew it, then I hope you have a lot of fun!
Perhaps you would like some help with sewing? I will soon be publishing the instructions on how to sew the Log Cabin Diamond here on the blog. Until then, have fun drawing and/or sewing!
Happy stitching!
Chris


