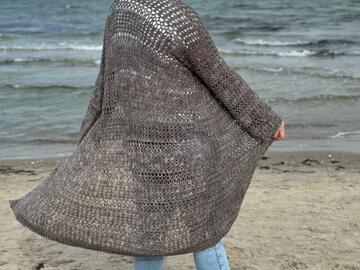
Free Beginner Guide for C2C Crochet (Croner to corner)
C2C is a crochet technique where you work diagonal in Blocks. You begin in the right corner one corner and work your way up to the left top corner. It’s an easy and fast technique to work Rectangles or Squares with loads of different Designs, Stripes or Pixel graphs.
It’s worked with a graph which shows the blocks. For a Square you work each row with a increasing by one until you reached the desired with and height at which you start to decreasing by one in each row
For a rectangle figure you would increase by one in each row until you reached the desired width where you start to decrease on one side and increase on the other side so you keep the same amount of Blocks until you reach the desired height where you start to decrease on both sides.
How to read the graph:
You start at the right bottom corner and work your way up diagonally, even rows (left to right) are backrows, uneven rows (right to left) are front rows. Easiest way is to print the graph and cross out the rows you have worked.

Work with colours: Generally, you would use a ball for each part for a colour, you finish the part and leave the yarn attached for the next row. If you work with many colours and even a colour repeats itself but later, you will end up with many different balls. Sometimes you can carry the yarn over to use it again, I would do that only if one of the blocks touching have the same colour. It might need some practice to figure out when its best to cut a yarn and sew in the ends or to carry it over. Also, it depends a bit on what you are Crocheting.


Let’s Begin: (Increasing)
Every Block always consist of 3 CH and 3 DC (Double crochet us term)
1.-3: First Block and First Row
chain on 6 and work in the 4.and the 2 following st 1 DC each, Turn.
4-7. Second Row first Block
ch 6, work 1 DC in 4th from hook and in each following of the next 2. attach the Block on the first block with a slst in the ch sp (photo 7)
8-9. Second Row second block
ch 3, work 3 DC in ch sp and turn.

3. Row
First Block: ch 6, work 1 DC in 4th from hook and in each following of the next 2. attach the Block on the first block with a slst in the ch sp. Second Block: ch 3, work 3 DC in ch sp and attach again with slst in ch sp, third Block: ch 3, work 3 DC in ch sp and Turn.
4. Row and all increasing rows
First Block: ch 6, work 1 DC in 4th from hook and in each following of the next 2. attach the Block on the first block with a slst in the ch sp, **ch 3, work 3 DC in ch sp attach with slst** repeat till only 1 block left, ch 3, work 3 DC on ch sp and turn.
Work like this until the required width is reached (repeat row 4)

Tipp: For a nice edge, work the very last DC on top in the ch st from the row before (green needle)

For a rectangle form:
For a better understanding I just changed the graph a bit:
To get a rectangle from we need to increase until we reached the desired width and keep the nr of blocks until we reached the height. For that well increase on one side and decrease on the other-So when the front is facing you, you would decrease on the left side and increase on the right side. Easiest is to attach a marker so you’ll always know where to decrease.

To Decrease for rectangle: work as many Blocks as shown on the graph, turn after attaching with slst and work 3 slst on the side to reach the place we need to start the next row, ch 3 and work 3 DC in ch sp work until end of row, turn and work 6 ch on this side where you don’t decrease:

The decrease in general:
When hight is reached for rectangular or square we start to decrease on both sides, so the blocks are one less each row.
After Turning the work we work now 3 slst along the st and ch 3 to get the hight for the Block. Work 3 DC in ch sp and slst, finish number of blocks for the row as stated, tun and again 3 slst along the prev DC.

Colour Change
Work the last DC with the old colour but wait with the very last pull through, use the new colour to finish the last loop from the DC, use the new colour for the slst as well. Drop the unused Colour on to the back of the work.
Carry the thread
Sometimes you want to carry a thread, so you won’t need to start a new ball for every little bit. For this you lay the unused yarn behind the work when working in the front row and in front if working on a back row, and crochet around it.
Sometimes you might need the thread earlier than where it ended in the row before, for that you’ll grab the yarn and crochet around just make sure to pull just enough to work around the sides from where it ended to where it’s needed.
This is how my backside looks like.

Have fun with working the C2C technique


