The only thing you need is cotton fabric in different colors and/or patterns. Either from fabric remnants or from larger pieces. In any case, you need at least four different colors and/or patterns so that you can recognize the patchwork patterns in the individual pieces (blocks) later on.
I always accumulate scraps of fabric. They are far too good to throw away. If you feel the same way and are wondering what you could do with these beautiful fabric scraps, then I invite you to take part in my first Fabric Scraps Quilt Challenge.
I can't tell you the amount of fabric or fabric scraps in advance, because I don't know how big your quilt will be, how many fabric scraps you want to use and which patterns you prefer to sew afterwards.
I assume that you have basic sewing skills, whether by hand or with a sewing machine. Both are possible, just sew the way you like it.
The timeline
Over the next few months, I will be introducing you to various patchwork patterns. As the warmer season is hopefully coming soon (so far May has been rather cold and rainy for us in Germany ...), we all have other work waiting for us in addition to our job, household and possibly family, such as the garden, barbecues and vacation planning...
This is exactly why I don't want to stress you or myself with a tight schedule. Take a little time to sew a patchwork pattern. Maybe you won't have the time and inclination for the next block until a week or two later?
No matter, sew whenever you have time. My blog articles here at crazypatterns are waiting for you, there is no time limit. If you like, please post your block and your progress here. This will motivate you, me and certainly others to take part in our challenge!
A quilt consists of three layers
A quilt consists of three layers: the lovingly sewn front, a batting of the desired thickness and material (polyester, wool, bamboo, ...) and a back, which is usually a simple cotton fabric. For particularly chilly people like me, the back can also be made from a fleece fabric.
The three layers are later joined together using stitches, known as quilting, to prevent them from slipping. The edge is embellished with a binding.
The quilt
Over the next few months, I will be showing you various simple patchwork patterns. These individual sewn pieces, also known as blocks in patchwork and quilting, are combined to form a quilt. Depending on how big you want to sew your favorite quilt, you will need different numbers of blocks. For a potholder, an enlarged block will certainly suffice, for a baby quilt you may only need half the number of blocks that you need for a cozy quilt for the couch.
It is important to me that you take the freedom you need to sew. If you particularly like a pattern, then please sew this pattern, i.e. this patchwork block, more often and then you can work it into your blanket several times. If you don't like a pattern, please leave it out and sew the other patterns instead.
The main thing is that you enjoy it and the blanket turns out just the way you like it.
Are you ready?
Then let's sew the very first patchwork block:
The Nine Patch pattern
One of the most popular patterns in patchwork is the Nine Patch pattern. The term nine patch has two meanings in patchwork.
On the one hand, it describes a patchwork block consisting of nine squares, three squares in a row and three rows high.
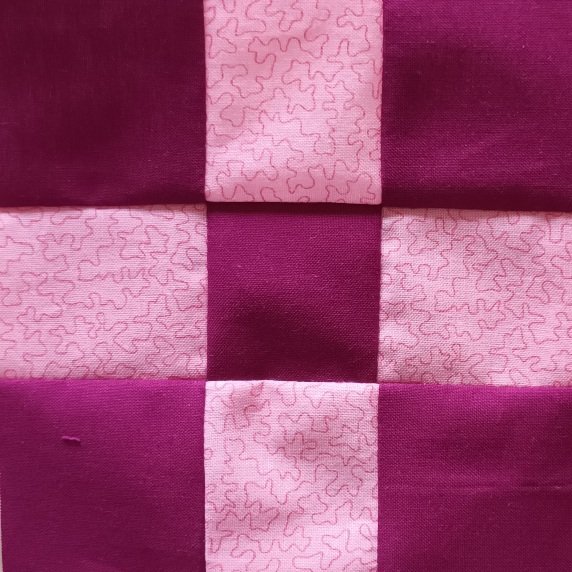
On the other hand, this pattern is also referred to here as the Nine Patch pattern:
.jpg)
You will see four light squares arranged around the center. The darker squares are arranged diagonally crosswise in this pattern.
I wish you lots of fun with your first patchwork pattern, your Nine Patch Block!
How to sew your first patchwork pattern, the Nine Patch Block!
As just mentioned, you will need
- 4 light squares
- 5 darker squares.
Each square measures 5.5 x 5.5 cm.
The size of your block and the seam allowances
The blocks, i.e. the respective patchwork patterns, have a finished size of 12 x 12 cm. Finished size means that the block is 12 x 12 cm when it is completely sewn into the patchwork quilt.
As all fabric pieces have a seam allowance of 0.75 cm, the unfinished block, i.e. the block including the seam allowance on the sides, measures 13.5 cm.
If you prefer to sew your blocks in a different size, you are welcome to do so. In this case, please work out for yourself how big the individual pieces of fabric will be 😉
The challenges of the Nine Patch pattern
What are your challenges in this challenge? ;-) I'd rather point out the challenges that await you in this block.
If you are already an experienced seamstress, then it is probably no longer a big challenge for you, but hopefully it will be interesting for some of you. For example, I always have to remind myself or alternatively use the seam ripper later or live with the result... :-)
1st Challenge: The exact cut
The smaller the piece of fabric, the more noticeable it is if you cut it inaccurately.
Our square has a size of 4 cm and a seam allowance of 0.75 cm on each side. It is therefore 5.5 x 5.5 cm in total.
If you now overlap by 0.2 cm, i.e. 2 mm (a size that is unlikely to be a problem with a kaftan), the squares will not be flush with each other when sewing. This is not the end of the world, it's not bad, but it probably bothers some people, because we have to correct this inaccuracy later by sewing.
2nd Challenge: The exat seam allowance
I have given you a seam allowance of 0.75 cm. You should keep to this if possible. A matching presser foot helps a lot. As there are also presser feet with a seam allowance of a quarter of an inch, please make sure that you are using the correct presser foot.
3rd challenge: The correct sequence
As already mentioned, there is a chance of mixing up the order of the fabric pieces while sewing. For me, it was usually the third piece of fabric in a row that I sewed to the wrong end of the other two pieces. No big deal, but I prefer to check a second and third time to make sure the order is still correct. Have I already mentioned that I hate unraveling things? :-)
4th challenge: The seam crosses
Yes, it looks so easy, three squares per row and three rows sewn on top of each other. But it's tricky, especially for beginners, to make sure that the intersections of the squares are exactly at right angles.
Only practice and forbearance will help if they don't lie exactly. My very first patchwork quilt consists of squares and the intersections are sometimes offset by several centimeters. But it still warms wonderfully and I love it dearly!
I now try to make the intersections as precise as possible, but I don't care if they are not. Practicing composure is more important to me in patchwork...
So, these are your first challenges in this quilt pattern. You will encounter some of them again in the course of the next blocks. I can assure you that by the end of our quilt challenge you will have practiced, trained and tried out a lot and that's what makes a challenge so much fun.
How to sew the individual pieces together
I find it easiest if I first lay out the individual pieces in the same way as they will be sewn together later.
For our Nine Patch Block, you lay out the lighter and darker fabric pieces in the order described above. You can see the arrangement again in the photo:
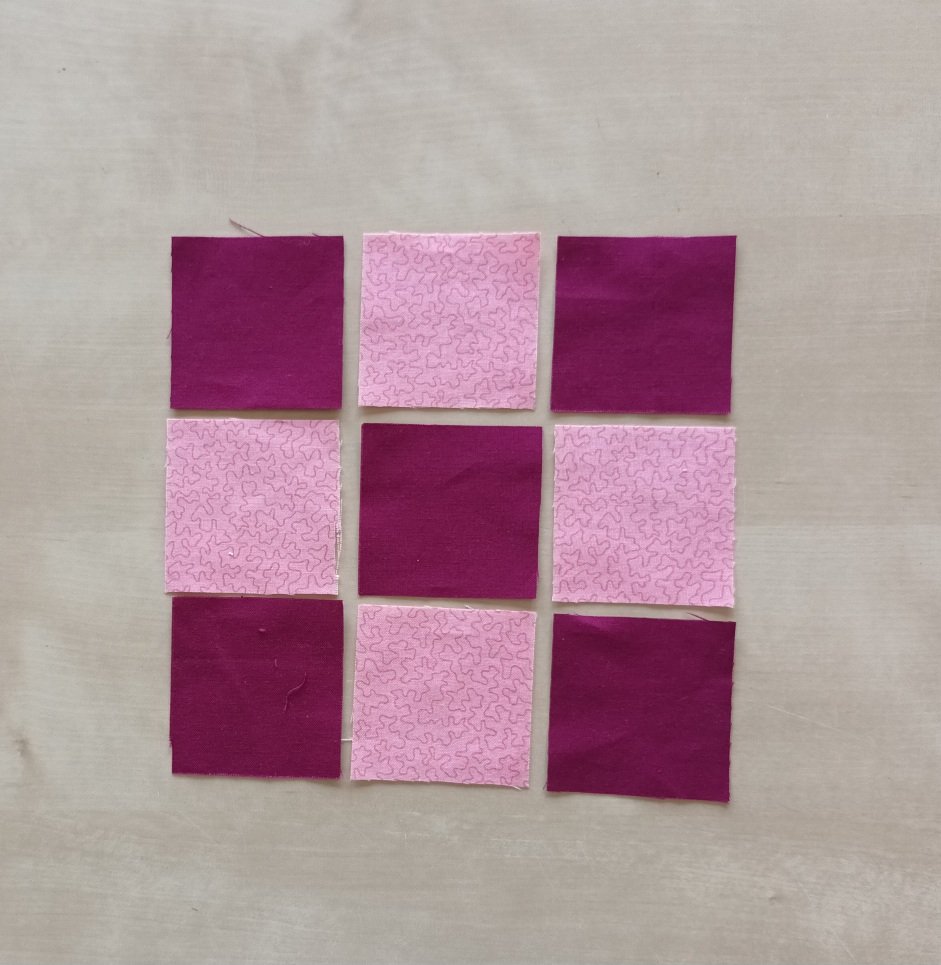
I have found it useful to lay out the cut fabric pieces in the correct order and then photograph them. That way I can always check that I'm following the right order. Believe me, it often happened to me in my first year of patchwork that the pattern looked different after sewing than it should have... 😉
Of course, you can decide the order in which you sew the pieces together. I'll show you the order that I find very practical:
First, I sew the pieces together within a row. After I have sewn all the rows together individually, I sew the individual rows together. The block is finished.
Some blocks are so easy to sew with a little practice that you can later work on several blocks at the same time. However, I would sew your first patchwork pattern slowly and in the order described. For me, it is very frustrating when I sew myself into the first sewing project and have to unravel it again. But maybe it's also because the seam ripper and I aren't great buddies ;-)
The sewing sequence
Here you can see the individual steps as a series of photos and get some explanations:
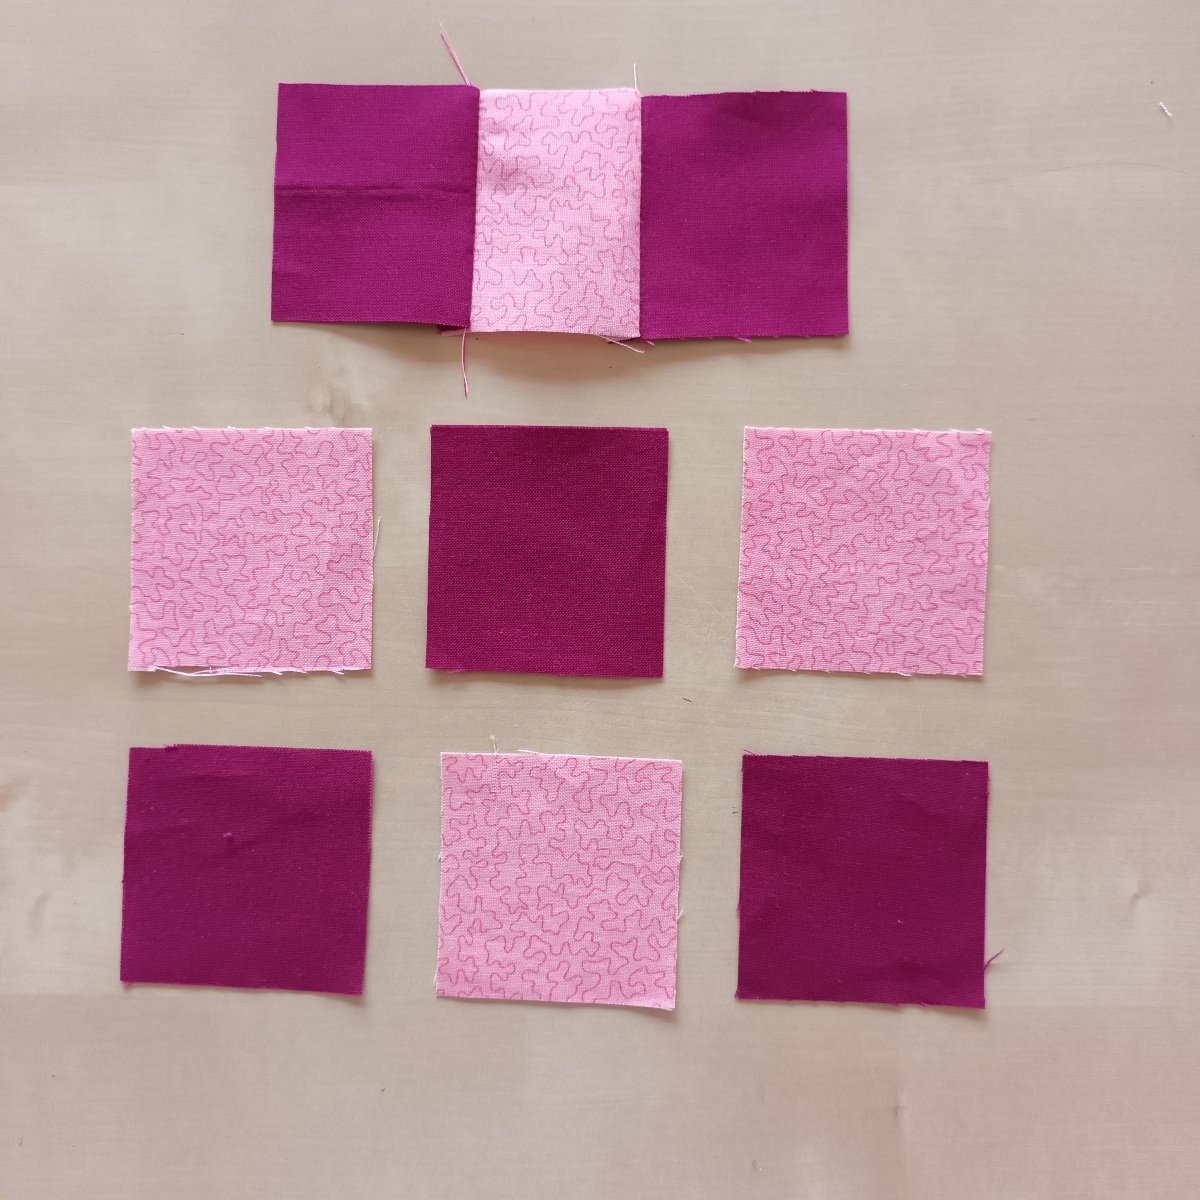
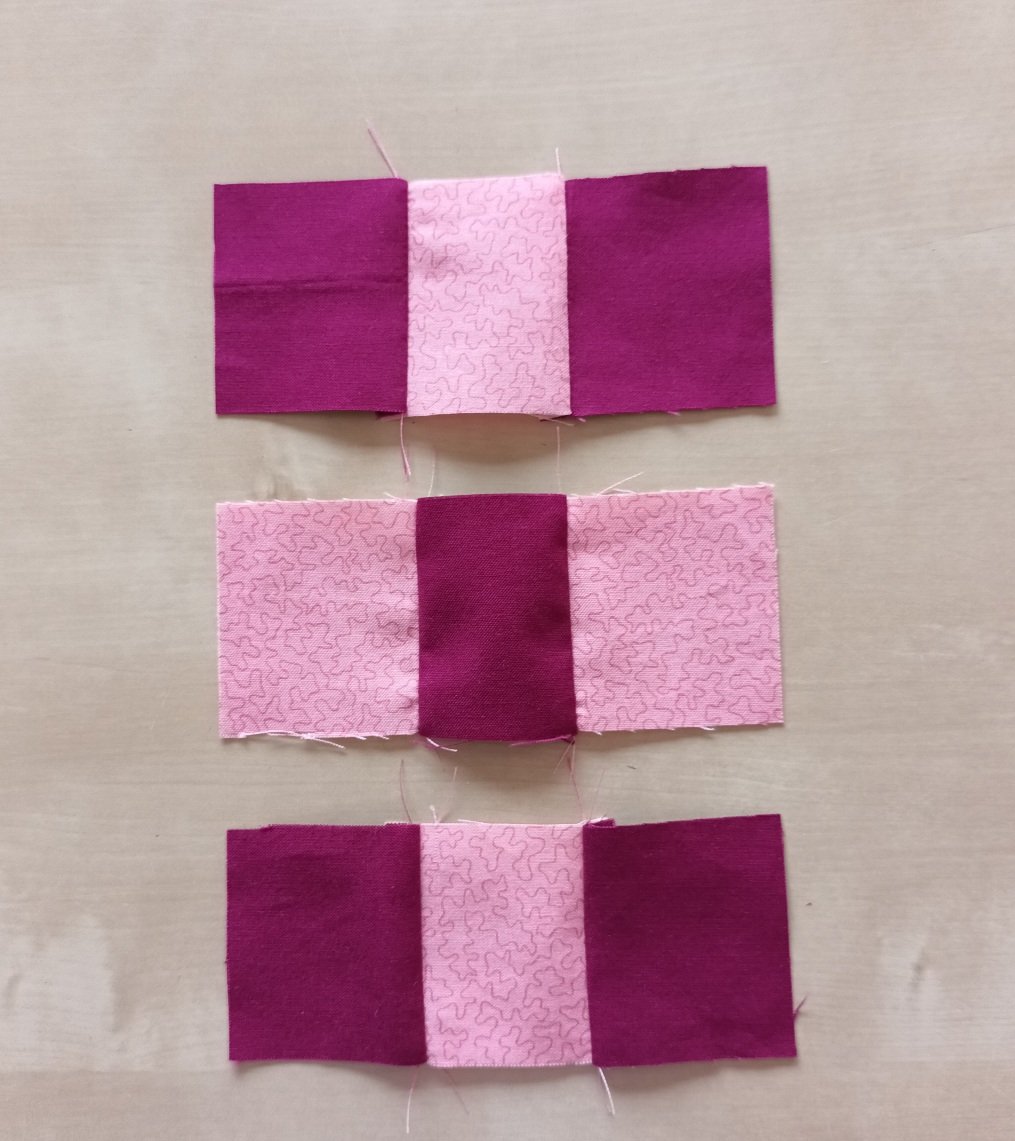
First, lay out the individual pieces of fabric in the correct order.
.jpg)
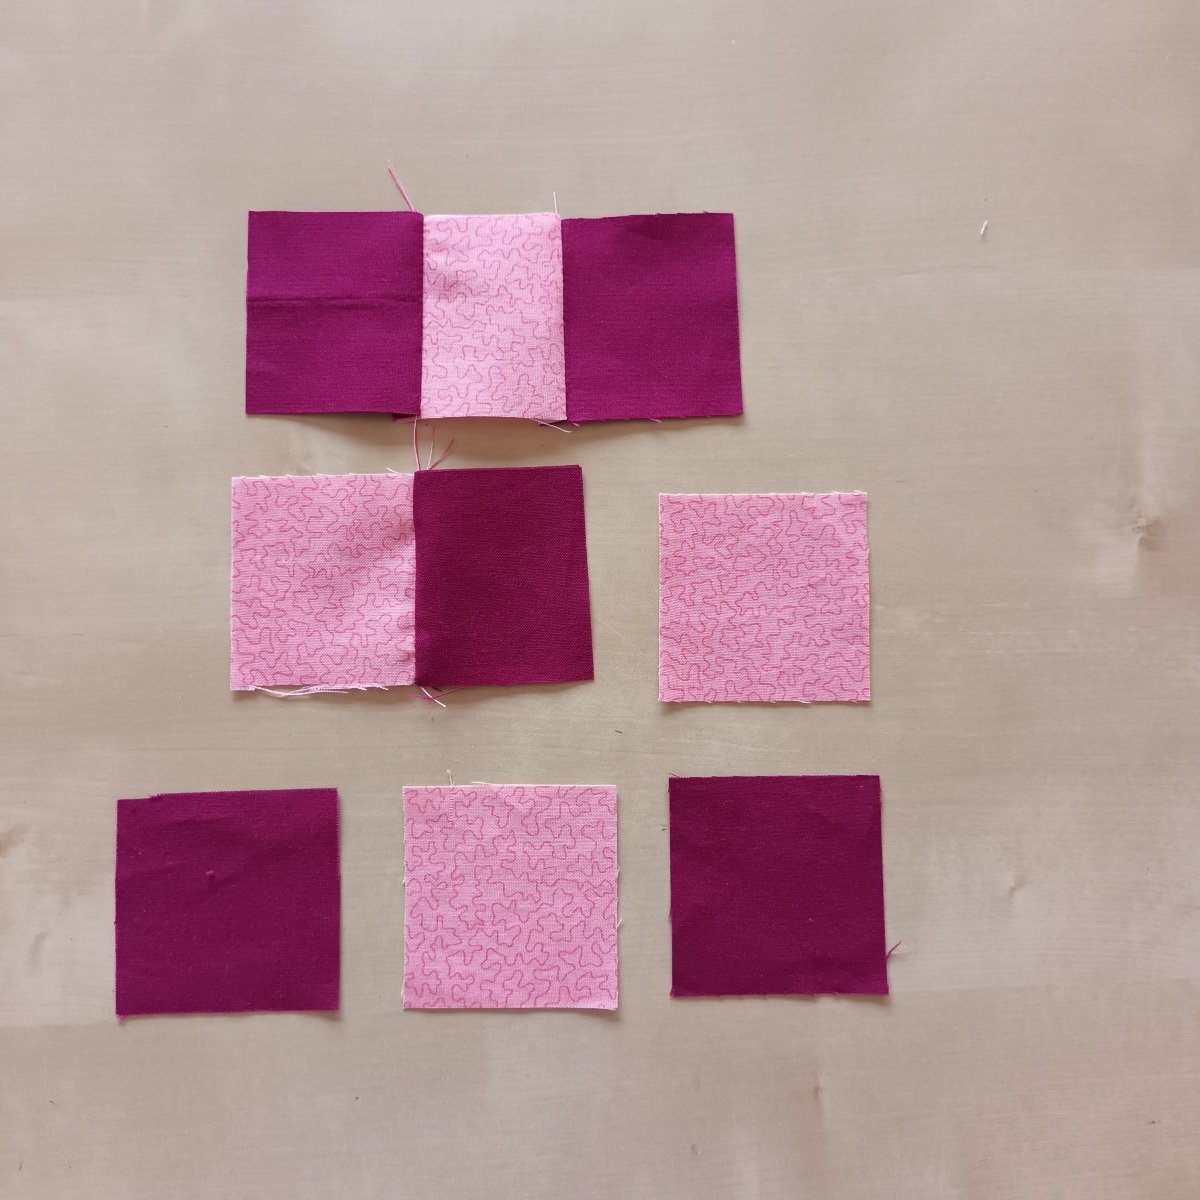
I always start with the top row and work my way from left to right if the pattern allows, but that is a matter of taste.
If you want to proceed in the same way, then sew the top two squares together first.
Please DON'T iron
You do not need to iron the fabric pieces after each seam, in fact I strongly advise you not to. When ironing, there is a risk that the movement of the iron will distort the fabric a little each time. The more often you iron the piece of fabric and the smaller it is, the more serious the effect!
After sewing, all you need to do is unfold the fabric pieces and smooth the seam with your fingers. Funnily enough, this is called “finger ironing”.
The pieces are not as flat afterwards as they are after ironing, which doesn't look so nice in the photos. But honest photos are more important to me than embellished ones, there are already too many of them on the internet ;-)
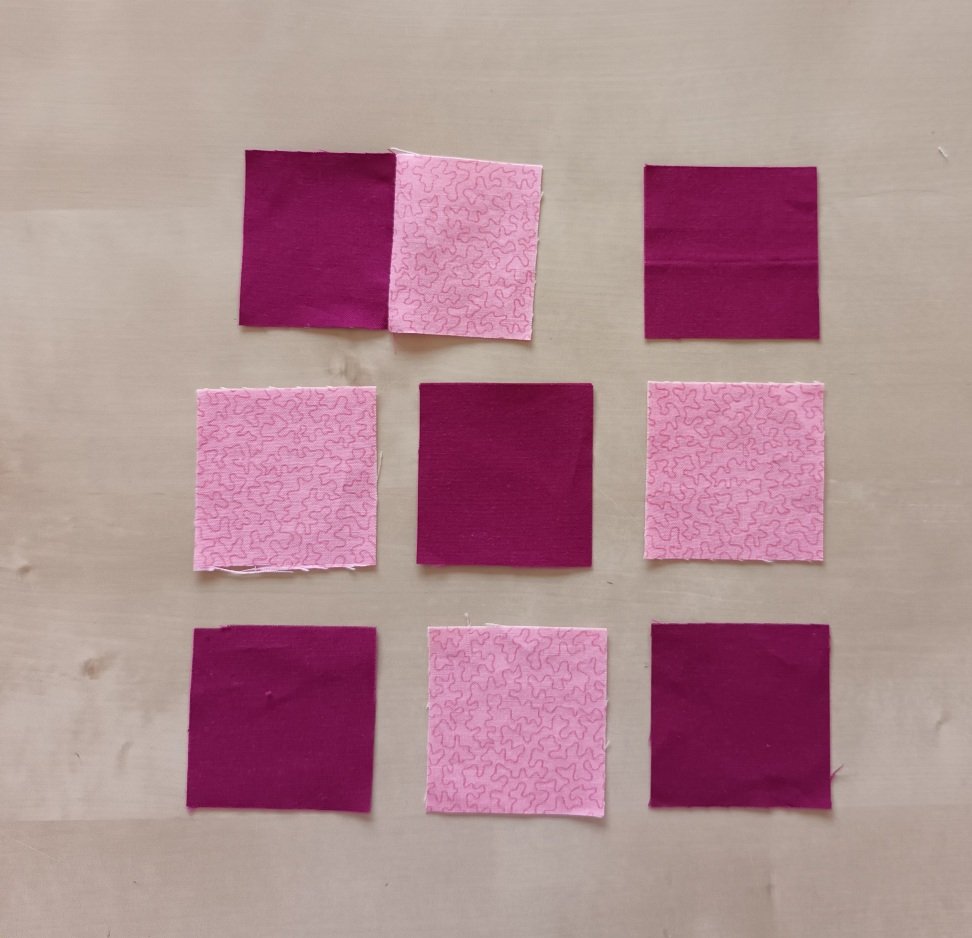
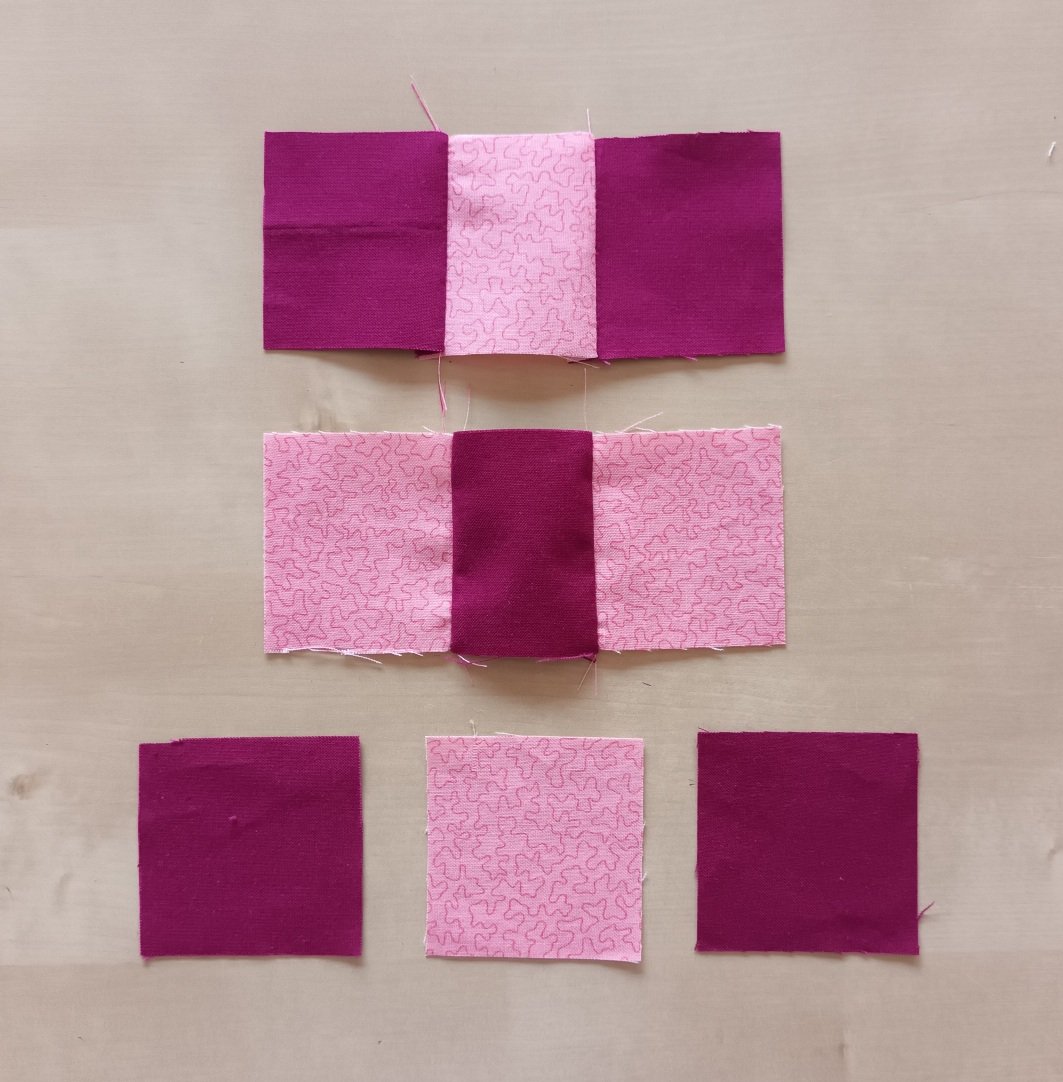
Next, sew the third, right-hand square to the other two. The first row is finished.
Sew the second and third rows in the same order.
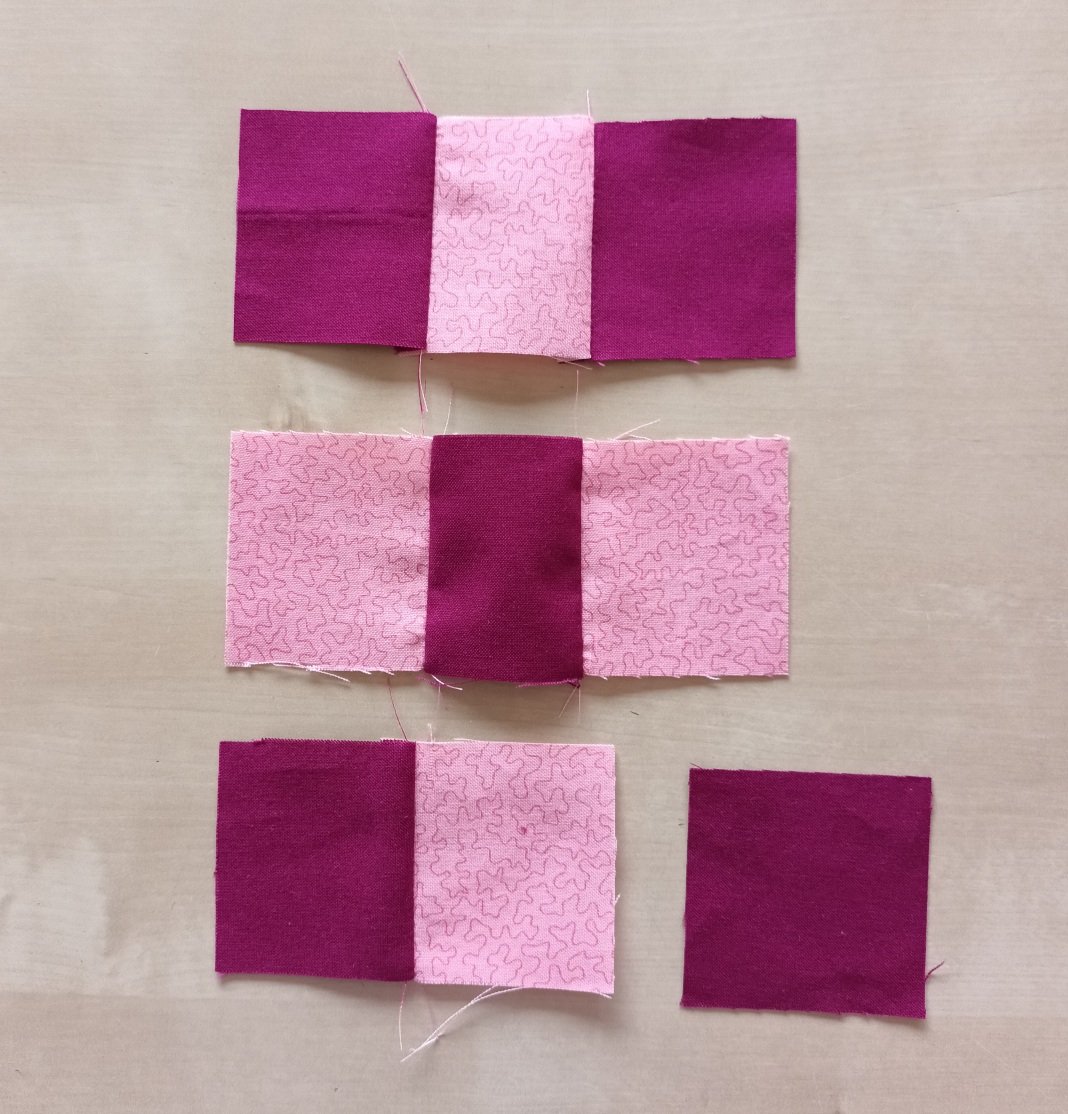
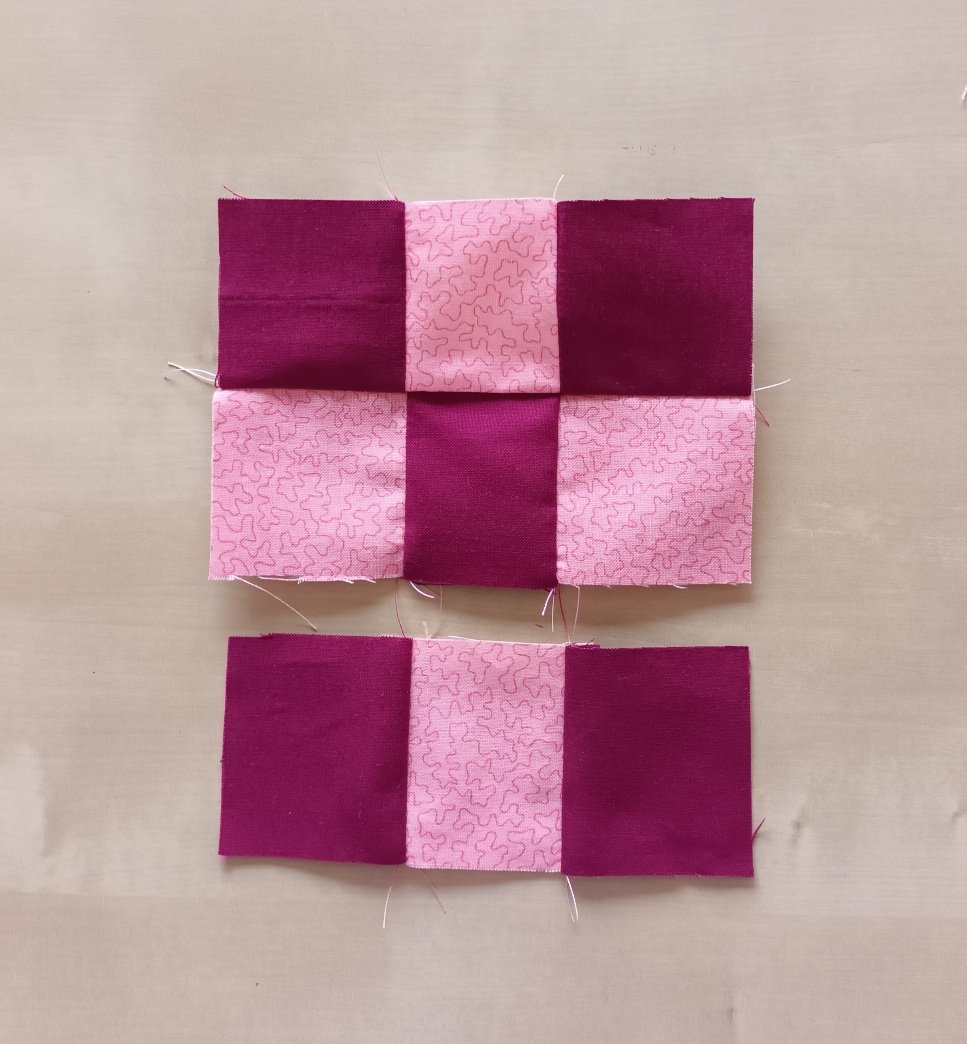
Now comes your challenge:
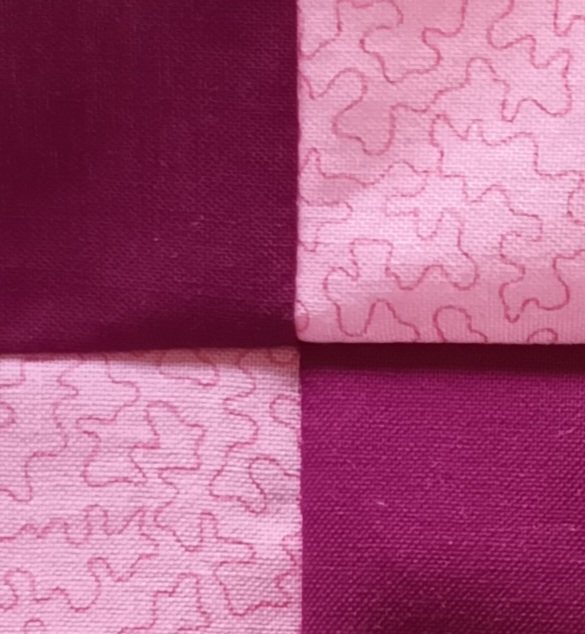
You sew the rows together and try to ensure that the intersections of the squares are as exact as possible.
Here is the detailed photo first:
.jpg)
Good luck! It usually helps if you fix the crossing points with pins. Please don't be too hard on yourself, the block is also very nice with less precise crossing points, I speak from experience...
.jpg)
You have made it! You have sewn the first block in this quilt challenge!
Be happy and if you want us to be happy with you, please post the photo of your block here at crazypatterns.
Have fun sewing and
happy quilting!
Chris


