A new challenge awaits you today! After working with large and small squares in the first blocks, the Nine Patch Block, the Rail Fence Block and the Single Irish Chain Block, the first triangles are waiting for us today. I can imagine that after the first three blocks you are already experienced in sewing squares, so look forward to the challenge with the new challenge.
For all patchwork enthusiasts who already know how to sew an HST, please skip the relevant paragraphs here.
Have fun with geometry
I don't know how well you liked geometry in math class at school? For me it was so-so, I just stubbornly memorized the necessary formulas... If my teacher had explained geometry to me using patchwork blocks, I would have been much more motivated and enthusiastic. 😉
Our triangles are right-angled triangles, which means that they have an angle of 90 degrees.
The nice thing about our right-angled triangles is that two of them, sewn together in the right way, form a square. This is because the corner of a triangle has a 90 degree angle and, as you know, squares also have a 90 degree angle in each corner. Cool, right ;-)
It's also very practical for our purposes!
HST: Half Square Triangles
In patchwork, there is a very nice English term for this square, which consists of two triangles: HST, or Half Square Triangles.
Method for sewing an HST
There are various methods of sewing two right-angled triangles together. I'll show you a simple method for sewing two HST from two squares in one go.
I will show you some of the other methods in the course of our challenge.
The triangles warp slightly
Triangles sew very well as long as you do not pull or tug on them while sewing. Please do NOT iron the triangles or the HST after sewing, just smooth them out a little with your fingers. Any pulling or tugging can cause the fabric to warp and change the size of your triangles.
To iron or not to iron...
The beauty of patchwork and quilting is that everyone can work the way they want. There is no “patchwork police” and most quilters are very tolerant of other opinions. And if I come across a “patchwork policewoman”, I try to ignore her. :-)
That's why there are only a few topics where there are heated discussions. One topic is whether ironing is done while sewing. You know my opinion on this now, you can find the other opinions on the internet ;-)
But before we sew your HST, let's discuss the construction and cutting of the block.
The structure of the Broken Dishes Block
The Broken Dishes Block is a four-patch block.
This means that it only contains two squares horizontally and two squares vertically. As you can see, the first four blocks in our challenge can be classified as either a four-patch block (2 x 2 squares) or a nine-patch block (3 x 3 squares).
Free choice of number of fabrics
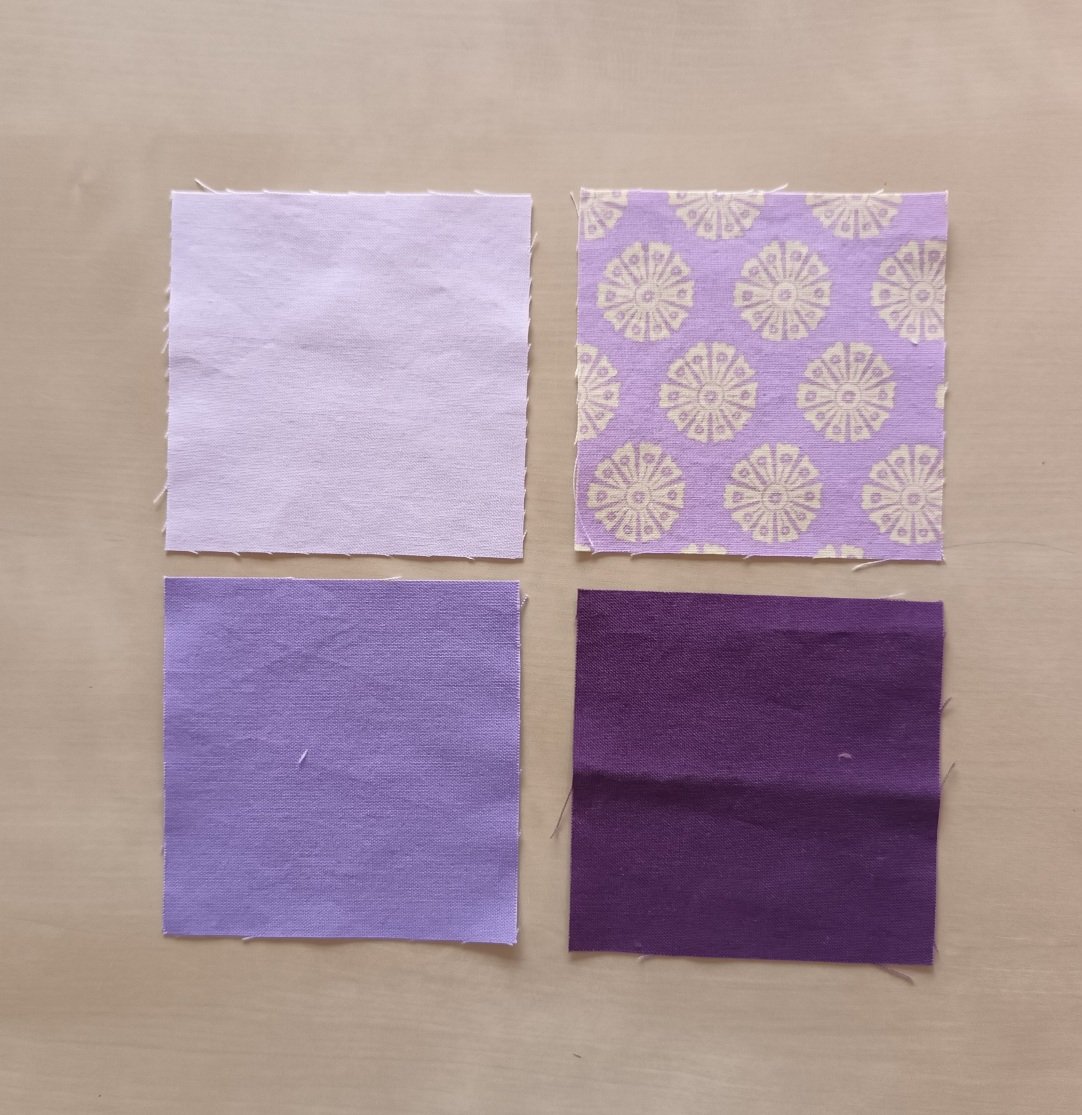
What makes this block so suitable for our scrap fabric quilt challenge is that we can use four different fabrics and only need enough of each fabric for one square.
Of course, you can also use more or less fabric, just as you like!
This of course changes the look of the block and the effect of the triangles. For me, it's precisely this playfulness that gives patchwork its charm and individuality. For the sake of accuracy, I'll mention that the block with two or three colors in the patchwork then has a different name ;-)
The size of the Broken Dishes Block
The Broken Dishes Block has a finished size of 12 x 12 cm.
The seam allowance is 0.75 cm. The unfinished block therefore has a size of 13.5 cm including seam allowances.
Cutting the Broken Dishes Block
You need 4 squares measuring 9 x 9 cm.
Perhaps you're wondering why we only need four squares? The solution is coming soon.
How to sew the Broken Dishes Block
First you sew your HST, i.e. your squares, which consist of two triangles.
What I really like about this HST technique is that I sew two HSTs at the same time. This gives me the feeling of being finished in no time, especially when I need a lot of HST for a patchwork block.
How to sew your HST
Now divide the four cut squares into groups of two. The two selected fabrics will then lie opposite each other as triangles.
.jpg)
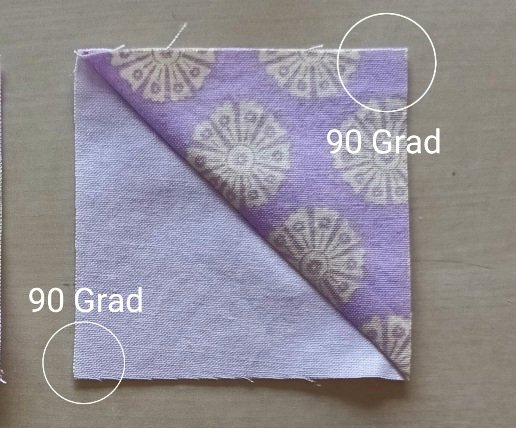
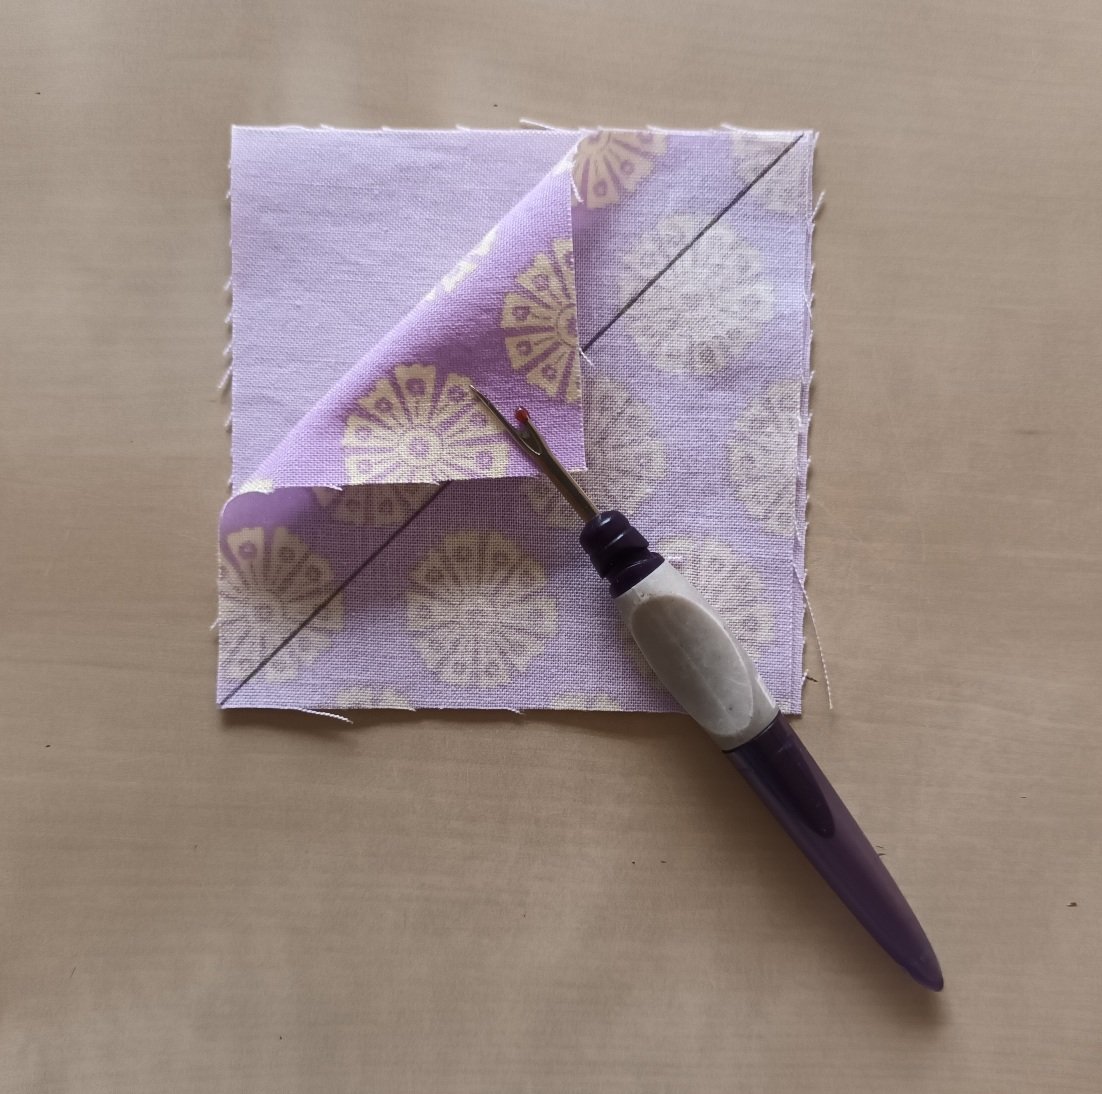
First you draw a diagonal on the left, i.e. the non-beautiful side of ONE square of a double pack. Marking is very easy with a pencil.
I like to use a soft pencil for this, preferably with a hardness of “4B” or even “2B”. The standard pencils have a hardness of “HB”, which is personally too hard for me to draw on my fabric. If the pencil is too hard, it scratches the fabric and tends to warp the fabric.
Now place the two squares on top of each other. The right side, i.e. the pretty side of the fabric, is on the inside. The square on which you have drawn the diagonal is on top, so you can see the diagonal clearly.
Your challenges
Now there are two challenges for you:
1st Challenge:
Can you sew the squares without the two squares slipping?
Depending on whether you are an experienced seamstress and/or are willing to take risks you have the option of joining the two squares together so that they don't slip under the sewing machine.
To attach the two squares, you can either use pins or a tiny bit of a temporary glue stick (water-soluble, especially suitable for fabrics). A special glue stick like this removes well from my fabrics after washing, but as always, please check beforehand whether your fabrics tolerate it and whether it can be easily washed out of your fabrics.
If you work with the glue stick, please use it sparingly on the right side of your square and only on the center line, i.e. only on the diagonal that you have drawn from the fabric corners.
2nd Challenge:
Can you sew the seam allowance at a distance of 0.75 cm from the center line or do you prefer to mark the seam line in advance?
It is absolutely fine to mark the seam line in advance. This way you can check at the same time whether you are really sewing with a seam allowance of 0.75 cm or whether you should move your needle, for example, to get an exact result.
Do you really have a 0.75 cm seam allowance?
There are some seams in patchwork patterns that are forgiving of small inaccuracies in your seam allowance. For example, if your piece of fabric is larger or if you cut the fabric slightly larger and trim it to the correct size after sewing. This is called trimming, by the way.
If you don't have this kind of leeway, it's a great help if you try out a piece of test fabric to see whether your sewing machine REALLY sews a seam allowance of 0.75 cm or whether it's actually 0.6 cm or 0.8 cm.
Maybe you don't sew so straight, so that the seam allowance is sometimes larger, sometimes smaller. None of this is a big problem, but HST in particular is very susceptible if the measurements are not correct.
To save you any stress in this regard, I have calculated the fabric squares to be larger. This allows you to compensate for small (! ;-) inaccuracies in your seam allowance by cutting your HST to the correct size after sewing.
Marking seam lines
You have drawn your seam lines to the left and right of the diagonal as required.
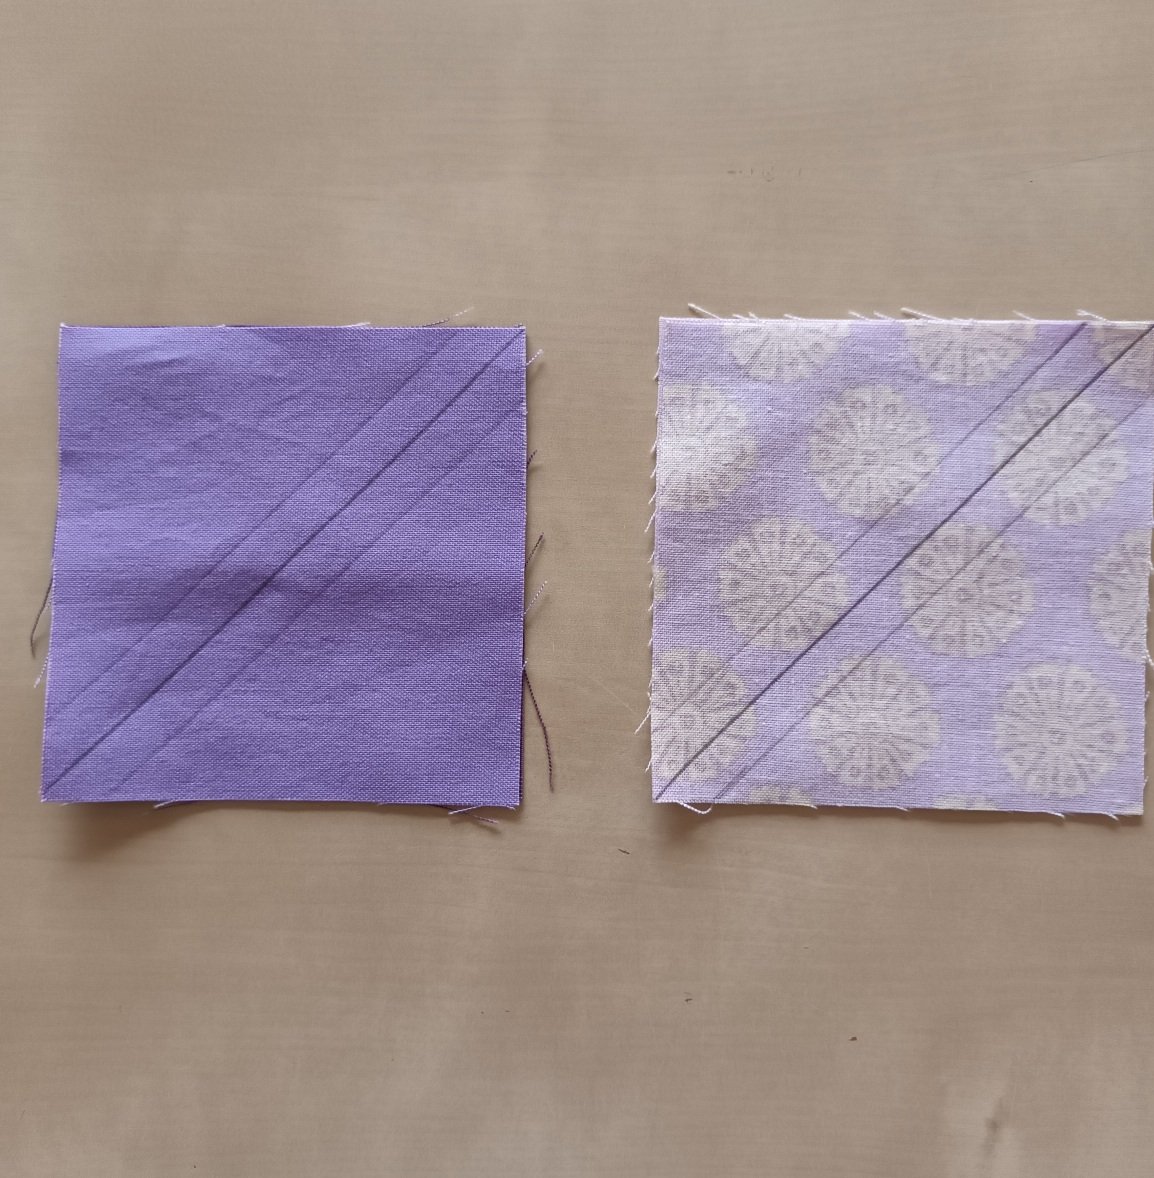
Now sew a seam on your seam lines, i.e. to the left and right of the center line. This is what your seams look like:
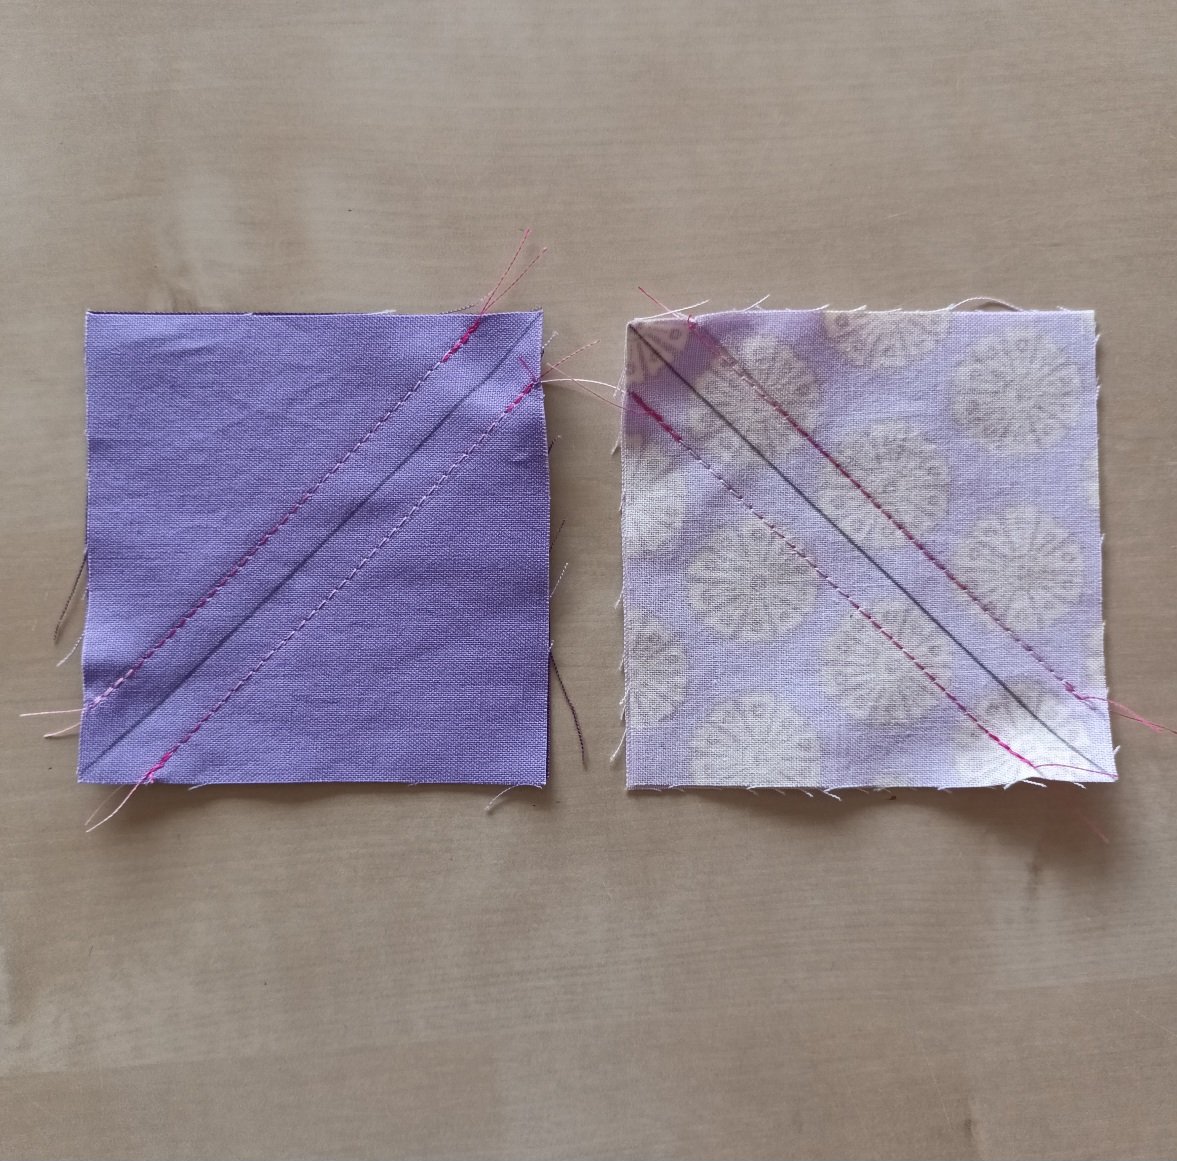
Now comes the exciting part. You cut through the fabric on the center line. It is very important that you check again before cutting that your seams have a seam allowance after cutting. Believe me, I have cut incorrectly more than once...
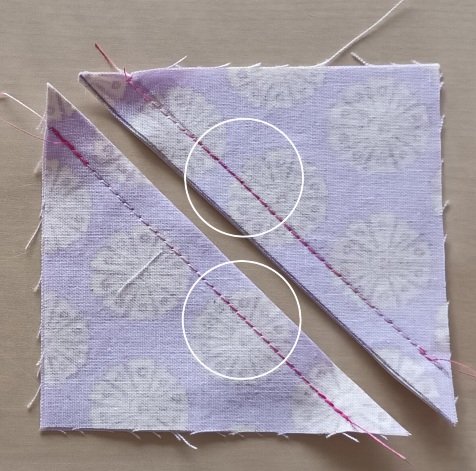
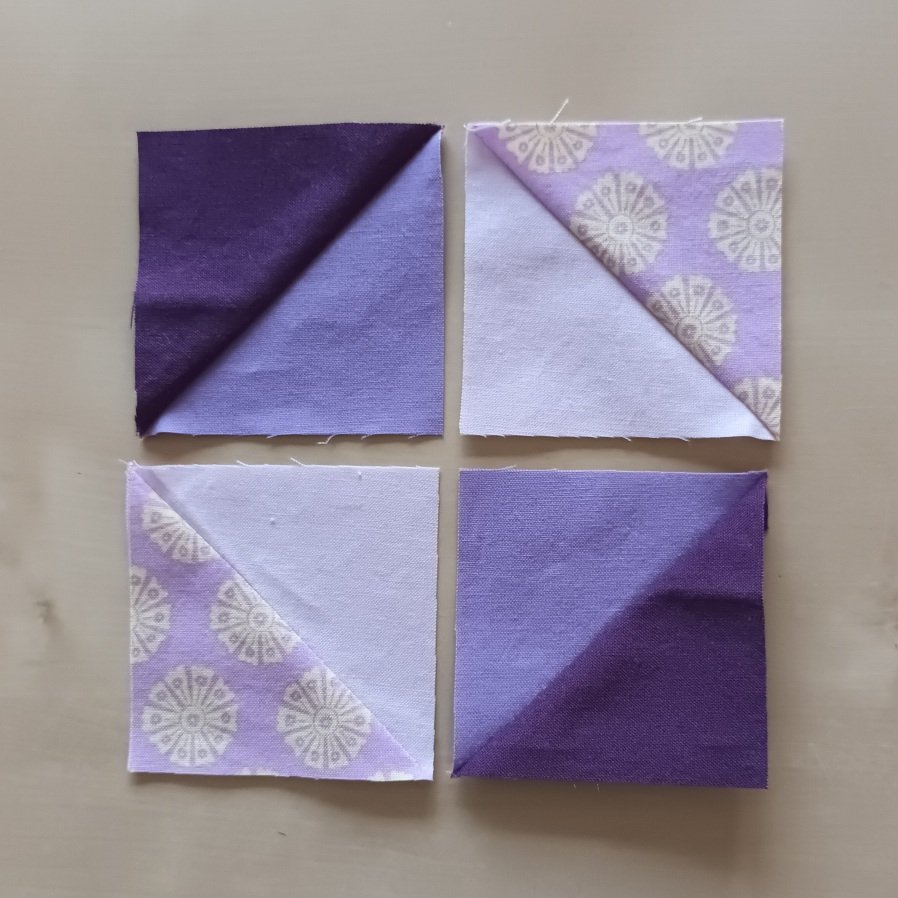
Next, unfold the two pieces of fabric, carefully smooth them out with your fingers and you have two HST.
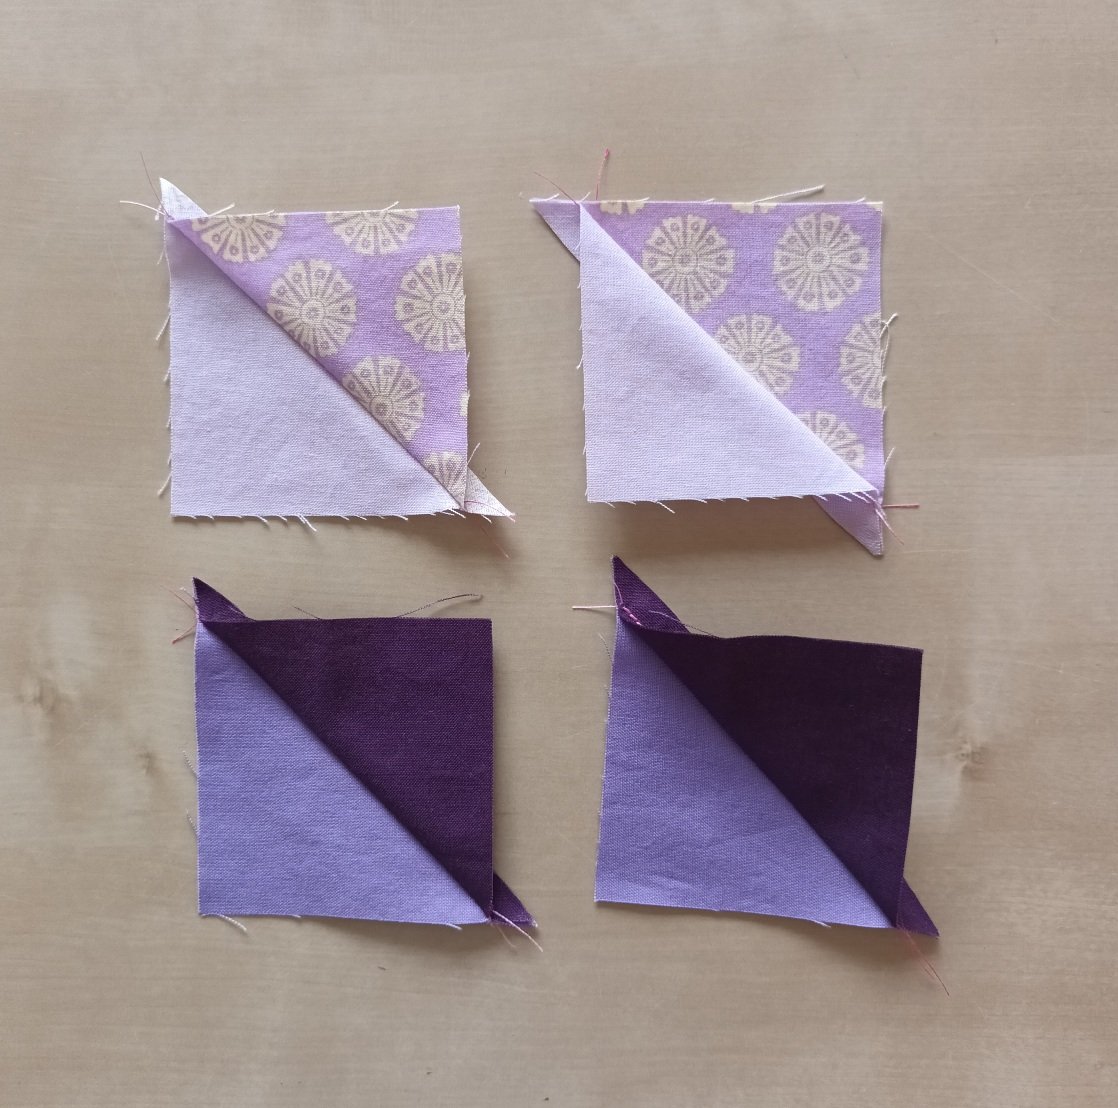
Sew the other two squares together in the same way. That's how quickly you have sewn four HSTs.
Now check the size of the squares. Each square should be 6 cm plus 1.5 cm seam allowance (2 × 0.75 cm), i.e. 7.5 cm. If necessary, trim the squares now, i.e. cut them to size. However, please make sure that you cut them evenly on all sides so that you still have two triangles of the same size in your HST.
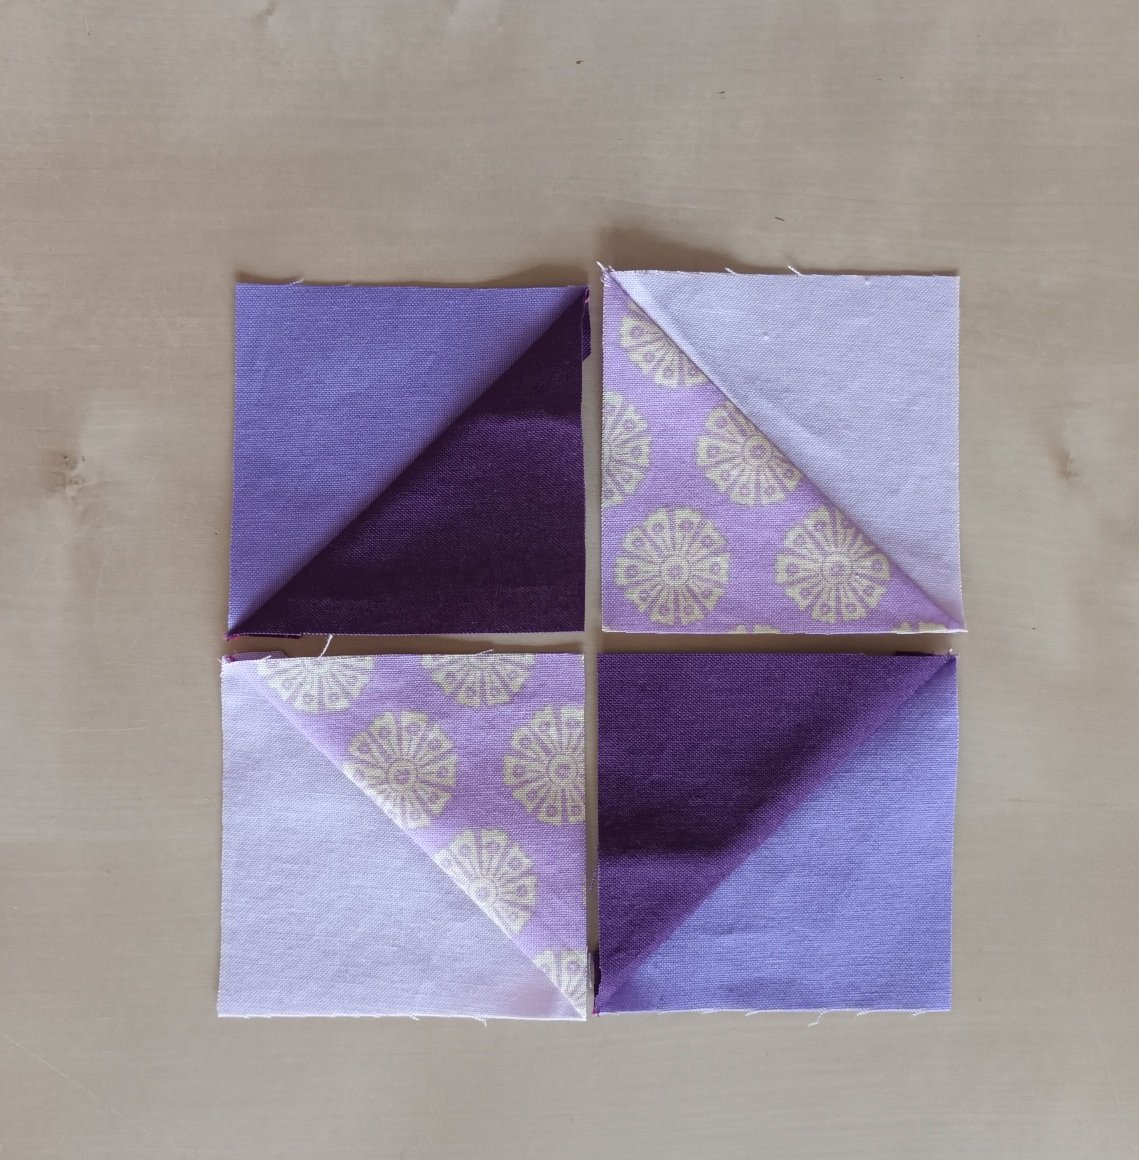
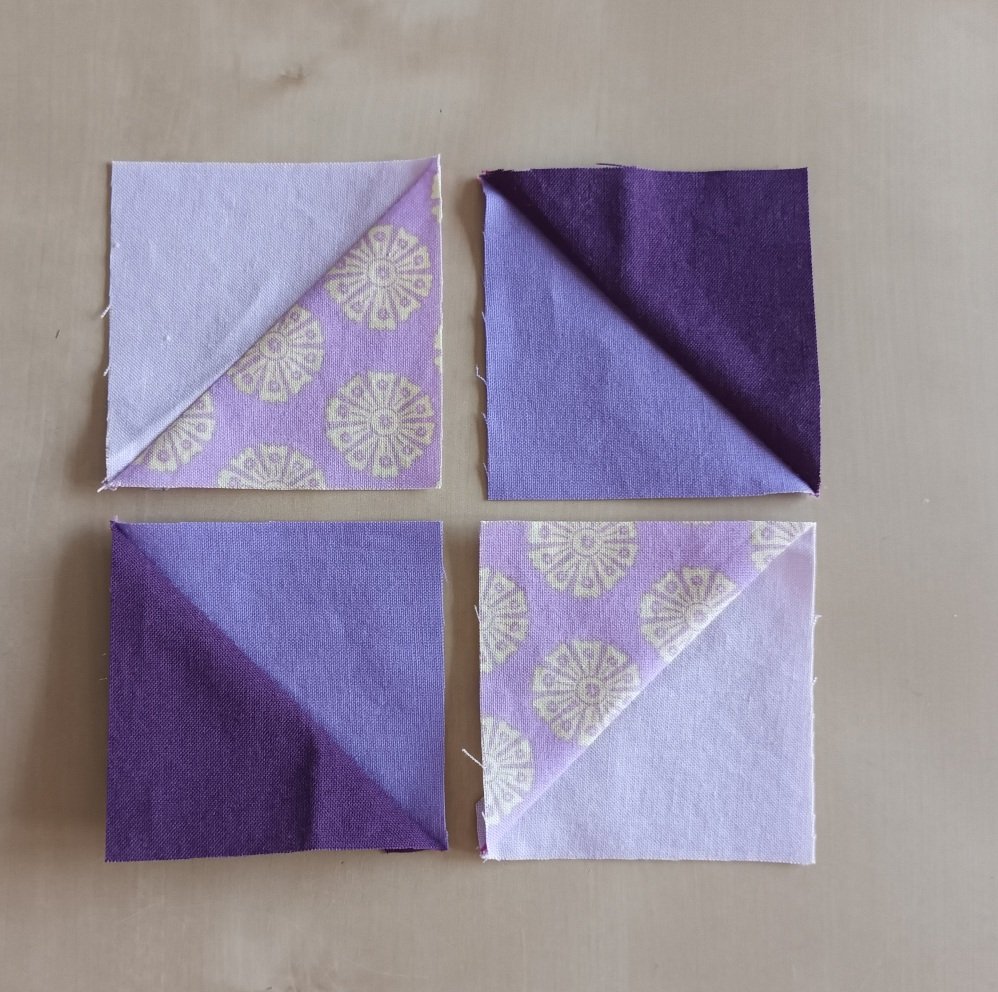
You can now play around with these four squares. Put them together in different variations and see which one you like best.
You already know the following sewing steps from the previous patchwork blocks.
You sew the two squares of a row together.
As you can see in my photo, I accidentally sewed the two vertical squares together first instead of the two horizontal squares. As there are 2 x 2 squares in the block, it was no big deal.
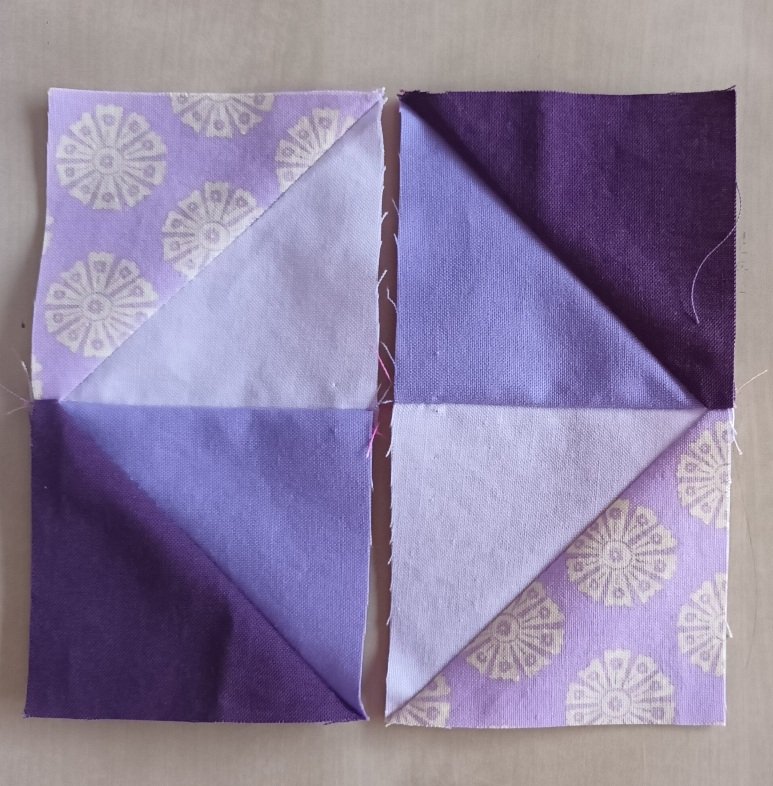
Finally, sew the two rows together. Your Broken Dishes Block is finished.
.jpg)
Don't let yourself be unsettled
Please don't let yourself be confused! There is a lot of information and statements on the internet about how to sew triangles. However, there are also many statements that, in my opinion, only fuel insecurities and fears about how difficult and complicated sewing triangles together supposedly is. When I read these statements, I always think that crossing a river with a bunch of hungry crocodiles is definitely easier to manage 😉.
So: Please only read such descriptions after you have already sewn a few triangles or HST. And only if you're sure you can smile about it, because I really don't want anyone to take the fun out of sewing and especially patchwork and quilting.
In my first projects, I always sewed what I liked. I worked my way through the different seams and even if they were sometimes not sooo ideal, they served their purpose and my quilt simply came together. It wasn't until months later that I read how “terribly difficult” a certain type of seam (the Y seam) was and that you needed a lot of patchwork experience for this challenge...
Nonsense! The only thing you need is the will and the enthusiasm to sew this patchwork block, then it will work and it will get better and better with every block.
I would be delighted if you sew this block and enjoy my Scrappy Quilt Challenge 2024! Maybe you would like to show a photo of your block here at cp?
Have fun and happy quilting
Chris