Today is all about creating a very special accessory for the little explorers and adventurers out there - the crocheted children's backpack. With our simple tips and tricks, anyone can successfully crochet a functional and sturdy backpack.
When it comes to a crocheted children's backpack, it's important to choose the right yarn and pay attention to the size of the backpack. You have many options for personalizing the backpack, such as adding names, motifs, and embellishments. This is also a great opportunity to involve your kids and work together on the decoration.
In this blog post, I will share some valuable tips and inspirations on how to design your crocheted children's backpack with attention to detail. I've made sure that the tips are accessible to everyone, whether you have experience with crocheting or are just starting out. Ready to swing your crochet hooks? Then let's get started and create something beautiful with love!
Since a backpack for children often needs to withstand a lot, it's important to choose a durable yarn that can endure many washes. Cotton yarn or yarn with a high acrylic content is particularly suitable for children's items like backpacks. You should also consider that the backpack should be large enough to hold a child's belongings but not so large that it becomes too heavy. Keep the child's age and needs in mind when determining the size of the backpack.
Kids love colorful and fun designs—this is clear to everyone. Therefore, think about which colors and patterns the child might like. It's best to coordinate the backpack's colors accordingly. It's also great to add appliqués or embellishments to make the backpack even more appealing. You can find some in the other Blogs.
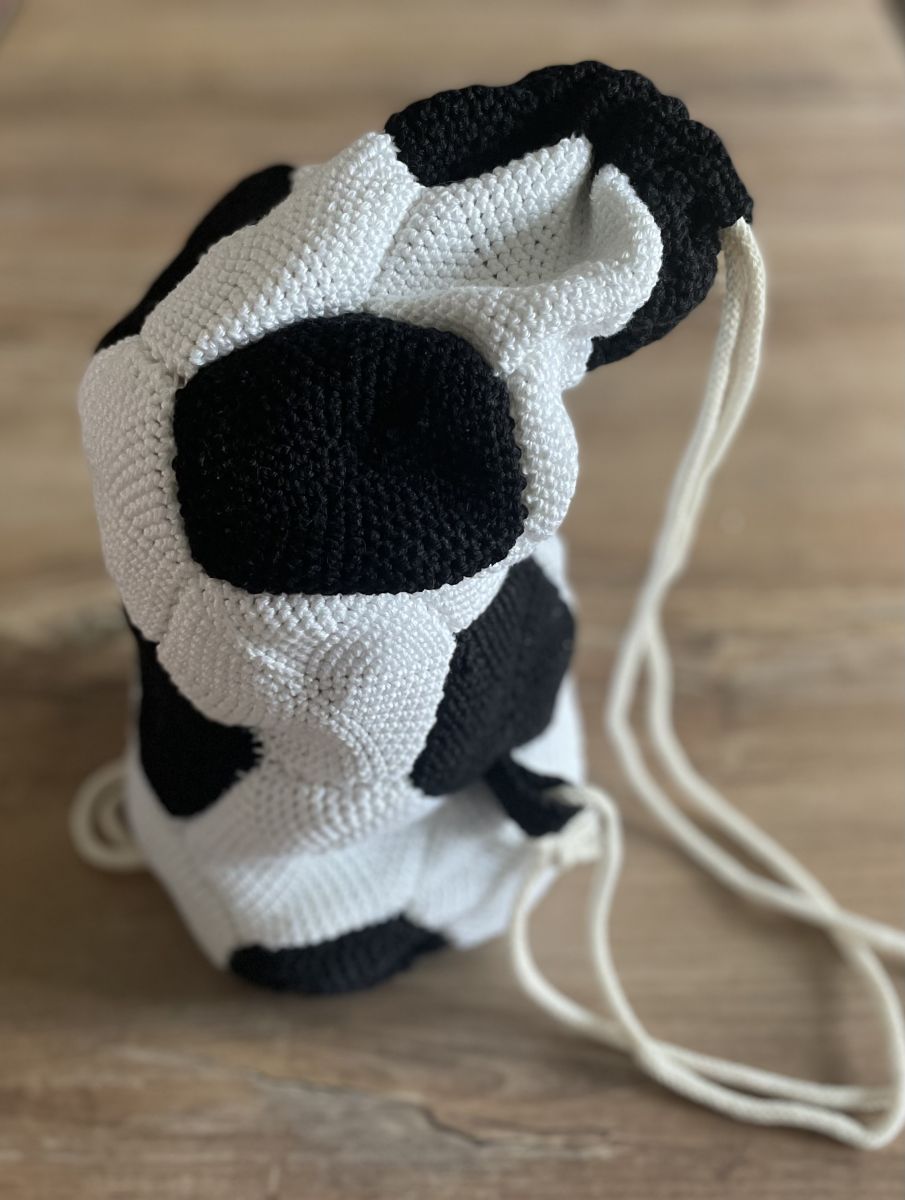
And here comes my suggestion! My nephew just started school and is a huge football fan. Since I believe that a traditional cone doesn't always have to be the norm and something special can be created instead, I thought about making a football backpack. That's exactly what I did, and I want to share my idea with you here:
What you need:
- White and black yarn (I used 3 rolls of white and just over 2 rolls of black Kira from Wollidu)
- A suitable crochet hook (ideally a size 3 or 3.5; I achieved better results with the 3.5, but it definitely depends on how tightly you crochet)
- A cord (I used 5mm Bobbiny)
- (It’s also great to use some fabric inside to make the backpack more durable)
And here's how to do it:
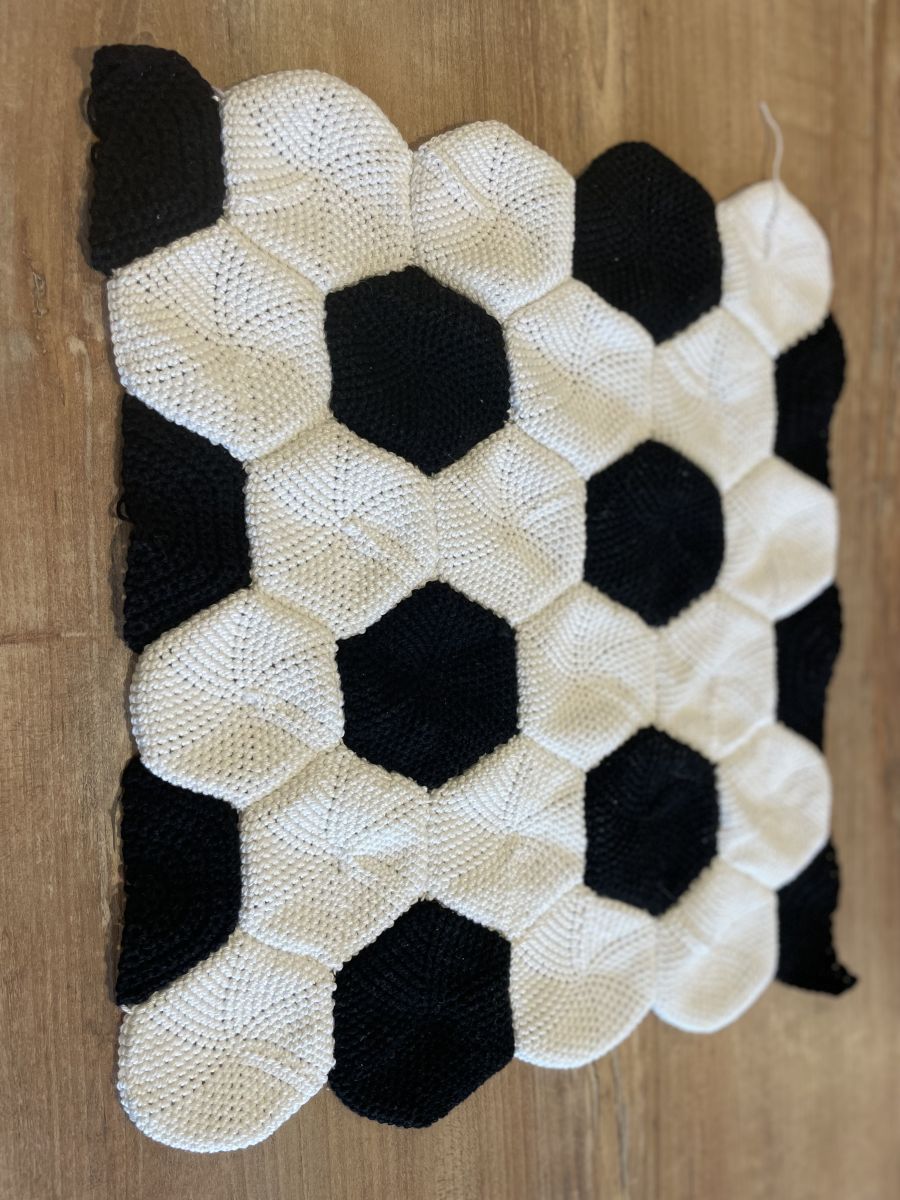
You need to crochet hexagonal and trapezoidal pieces. For my design, you will need:
- 6 black hexagons
- 18 white hexagons
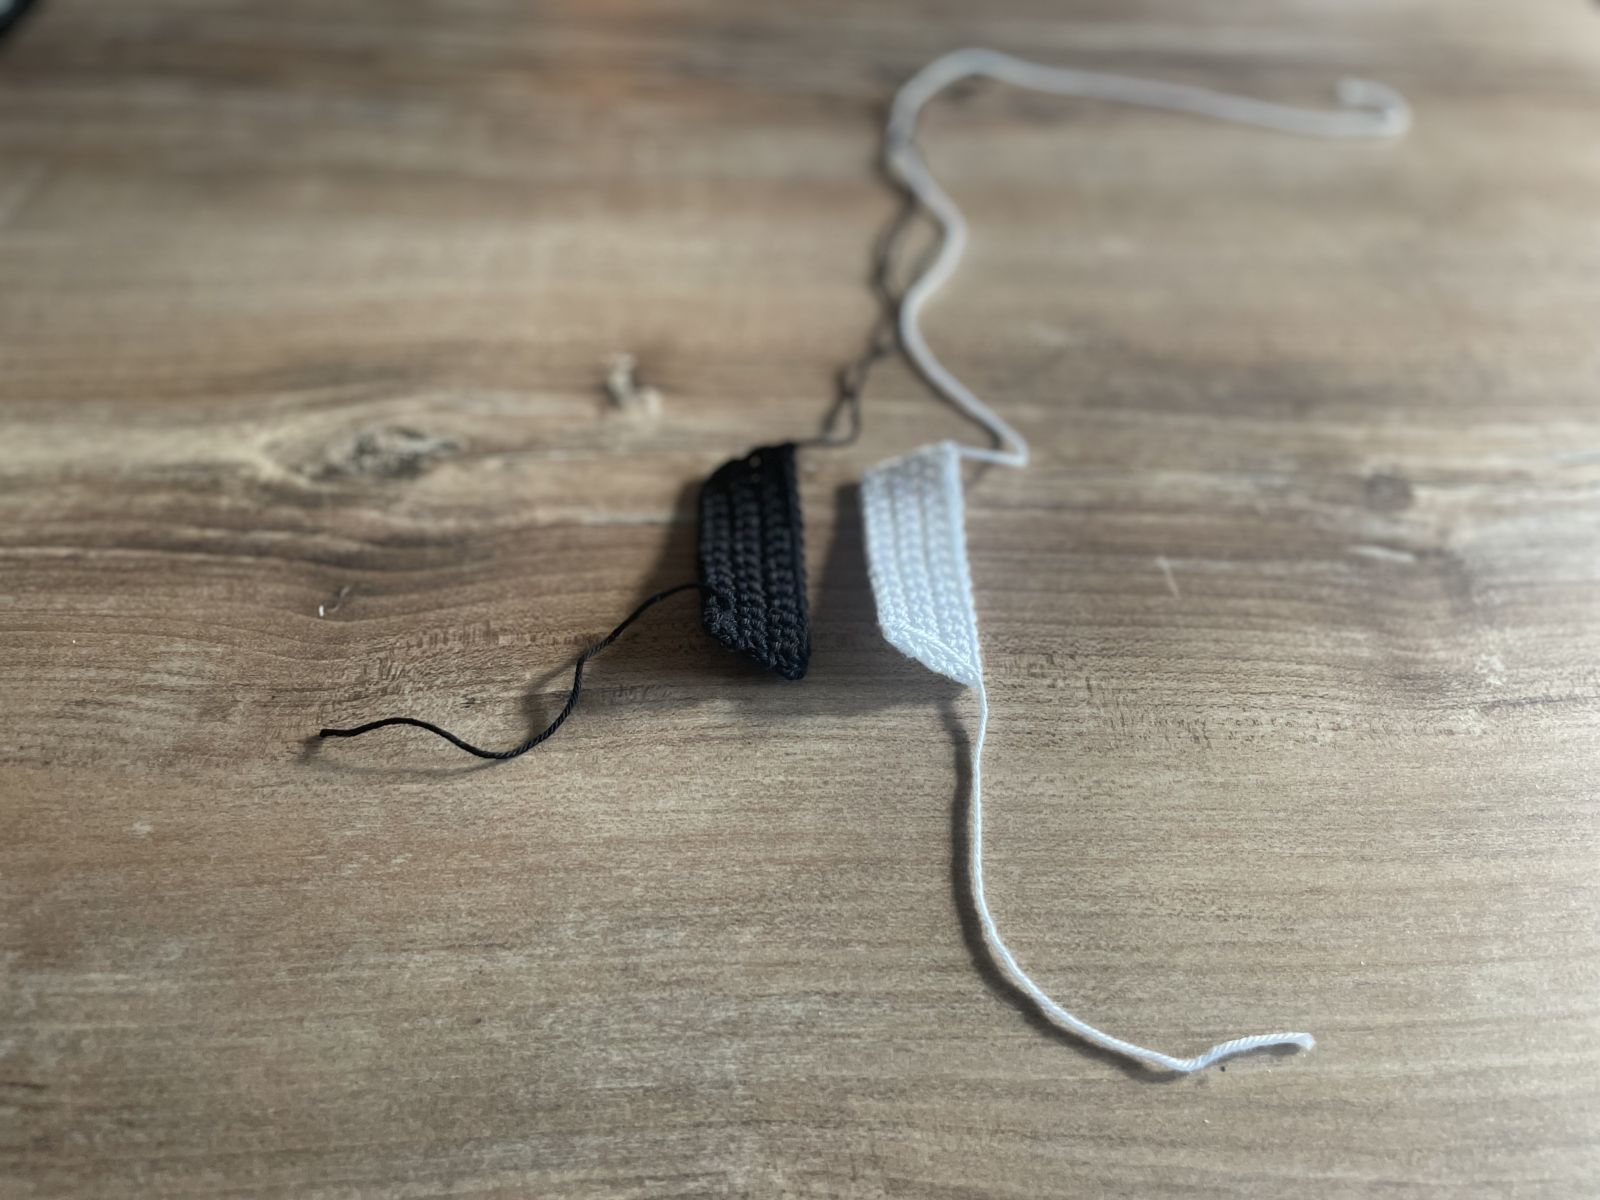
- 6 black trapezes
The pieces are crocheted in the same way. Each round starts with a chain stitch and ends with a slip stitch (so you will be crocheting in closed rounds).
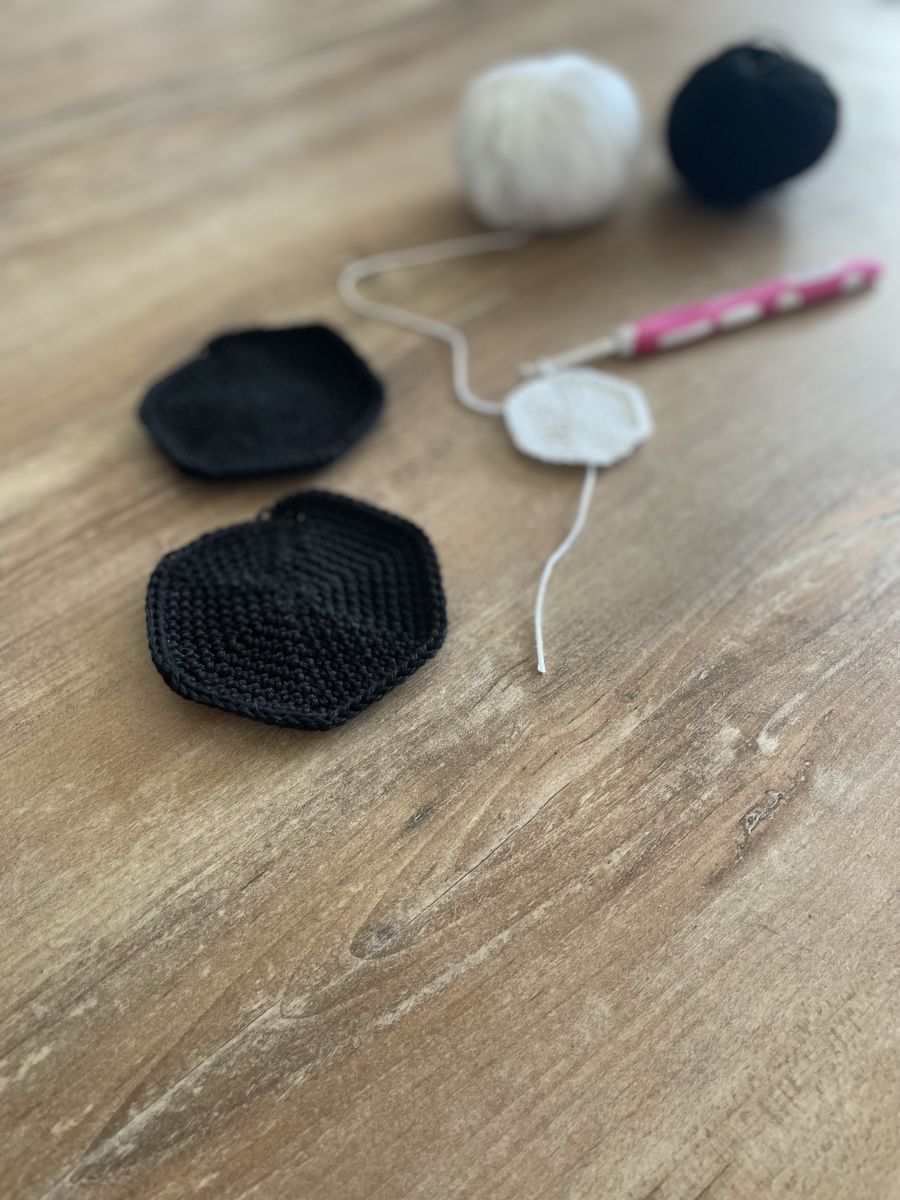
For the hexagonal pieces, follow these instructions:
1. Round: 6 single crochet stitches in a magic ring (6)
2. Round: double each single crochet (12)
3. Round: double every second stitch (18)
4. Round: double every third stitch (24)
5. Round: double every fourth stitch (30)
You should already notice that the two single crochet stitches worked into one stitch are always positioned between the two from the previous round, gradually forming a more angular shape.
6. Round: double every fifth stitch (36)
7. Round: double every sixth stitch (42)
8. Round: double every seventh stitch (48)
9. Round: double every eighth stitch (54)
10. Round: double every ninth stitch (60)
11. Round: double every tenth stitch (66)
The finished shape will look like this:
The trapezoidal pieces are crocheted back and forth in rows, starting with a chain stitch (except for the first row, which starts with 2 chain stitches):
1. Row: 6 half double crochets in a magic ring (alternatively, you can use single crochets, starting with 3 single crochets and then crocheting another row where you double each stitch to reach 6 single crochets)
2. Row: In the first stitch and then in every second stitch, make 2 single crochets; otherwise, make 1 single crochet (9)
3. Row: In the first stitch and then in every third stitch, make 2 single crochets; otherwise, make 1 single crochet (12)
4. Row: In the first stitch and then in every fourth stitch, make 2 single crochets; otherwise, make 1 single crochet (15)
5. Row: In the first stitch and then in every fifth stitch, make 2 single crochets; otherwise, make 1 single crochet (18)
6. Row: In the first stitch and then in every sixth stitch, make 2 single crochets; otherwise, make 1 single crochet (21)
7. Row: In the first stitch and then in every seventh stitch, make 2 single crochets; otherwise, make 1 single crochet (24)
Now, all the shapes need to be sewn together. If you do this correctly and follow this pattern, it will create a design that resembles a football:
You should sew the ends together so that they face upward on what will be the inside later. This means you need to insert the needle as if you were going to crochet a new stitch. This way, the backpack will achieve an authentic football look:
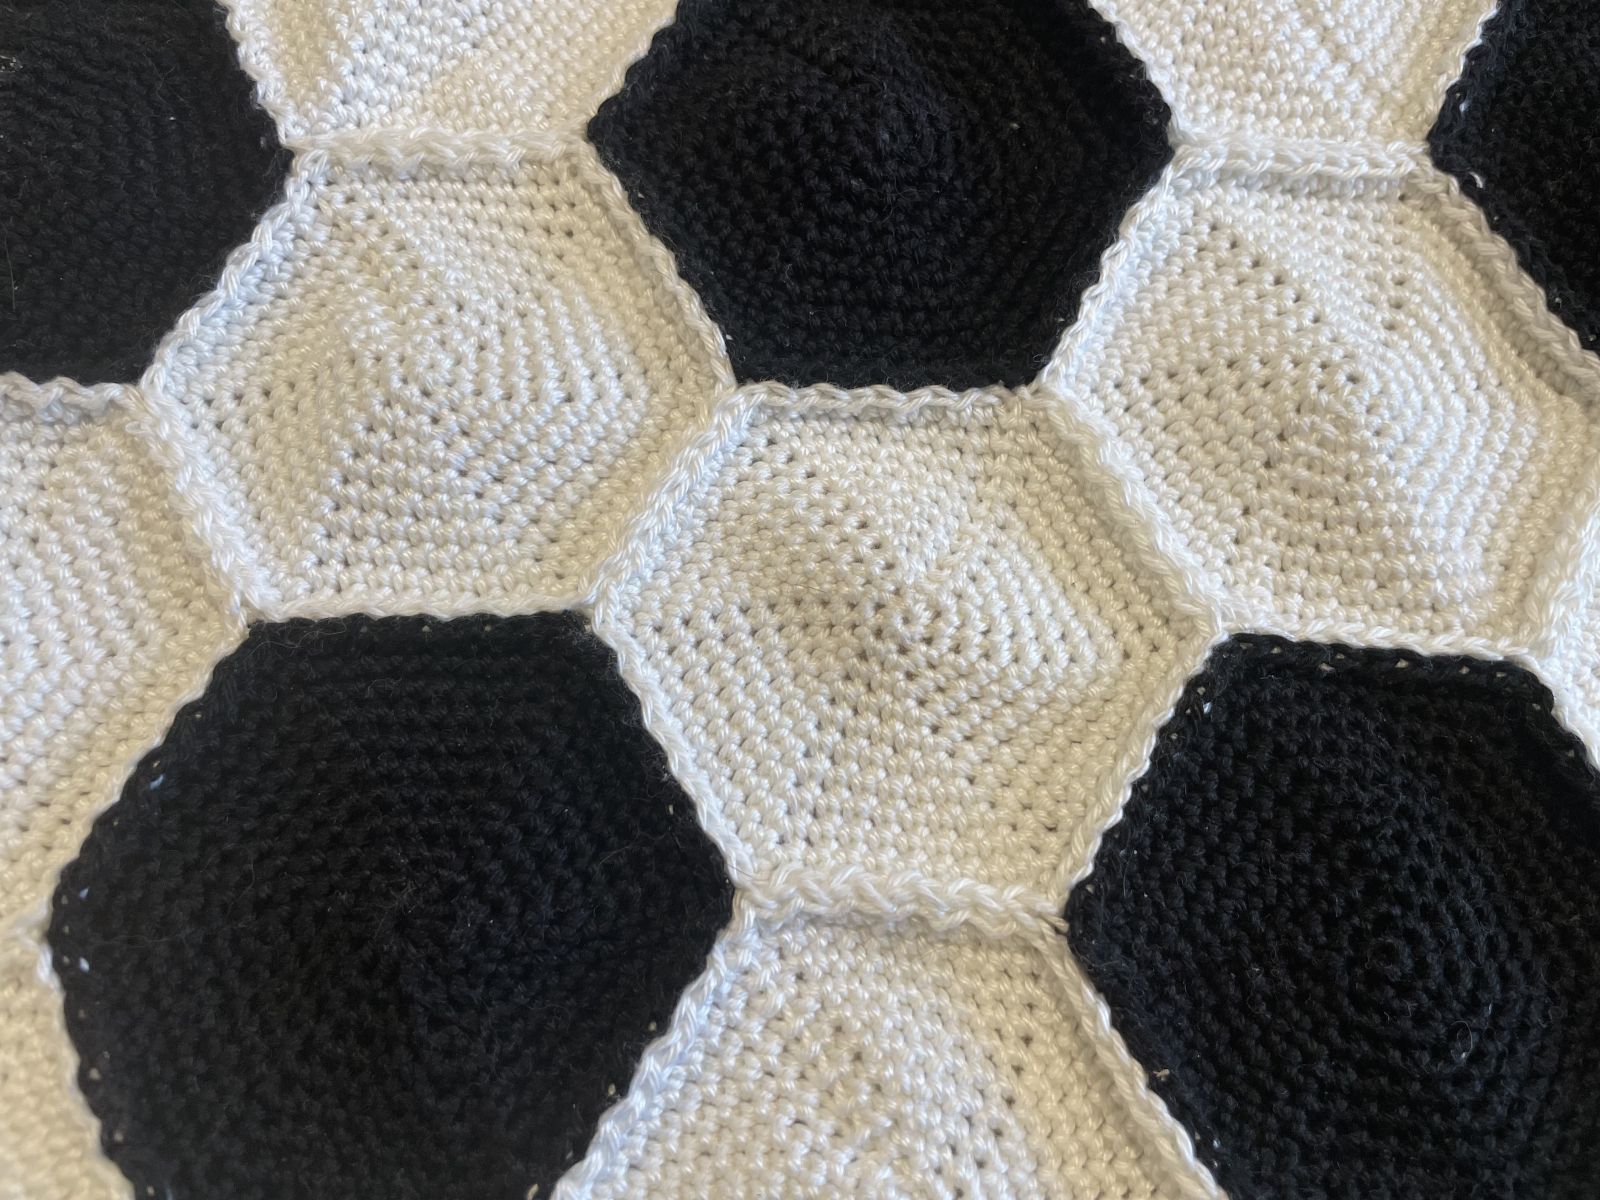
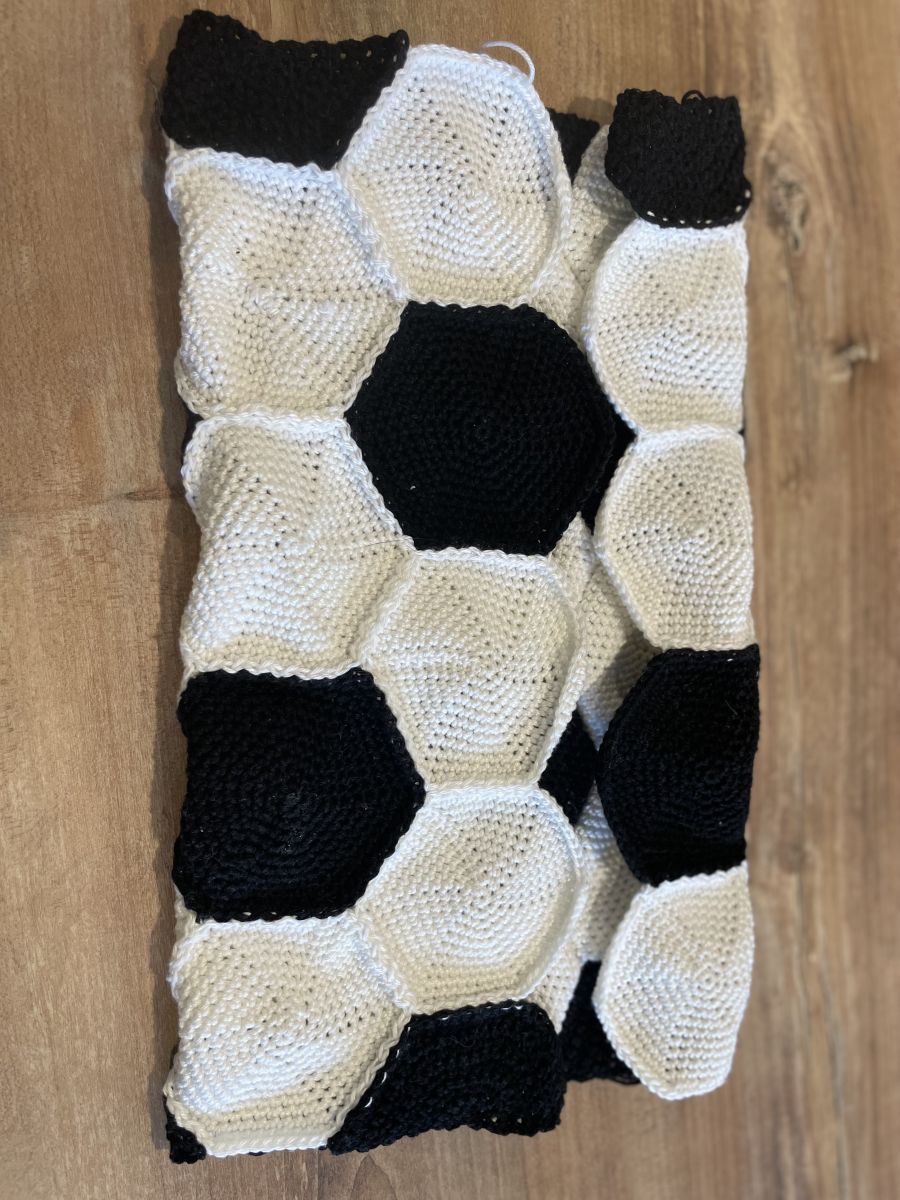
Then you need to sew the two sides together. This will clearly show whether you've sewn everything correctly, as only then will the two sides fit together perfectly:
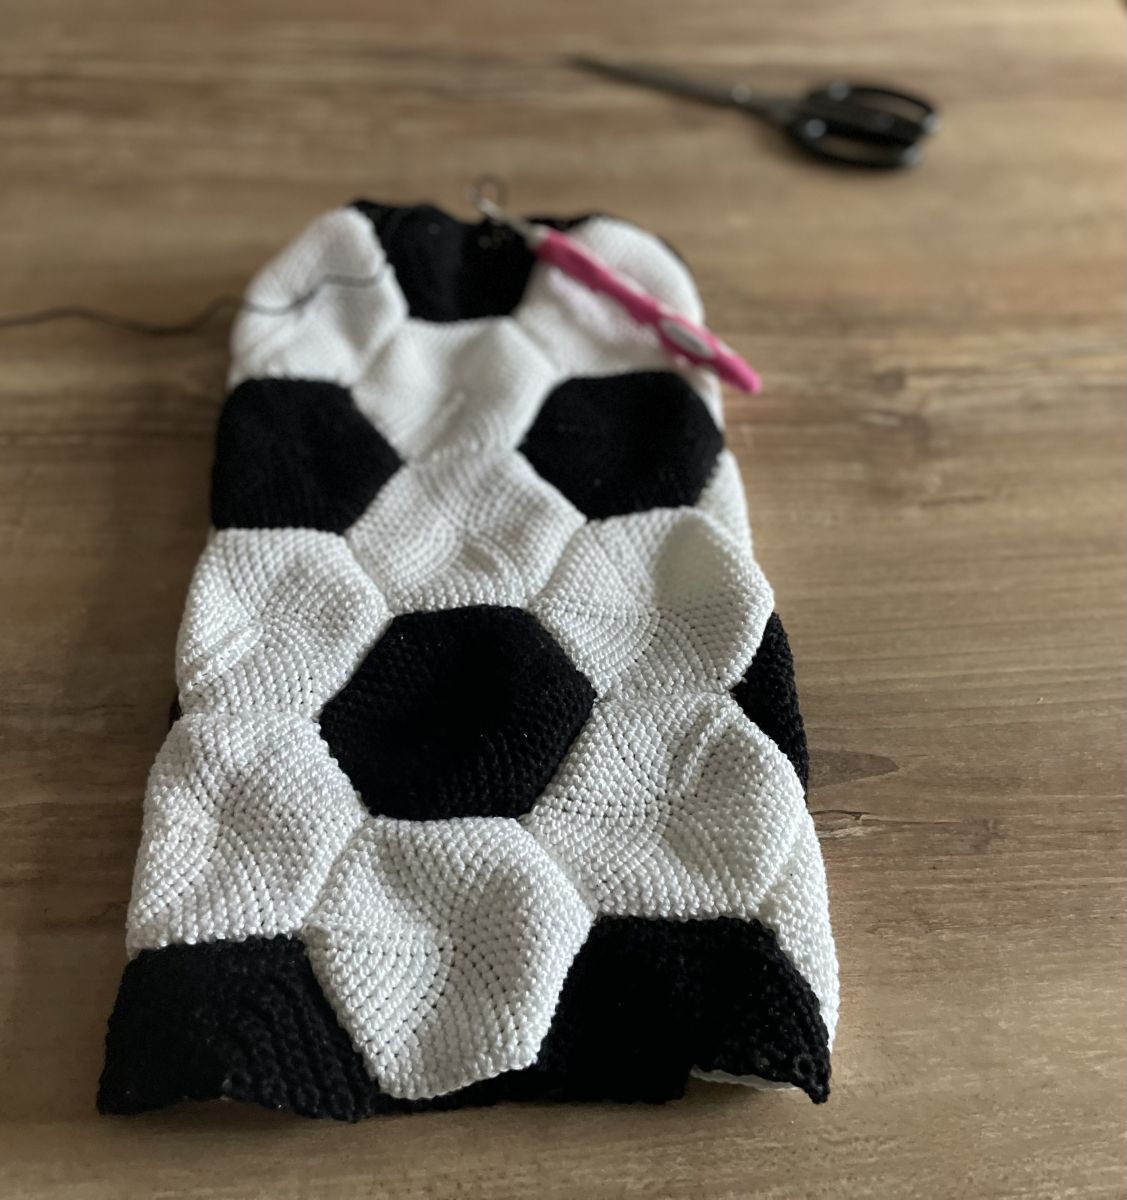
And now, the bottom needs to be created. This will be crocheted again. I made it in black so that the backpack doesn't become unusable after a short period of use. If you make it white, it will get dirty very quickly. So, if you plan to make the backpack taller, keep this in mind during your planning. The bottom is crocheted in rounds, and you'll decrease stitches in each round. It looks best if you work in spiral rounds, meaning without closing the rounds. Here’s how to do it:
1. Round: Attach the yarn at one side—there should be 66 rows in black and 33 stitches in white showing downward from the previously sewn parts, so you should start with 99 single crochets.
2. Round: *Decrease every tenth stitch* 9 times (90)
3. Round: *Decrease every ninth stitch* 9 times (81)
4. Round: *Decrease every eighth stitch* 9 times (72)
5. Round: *Decrease every seventh stitch* 9 times (63)
6. Round: *Decrease every sixth stitch* 9 times (54)
7. Round: *Decrease every fifth stitch* 9 times (45)
8. Round: *Decrease every fourth stitch* 9 times (36)
9. Round: *Decrease every third stitch* 9 times (27)
10. Round: *Decrease every second stitch* 9 times (18)
11. Round: 9 decreases (9)
And of course, the upper side also needs to be finished. For this, you will start again and crochet in closed rounds:
1.-7. Round: 99 single crochets
8. Round: Now crochet only the first 47 single crochets, make a turning chain, and turn
9.-13. Round: Crochet 47 single crochets each time, make a turning chain, and turn
14. Round: 47 single crochets
From the 8th round to the 14th round, you will now repeat this on the other side, leaving 2 single crochets free.
.jpeg)
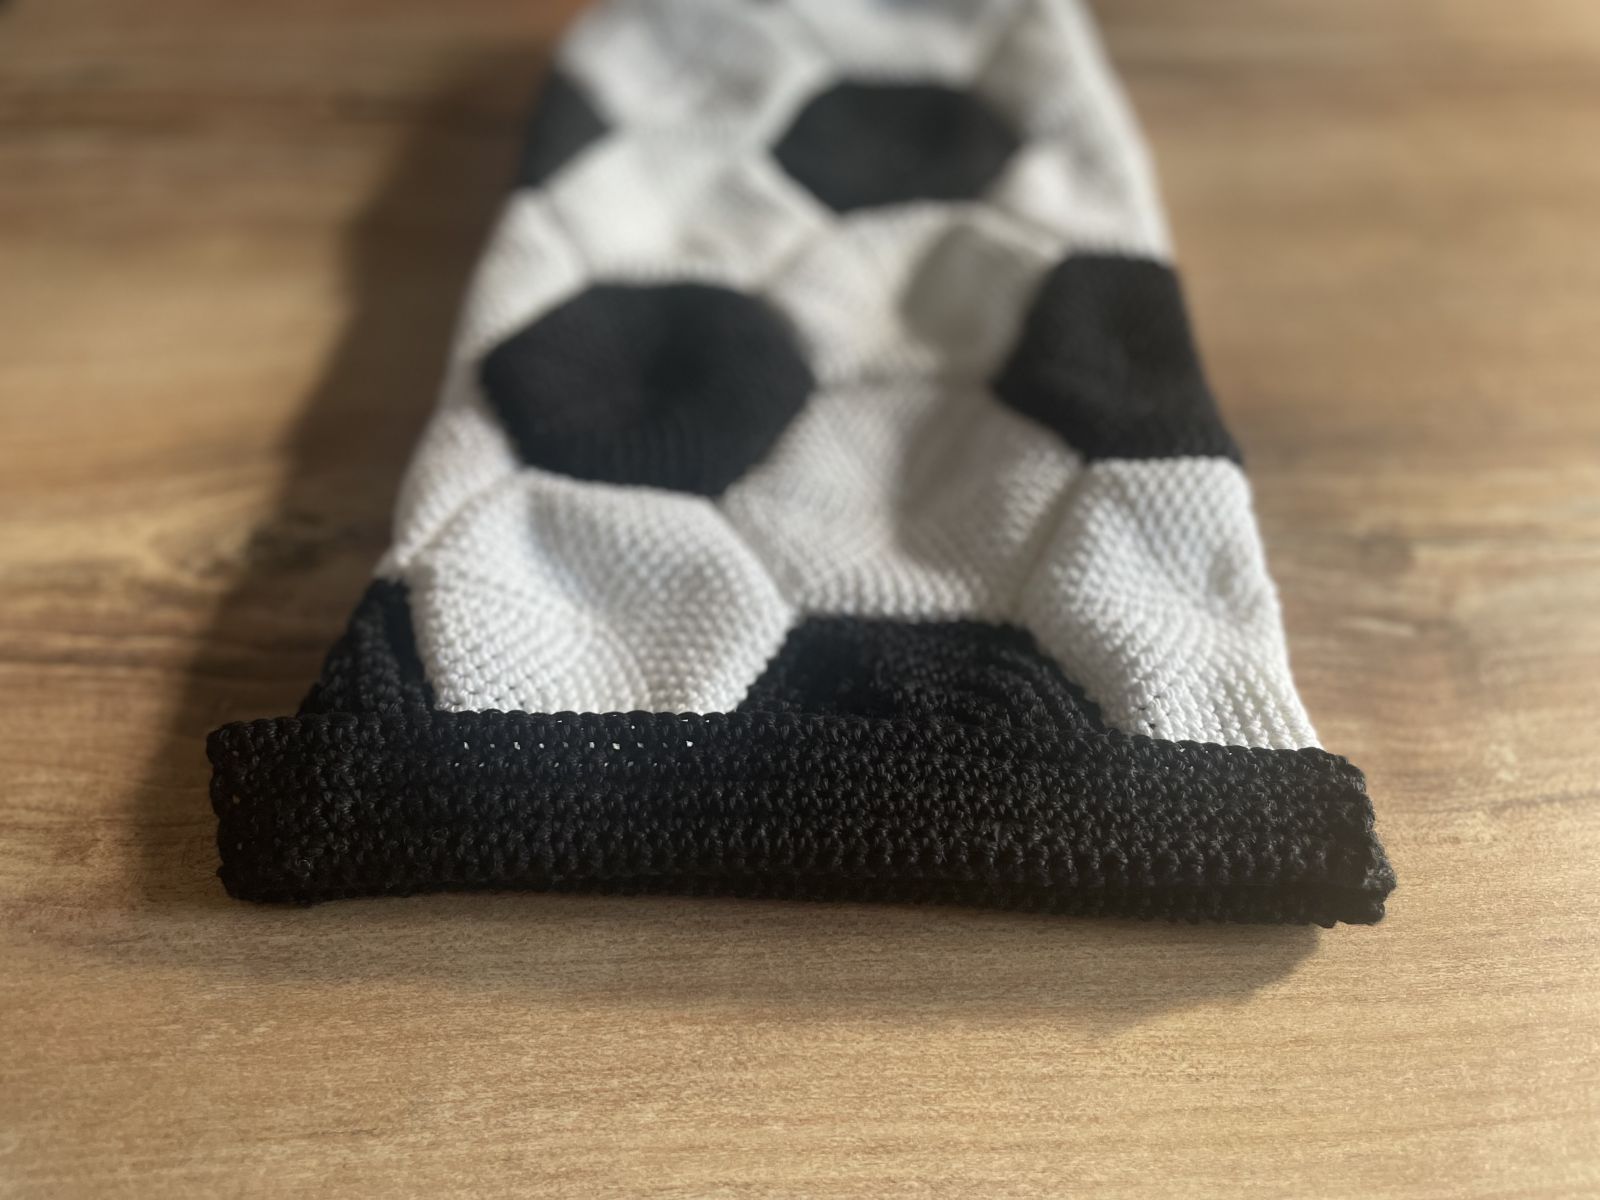
These two ends will then be folded down and sewn securely. This will create the channel through which the cord will be threaded later.
Now you just need to crochet two small pieces that will be sewn onto the lower part of the backpack as counterparts for the cord. For this, it's sufficient to chain 14 stitches and then crochet back and forth with as many rows of single crochet as you like. Since it's up to you where to attach these pieces, just make sure they match in color.
Finally, sew the pieces together, and you’ll have a backpack created with love!
